@niels-j Can't say whether the servo would operate with a completely flat battery but here's a 3NC wiring diagram which I'm fairly certain your bike has due to the numbers on the CDI unit and the 2-pin connector with blue and light blue wires. I'm a bit too tired to get involved with a wiring question now due to a long cycle ride today but have a look at my previous posts, the 3NC wiring has been discussed quite a lot on here:
HOTSHOT III
Posts
-
Yamaha dtr -
Stevie’s French '98, Mid-90's WR/YZ/DT (An idiotproof guide to building your own DTR)@SpookDog Yes I think it was someone with a TDR125?
@Stevie-Wonder Sounds like you're moving forward with this, those pattern fuel taps are a bit of a mixed bag but I've bought good ones before. Next time you have to disturb the carb warmer hoses, just bypass the carb altogether and run a single hose from the banjo on the head directly to the one on the thermostat housing. You still get the benefit of the cooling system being self-bleeding when refilling, but it makes the carb a lot easier to remove and UK winters aren't really cold enough to worry about carb icing.
-
Stevie’s French '98, Mid-90's WR/YZ/DT (An idiotproof guide to building your own DTR)@Stevie-Wonder Looking good, USD front end with a speedo cable reminds me of the KDX125SR or RMX250. Nice spot to take some pics as well :+1:
Definitely keep an eye on the oil drain bolt. These are very soft and visibly stretch when overtightened, it was Yamaha's intention to spec the bolt like this IMO as it means if it's done up too tight, it will always snap the bolt rather than wreck the thread in the crankcase whereupon you can just pop the clutch cover off and wind out the broken part with pliers etc. I must admit I speak from experience here as I repeatedly overtightened the drain bolt on my 1990 I owned as a teenager and then sold it to a mate, and the very 1st time he changed the oil it snapped! So I felt duty bound to go over and help him repair it, we removed the engine assuming we'd have to split the crankcases to get the thread repaired, and then fortunately it just unwound so we could just put it back together. The genuine drain bolt is like £2 from Fowlers so again, well worth buying genuine (including a few copper washers) because if you go and get a really strong bolt and then overtighten it by mistake this could make the difference between an easy repair and a complete engine rebuild. Torque setting is 15Nm IIRC (check this) so another job for your 1/4" drive torque wrench.
I know I always say this but a DTR fourstroking at medium engine speed is almost always a blocked emulsion tube (the brass tube the main jet screws into) so I'd look here first. Tap it out and make sure all the holes are clear as these get blocked with moisture/crud and it just starts fourstroking one day. HT lead breaking down is also possible but when this happened to me it started at very high rpm like 9000+. Definitely do a carb clean even though it's a PITA I know. Also check the air supply for the emulsion tube, it's the brass tube on the right rear of the carb body just in front of the carb-to-airbox rubber. You should be able to blow through this, but only just.
Autolube leaking I would just do an oil pump recon as the Yambits kit contains all the seals and gaskets you need to completely recondition the pump, including the gasket where the pump body joins the crankcase. Do this and replace the ball and spring kit where the delivery hose attaches, clear delivery hose and a new supply hose from the tank (retain and re-use the spring-like sleeve this passes through) and you're golden. One thing about the Yambits clear oil delivery hose is, it's slightly thicker walled than the OEM hose and quite a tight fit through the rubber grommet where it comes out of the oil pump housing so 5 minutes with a Dremel and you can make this a nice snug fit which still doesn't allow water ingress.
The gearchange shaft seal can be replaced without removing the shaft if you're careful to avoid marking the shaft. First give the entire area a good toothbrush/Jizer clean to remove all chain lube/road grime from the exposed part of the shaft, and clean this up with wet and dry to remove any rust/sharp edges which might rip the new seal during installation. Then what you have to do is go to a model shop and get some 1mm Lexan offcuts from RC car bodyshells, cut off a small section and jam this between the old oil seal and the shaft to protect the sealing surface as you lever the old seal out. Lexan is flexible yet tough and it's not uncommon for a bodyshell to still look good after a season of crashing at scale speeds of 400mph+ so it's ideal for this, this also works on crank seals.
-
Fork too soft@Hark_Ptooie Yes all the XT600 forks look pretty similar (except the XT600E has a twin piston front caliper), I wouldn't think the fork springs differ that much between models and I have heard of people running XT600E fork springs in the DTR. The 3AJ is the Ténéré yes, I recommended them because I found someone selling a set on eBay for £20 (he'd fitted aftermarket springs as Yamaha managed to make the forks too soft an that bike as well).
I never liked the XT600E to be honest, I owned a Honda NX650 Dominator at one time and that was something of a disappointment as well, I think a well sorted DTR or KMX125/TS125R would give all those big singles a run for their money on tarmac as well as being a lot more fun off-road.
-
Fork too soft@Hark_Ptooie Both fork legs should have a spring and a spacer.
You can make major improvements to the DTR suspension by running XT600 3AJ fork springs (same size but 20% stiffer) and 500ml per leg 15W oil (stock is 500ml 10W), this made my '98 DTRe jump and resist bottoming a lot better than the 2020 KTM 250EXC I also owned at the time. I was also running a YSS shock and to get it to match the upgraded forks I had to increase the preload by 16mm and run the rebound on position 29 out of 30. I weigh 150lbs and this setup gave 25% static sag at both ends, normally a good starting point for setting up suspension.
There are also aftermarket DTR fork springs available which some of the guys on here have had good results with @SpookDog
-
New member@niels-dt200r Welcome, this is a great forum.
I always loved the DT200R but I've never seen one, I found the DT125R is very quick to get hot during any serious off-road riding so I think the twin radiators of the 200 would make it a much better bike. Take good care of these as they almost never come up for sale, spraying lots of WD40 over them after washing stops the fins from corroding.
One modification I would consider to the DT200R would be to protect the aluminium swingarm from the mud flap behind the shock rubbing on it and wearing it away over time (on the rear of the linkage bearing housing). The aluminium swingarm on the 200 is much lighter than the 125's steel arm but bikes with alloy swingarms are prone to this. On modern KTMs a lot of people glue a coin onto the area where it rubs; I used a piece of plastic cut to the right shape and zip-tied on, it doesn't need to be anything expensive or complicated just as long as the aluminium is protected.
-
Where is everybody ???@MadGyver I check the forum every day as well, no DTRs in my house any more but this doesn't mean it's any less interesting.
-
tips/tricks@duxky229 Supermoto is an interesting concept but also quite a major change to the bike; if you're just getting started with DTRs it makes sense to get what you have as good as it can possibly be before you start modding. Avon TrailRiders in the recommended sizes on the stock wheels give plenty of grip on tarmac and are still blocky enough for light off-roading when it's bone dry. Replace inner tubes and rim tapes. Michelin Trackers and rim locks if you want to get serious on dirt.
Tips and tricks; copied and pasted as people ask the same questions over and over again on Facebook etc. so I typed them out in a Word document in the end. Hope some of these help:
High rpm misfire? HT lead
Possibly could be the HT lead as they break own on DTRs causing this exact problem. The actual coil is very good quality so it's well worth fitting a new lead; you can cut off the very top of the coil's outer case where the lead pushes in with a junior hacksaw, pull out the old lead and solder the new one to the coil output for a really good connection. Then re-waterproof using Shoe Goo and electrical tape. Looks messy but no-one can see it under the tank, and you should notice a performance increase as the leads deteriorate over time. Much better option than just buying a new pattern coil as these often have different specs to OEM which can cause other issues. Fit a new NGK cap while you're there, try to get the type that's moulded into a single piece of rubber.
I had a high-rpm misfire once, after trying everything else we replaced the HT lead in the manner described above which took around 1 hour on a summer's day so the engine was neither stone cold nor up to operating temperature when I took it for a test ride. It wheelied out of the driveway without me even trying, and I couldn't believe how much better the performance was at all engine speeds. Made a big impression on me as I was 17 at the time and I'd spent practically a weekend trying to fix the bike and getting nowhere.Don’t gut stock pipe
Don’t gut the stock pipe. The DT125R/DT200R styling was based on the 1988 YZ250 and the expansion chamber is about the same physical size. Within that there was enough space for an appropriately-sized, functioning expansion chamber for a 125cc road/trail bike and enough noise suppression material for the bike to pass a noise test (whereas the YZ is for closed-course competition which is why it has a single-skin racing exhaust). If you chop it open with an angle grinder and rip all that stuff out, it will not only sound like a wasp in a tin can but also you’ll probably lose power as you no longer have an expansion chamber which matches the porting/carb/crankcase volume etc. By all means take the washer out of the header pipe but the stock pipe and silencer aren’t restrictive besides that; I’ve owned several full power French import DT125Rs which have all revved to 10k+ rpm with the stock pipe. In fact in one case I bolted on a DEP silencer and the bike immediately refused to rev higher than 9k; this was cured by refitting the stock silencer.Rear caliper pattern seals leak
Buy a genuine piston/seal kit from Fowlers. I bought an eBay rear caliper rebuild kit once, cleaned the caliper completely including the seal grooves, put it together and bled it and there was a small dribble of brake fluid on the back of the pad on the piston side. Wiped it off and it came back several times, so I cleaned up the (old) genuine piston/seals and put them back in as I wanted to go for a ride that evening and it cured it, no issues for a couple of months whereupon I bought new genuine ones. Compared the seals, the eBay kit seals are slightly smaller in cross-section than genuine which is what causes them to leak.HEL braided hoses make the best of the stock brakes and it's well worth reconditioning master cylinders as well; I always had good results with genuine front and Yambits rear.
Enduro/Greenlaning preparation
Run fork gaiters if you want acceptable fork seal life; Polisport ones are very good but you have to enlarge the vent holes at the bottom with a leather punch to stop them ballooning under full travel. If you weigh any more than 140lbs, XT600 fork springs and 500cc per leg 15W oil makes the bike jump a lot better (i.e it actually can jump without bottoming everywhere) and a YSS rear shock can be adjusted to match the fork setup (I had to run mine with +16mm preload over stock and rebound on position 29 out of 30). Chain; run 40-50mm free play or using all the rear travel will destroy the bearing behind the front sprocket. An O-ring chain takes an extra 0.5bhp to turn; when you're working with YZ85 power/XR600 weight you'll notice this so run a D.I.D 428HD and just keep degreasing and re-lubing it after every ride. Get a load of spare D.I.D split links the correct size/spec for like £1 each and just use a new one every time the chain has to be removed. Get a decent grease gun and re-lube all rear suspension bearings after every off-road ride/jet wash. Fit a grease nipple in the headstock and seal up the slot in the stem for the steering lock with heat shrink tube and cable ties. Get 3-4 Yambits air filter elements and devise a system for cleaning and re-oiling them so you can quickly fit a fresh one. Wash them in petrol (wear gloves) and use foam filter oil. Yamaha did a very poor job of gluing the carb-to-airbox rubber when the DTR was new and being downstream of the air filter, this will allow the motor to suck dirt. Seal this up using a petrol- and oil-resistant glue such as Seal-All (the airbox needs to come out to make a proper job of this so do it at the same time as replacing the shock). Likewise replace the 5mm air filter foam (eBay) on the back of the element holder where it slides into the airbox using more Seal-All. Run genuine throttle and clutch cables; these are pricey but good quality, and those £12 pattern throttle cables are responsible for a lot of DTR engine meltdowns (the OEM cable automatically synchronises the carb and oil pump on pre-’99 bikes). Keep the Autolube unless you want to waste time rejetting and run a good quality synthetic two-stroke oil (JASO FD is the Japanese industry standard for racing two-stroke oil so look out for this, doesn’t have to be expensive, I used to run Exol which is about £30 for 5 litres). Lube all cables after every jet wash; this more than anything delivers striking cobra responsiveness and a cable oiler costs £5 from Yambits. The stock pipe is fine but if you want an aftermarket one, run a Tecno (same as Athena but half the price) expansion chamber; this is a good mid-range pipe and makes the bike pull strongly from 5k rpm which is more useful off-road than screaming top-end. DEP silencer fits the Tecno well. Run a 100/80W P45T halogen bulb in the stock headlight; Yamaha cheaped out and fitted a 45/40W candle from new but the actual light is the same unit as 900cc+ Yamaha superbikes of the day and the DTR's AC lighting means high wattage bulbs won't flatten the battery. This lights up the trails like a rally car. Make your own powervalve cables from MTB gear cables so you can re-lube them in situ https://dt125r.co.uk/post/28693
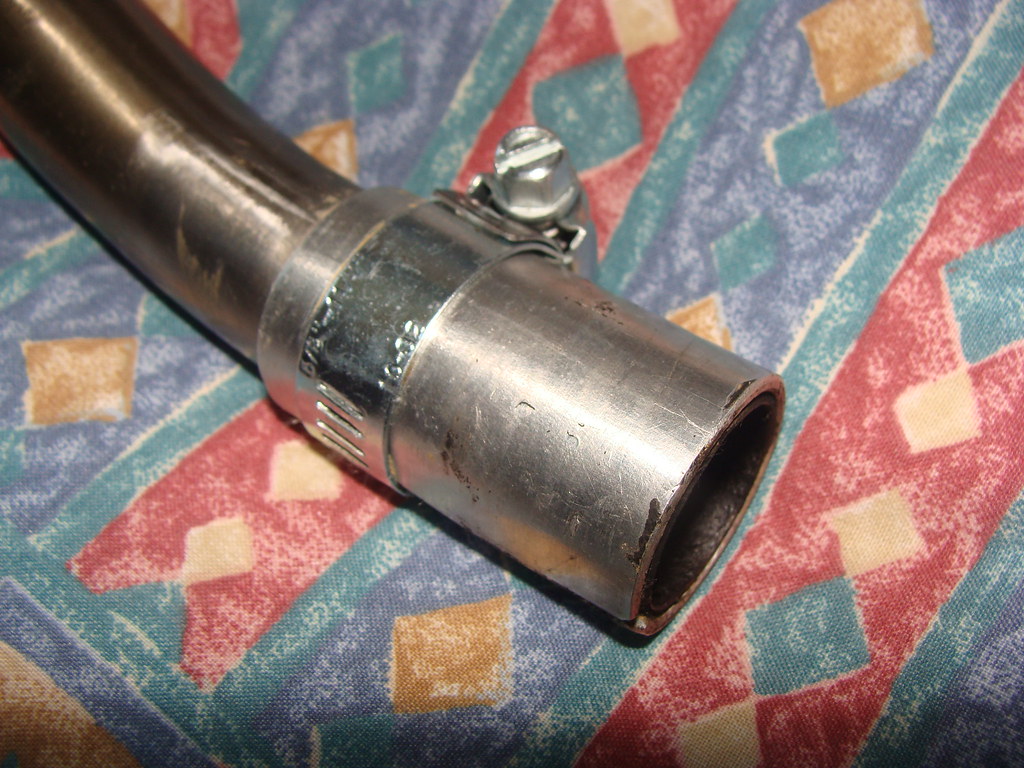
Carb Warmer Hoses
As others have said it doesn’t make any difference which hose goes where, and they’re not really needed in a country like the UK with mild winters. However they also serve another purpose which is to make the cooling system self-bleeding when refilling as the one on the thermostat housing comes out above the actual thermostat, so all you have to do is fill the radiator slowly and you end up with no trapped air (this is why bikes like the 350LC and a lot of MX bikes have bleed bolts on the head and barrel etc.). So it’s useful to just run a single hose from one banjo straight to the other and bypass the carb; you still retain the self-bleeding cooling system but it’s a lot easier to get the carb off for cleaning, jetting and float height changes etc. -
Head scratcher@StanKn No worries bud, lots of people miss this the 1st time they do a carb strip on these bikes. Glad to hear it's running better now!
-
4BL flywheel removal@rubberfingers What @Calum said, or Lidl are selling cordless 20V impact guns from today which are as good as a branded one costing three times as much. Might be worth it if you've got to undo a few other bits to split the crankcases:
https://www.lidl.co.uk/p/parkside-20v-cordless-vehicle-impact-wrench/p10012652
-
4BL flywheel removal@rubberfingers I think you need one of these:
https://www.machinemart.co.uk/p/clarke-cht698-46-piece-harmonic-balance-puller/
-
Head scratcher@StanKn The emulsion tube is the long brass tube the main jet screws into yes. If you haven't done this yet you'll need to get this out (screw the main jet back in without the brass washer and lightly tap it), make sure all the holes in the tube are unblocked and also check its air feed is clear, this is the small clear tube which pushes onto a brass tube on the right of the carb body just in front of the carb-to-airbox rubber (it's a very small hole and difficult to blow through).
What happens over time is the space between the carb body and emulsion tube accumulates moisture and debris and this blocks more and more of the holes until it just starts fourstroking one day.
-
Stevie’s French '98, Mid-90's WR/YZ/DT (An idiotproof guide to building your own DTR)@Stevie-Wonder The vacuum bleeder could be sucking air down the bleed nipple threads and into the hole at the bottom of the bleed nipple. I'd forgotten this but I once tried sucking the fluid out with a syringe and it did this, took me a long time to figure out. You can improve this and prevent corroded/snapped bleed nipples by liberally applying copper grease to the threads when you install them. Put a fat O-ring between the caliper body and 8mm hex head with a bit more copper grease when you've finished bleeding as well and they'll crack off with no drama in two years' time.
Couldn't help noticing your stock pipe/DEP silencer joint above the battery; is it sealing? If not you can make a sleeve to take up the extra space quite easily out of 2mm aluminium. Remember that circumference = pi x diameter so just measure the OD of the tailpipe, multiply this by 3.142 and cut out a piece this size by about 50mm. Beat it around a socket about the same size in the vice to make it tubular and secure it with a jubilee clip and car exhaust jointing paste. You can fine-tune the fit if needed by taking the garter spring off the stock joint rubber, unscrew the ends and cut a few mm off the female end before screwing it back together. A lot of MX people used to do this in the days of crap fork seals to get a bit more life out of them, it's worth spending the time on because the stock exhaust jointing rubber is better than any aftermarket one and you can do the same thing to an aftermarket front pipe as well.
I have the same tap and die set as that except mine is badged "Presto", it's very good except (unless yours is different) it doesn't include M10 x 1.25 (pretty universal on Japanese bikes) so I had to get it separately. Be careful of this as I nearly wrecked my sidestand cleaning up the threads after powder coating.
Re-chroming fork stanchions could be an option if you can't get hold of any lower legs exactly the same model/year as yours. I'm not certain but I think those stanchions unscrew from the wheel/brake bosses (they'll need to for chroming). I once changed one on a GSX-R400SP GK76A (I had bent forks but wanted to retain the SP rebound adjuster and could only find standard forks at the breakers) and it required a lot of heat to get it to move, I think it was held in with some kind of industrial strength Loctite. Once undone there was a O-ring to seal the joint and a thin shim underneath the stanchion. I reassembled it with a new O-ring and loads of JB Weld but someone somewhere will know the torque setting for this, maybe fire off a few emails to some of the tuning shops in the States like Pro Circuit etc.?
Understand your point about slight oiling protecting the fork stanchions but it can also "protect" your front brake and for this reason an alert MOT tester will fail you for pitted forks. A bit of GT85 on a rag after every rain/mud ride and after washing should stop the corrosion and give your seals an easier life.
If you want an alloy swingarm IMO your best bet would be a 3ET DT200R item as in many ways it's dimensionally the same as the steel DTR one (i.e it bolts straight in between the engine and frame) and much lighter. Here's a mock-up I did on the bench with some spare DTRe crankcases (the crankcases dictate the position of the swingarm almost as much as the frame). This is a 3ET swingarm, drive side spacer and rear caliper hanger (they're both narrower than DT125R to accommodate the fatter arm), DT125R hub, 428 sprockets and a 2mm M20 washer between the caliper hanger and swingarm. You can see from the straight edge the sprockets line up which should in turn mean the wheels on an otherwise stock DT125R are still in alignment as well. If the sprockets are still slightly misaligned you might be able to get around this by messing around with swingarm side clearance adjustment.
The 3ET rear hub is different, I don't have one to try unfortunately but I think it has two bearings on the drive side so not sure how that would affect things. That guy Peter MacDonald on the DT200R Australia Facebook page is always selling 3ET swingarms, only thing you need to watch for is the mud flap behind the shock wears away the back of the linkage pivot over time (doesn't affect the steel ones) so take a good look at what you're buying from the other side of the world. Quite easy to prevent though, on my KTM EXC I cut up the plastic tube inside a roll of sticky labels and zip tied it onto that part of the arm which stopped it. And sometimes bozos who live on Ramsay Street ride them two-up off-road which makes the rear pegs bend inwards, and this can make a proper structurally compromised mess of an alloy swingarm.Definitely agree messing about with stuff like this gives a greater high than going out and getting wasted with the "In Crowd". Sat here writing this on a Friday night after spending all day on a wheel build and life feels pretty agreeable :+1:
-
Stevie’s French '98, Mid-90's WR/YZ/DT (An idiotproof guide to building your own DTR)@Stevie-Wonder @SpookDog Those vacuum bleeders look pretty cool, also that guy Jennie's Garage on YouTube used the top off a hand soap dispenser with some success on the rear:
https://www.youtube.com/watch?v=x1ddFwEkn3E&t=495s
Last time I did a DTR front brake I used a syringe and back-bled it from the caliper upwards, this worked pretty well as I just ended up with a small air bubble behind the caliper piston which is above the point where fluid comes into here from the hose (put something directly below the handlebar to catch any overflow from the master cylinder). This last bubble behind the piston was then bled out using the normal method. Tried it on the rear as well, didn't seem to work quite as well but got some fluid down there at least before switching to pumping the pedal.
How clean are your master cylinders? The front DTR one should have a small plastic baffle to catch dirt above where the fluid enters the piston area and this can get full of crud and cause trouble. On the rear, the area behind the plastic reservoir hose connector can become scabby and the fluid entry hole to the piston is tiny. So well worth a couple of master cylinder repair kits (I always had good results with genuine front and Yambits rear) and a good blast out with brake cleaner. Also it helps to take off the plastic rear reservoir hose connector and give this a good clean out, and wire bush the part of the m/cyl where it fits into. These can be difficult to remove as brake fluid has no corrosion inhibitor so plenty of patience required here (it's still available but costs £20) and replace the circlip and O-ring with genuine (90p each).
The reservoir hose is well worth replacing but no longer available genuine and you have to be careful what you replace this with, don't use any old hose the right diameter as DOT brake fluid is a solvent and can pass through some types of rubber at a molecular level which looks like heavy condensation even when the rest of the bike is bone dry (don't ask me how I know lol). The best stuff I found was Tygon 2375 off eBay:
https://www.ebay.co.uk/itm/121518690884
All moving in the right direction, take a look at the Tecno front pipe as it's well made, fits the DEP tailpipe well and pulls strongly from about 5krpm so a good choice for offroading and two-up work. And keep an eye on when Lidl are doing heatproof black spray paint again as this is the best I've ever used on the stock pipe (in fact if I bought another Tecno pipe now I'd painstripper the clearcoat off and paint it Lidl HP black from new) :+1:
-
Powervalve fully open@Vcelicka Do you mean with the servo fitted? If so and if yours is an early bike, that sounds right. When you turn on the ignition on a DTR with 3NC or 3MB electrics (pre-'99) the servo should do one full cycle to clean itself, then settle in the fully open position. Then on startup it should adjust to engine speed (i.e close assuming you're at low rpm). Have you taken off the pulley cover and watched it operating? The forked section of the pulley should line up with the 4mm hole in the barrel behind it when it's done its cleaning cycle before you start the engine, and the actual valve should be flush with the roof of the exhaust port at this point (you need to take off the exhaust to check this). This explains it better than me:
https://www.youtube.com/watch?v=Wo_bI40UyWE&t=66s
Talk to @Calum about the later bikes as I don't know too much about these.
75mph doesn't sound too bad, some DTRs are faster than others, I always found 3MB to have a slightly fatter spark and give a bit more power than 3NC but if your bike was restricted, you'd struggle to get 60mph. What age is the bike?
-
Properly Sorted with her 18 tooth sprocket and a carb clean!@FloWolF All sounds good, pics look ace and changing coolant is always a good shout on a used bike :+1:
-
Powervalve fully open@Vcelicka As a youth in the 90s I ran a pinned open powervalve on all my DTRs and it was very depressing. The factory powervalve kit at the time cost over £300 (a lot of money in 1993) and you had to have a full licence to buy it so most people just turned the powervalve round which gave good top-end performance at the expense of low-rpm torque.
It made the bike practically unrideable off-road and you had to rev it to the moon to make it do anything; combined with dual-purpose tyres which in practice manage to be crap on both tarmac and dirt it was a very unpleasant experience and quite antisocial around horse riders, dog walkers etc. on the lanes.
It wasn't until I got my 1st French import in 2020 I even got the chance to try a DTR with functioning YPVS and I can tell you, it transforms the bike and I found it more enjoyable than some bigger bikes. Once at a place called Pepperbox Hill near Salisbury this family out for a walk told me they were really impressed how quiet my bike was when I went past them slowly; 5 minutes later I was doing 70mph on the dual carriageway.
Take good care of your YPVS cables as allowing them to seize is a leading cause of knackered servos. If you want to make your own I wrote a how-to about this which allows you to lube them without taking them off:
https://dt125r.co.uk/topic/2971/home-made-quick-lube-ypvs-powervalve-cables
-
Changing to larger 18T front sprocket, does chain tension/wheel position need adjusting too?@FloWolF It's very brave of you to share your troubles on here. I've never heard of Impostor Syndrome but after a quick Google, I think you may have put a name to what causes me problems.
Sometimes I find myself taking stuff apart again to make sure I did the job properly the 1st time and honestly, not meaning to come across as conceited but I can't remember the last time I actually found something I'd done wrong! But every time that voice kicks in it always feels like it's different this time (which it never is, it's just the same emotion over and over again looking for a hook).
Although it's difficult, you have to see the positive side; this affects you because you're a deep thinker and are naturally disposed to question things. Whereas given enough time, a chimpanzee can be taught to be an Aston Martin technician, brain surgeon etc. And once you start looking around you in main dealers, universities etc., you begin to notice quite a lot of chimpanzees. Being this way doesn't always make life easy but I wouldn't be without what it gives me.
All the best to you buddy, and fair play taking on the carb strip!
-
Does the DTR fuel tank 'breath' through the fuel cap?..@FloWolF Forgot to mention there's also (or should be) a small gauze filter which pushes into the carb fuel inlet that sometimes gets blocked, it's a bit fiddly but you can pull it out and clean it. They're still available from Fowlers but I've cleaned them by spraying brake cleaner on the float bowl side before, it's OK as long as you don't push the nozzle completely down and give it the full fire hose treatment.
-
Does the DTR fuel tank 'breath' through the fuel cap?..@FloWolF It does breathe through the filler cap yes. The Yambits pattern one is completely identical to OEM and costs less than £30 IIRC.