So Close!...
-
I feel quite blessed really compared to your situation @SpookDog , I got my DT off a older gentleman at 5500 miles and have had it since. It's been nicked in that time but luckily that was just indicators that I binned off anyway. Your problems sound like what I am going to have with my ETX. That thing is pure trash
-
Yeah, I don’t give up easily though. 35 year old looms with black tarnished copper cores can be challenging! This has only started since I removed, stored and replaced the loom. It’s easy to find an intermittent broken inner if it’s just an indicator or tail light wire that you can wobble around. Wires in the core of the loom are another matter
Have you done anything on your bike lately? I know that the weather is still shitty here most of the time…
You’ll have to update your thread with the current situation when you can. We’ll get them running again like they should…@SpookDog said in So Close!...:
Yeah, I don’t give up easily though. 35 year old looms with black tarnished copper cores can be challenging! This has only started since I removed, stored and replaced the loom. It’s easy to find an intermittent broken inner if it’s just an indicator or tail light wire that you can wobble around. Wires in the core of the loom are another matter
Have you done anything on your bike lately? I know that the weather is still shitty here most of the time…
You’ll have to update your thread with the current situation when you can. We’ll get them running again like they should…I understand,opened twice the 30 year loom completely,once when rebuilding and now when searching for the electrical problems.Second time was 3 times the searching test&time of the first.I believe now is almost new.
I haven't done much because the bad weather most of the time,no light to work after sunset,2 small kids so almost no spare time and my health problem.
I hope so,need so much to ride again it's like a dream for me now. -
@SpookDog All sounds good!
If the bike still runs I doubt you've done any damage to the CDI by crossing those wires, usually CDI units either work or they don't. Interesting it did still work though; the black/yellow wire tells the little on-board computer inside the 3-wire servo the engine speed (like the crank sensor on a car) and the black/white wire stops the plug sparking by earthing the CDI when you flick the kill switch or turn off the ignition, so I guess if you hooked either of those wires from the CDI up to some test equipment like an oscilloscope, you'd probably get some quite similar results.
Keep us posted for any improvements!
I’ve found the 2 wires that the starter solenoid joins to the loom by, also a wire that appears to be the clutch switch.
What stator did these 3mb RE’s use bud, any idea?…
—————————-Edit: I managed to get the 3nc CDI working thanks to HotShots 3mb wiring diagram. Turns out that the wire that goes to the side stand, from the CDI, needed earthing…
Will test it out later when I can…——————————
PS if this doesn’t cure it I’ll have to try swapping out the carb for the tzr one or my old one. I’m wondering if the choke plunger rubber is worn and not sealing properly.
Also the ignition coil on the stator and the wiring between it and the CDI unit…
I can’t think of anything else at the moment…
Still getting light missing at low revs and an orange/red spark…I replaced the connector & wiring from pickup to CDI. Repaired a connection & wiring in the orange coil wire as well.
-
I’ve found the 2 wires that the starter solenoid joins to the loom by, also a wire that appears to be the clutch switch.
What stator did these 3mb RE’s use bud, any idea?…
—————————-Edit: I managed to get the 3nc CDI working thanks to HotShots 3mb wiring diagram. Turns out that the wire that goes to the side stand, from the CDI, needed earthing…
Will test it out later when I can…——————————
PS if this doesn’t cure it I’ll have to try swapping out the carb for the tzr one or my old one. I’m wondering if the choke plunger rubber is worn and not sealing properly.
Also the ignition coil on the stator and the wiring between it and the CDI unit…
I can’t think of anything else at the moment…
Still getting light missing at low revs and an orange/red spark…I replaced the connector & wiring from pickup to CDI. Repaired a connection & wiring in the orange coil wire as well.
@Me!…
It would appear that a hot wired £25 CDI unit bought from fleabay has cured the low rpm problems! 25 miles with no noticeable pops or hesitation! I’ll check again tomorrow after I’ve adjusted the new slack in my chain…
But for the time being I am optimistic!…


 ️
️
-
@Me!…
It would appear that a hot wired £25 CDI unit bought from fleabay has cured the low rpm problems! 25 miles with no noticeable pops or hesitation! I’ll check again tomorrow after I’ve adjusted the new slack in my chain…
But for the time being I am optimistic!…
️Last post of the day!…
Sparks?! I believe that they should be fat blue~white, yes? If mine are orange ~red then I’m wondering if the capacitors in the CDI unit are getting enough electrickery to generate constant good blue ~white sparks? Even if this could contribute to the demise of a CDI unit? (Serious Deja Vu here somehow)
I’m thinking of changing out the ignition ~source coil and the wiring from the stator to the CDI unit anyways...
I would seriously love some feedback about spark colour and strength… -
Bikes still running good and sweet. The source coil was well in spec with the Ohms (not the purple ones)
One good thing is I’ve learned how to isolate the ignition system from the rest of the loom. Just pulling the black/white wire (kill switch & key barrel) on the CDI isolates most of it. Depending on the CDI year there’s more you can do to isolate the side stand curcuit. It doesn’t use a ‘to earth’ curcuit to kill the engine. It uses a curcuit that kills the ignition if not earthed (IE a partial break inside the insulation will kill it) You can bypass the loom by earthing the single blue CDI wire to the HT earth point.
Both these give you a chance to identify a possible partial/intermittent break in the loom…
I’ll read through your thread again. You have a 3nc CDI if I remember? -
@SpookDog Yes you remember correct,1x3NC and 2x4DL.
I did some work on the DT,will update the thread within the week.Let me know what is happening with the spark! If it’s sparking and not running, or if there is a spark but the engine only fires once. Or there’s no spark at all. We’ll get your bike running bud, I’d stake my ‘reputation’ on it! ROTFFLMAO!
 …
…———————————
My bikes still running and firing smoothly, I’m almost ready to call it fixed!…
-
Let me know what is happening with the spark! If it’s sparking and not running, or if there is a spark but the engine only fires once. Or there’s no spark at all. We’ll get your bike running bud, I’d stake my ‘reputation’ on it! ROTFFLMAO!
…———————————
My bikes still running and firing smoothly, I’m almost ready to call it fixed!…
-
Engine is running sweet as fux! It’s officially mended by replacing the CDI unit with a 3NC unit, that I had to earth the single light blue wire to bypass the side stand circuit.
It’s strange that the old 3BN CDI was still working but missing, they usually work or don’t in my previous experience. I will have to check the wiring for internal breaks…Now I can start on the 101 other things that need attention! Greasing the brake pads! Fitting the rear mud flap (can you get a front one that’s half decent?) Fitting the 2T oil pump. Rear linkage bushings. Wheel bearings. Chain tension. LED driving lights. Resonating exhaust expansion chamber. Recovering spare seat. Barrel base gasket. Front brake light switch wire inside break in wire. Bed forks in properly. Find proper clutch perch. Find new block and bullet connectors and proper gauge wire to build new loom. Original throttle cable. Electrolysis the rust out of tank and POR15 seal it. Machine/dremmel fuel petcock to take original metal ‘lever’.
And anything else that I can’t think of off the top of my head!
Till then, signing off …
… -
Engine is running sweet as fux! It’s officially mended by replacing the CDI unit with a 3NC unit, that I had to earth the single light blue wire to bypass the side stand circuit.
It’s strange that the old 3BN CDI was still working but missing, they usually work or don’t in my previous experience. I will have to check the wiring for internal breaks…Now I can start on the 101 other things that need attention! Greasing the brake pads! Fitting the rear mud flap (can you get a front one that’s half decent?) Fitting the 2T oil pump. Rear linkage bushings. Wheel bearings. Chain tension. LED driving lights. Resonating exhaust expansion chamber. Recovering spare seat. Barrel base gasket. Front brake light switch wire inside break in wire. Bed forks in properly. Find proper clutch perch. Find new block and bullet connectors and proper gauge wire to build new loom. Original throttle cable. Electrolysis the rust out of tank and POR15 seal it. Machine/dremmel fuel petcock to take original metal ‘lever’.
And anything else that I can’t think of off the top of my head!
Till then, signing off …
Link (@ least one) on the chain locked up solid because of road salt. So freeing off the chain and adjusting is going to be my first job. What good is an X~ring chain if it doesn’t survive a couple months of winter?!…
-
Link (@ least one) on the chain locked up solid because of road salt. So freeing off the chain and adjusting is going to be my first job. What good is an X~ring chain if it doesn’t survive a couple months of winter?!…
-
The amount of times I've had a pushbike chain snap on me, and I've gone over the handlebars, because the fricken salt has corroded it

I've had it a few times where I've gotten to work and ended up with a puncture, to repair the tyre only to leave the car park to cycle home and fall flat on my arse

-
Link (@ least one) on the chain locked up solid because of road salt. So freeing off the chain and adjusting is going to be my first job. What good is an X~ring chain if it doesn’t survive a couple months of winter?!…
Link (@ least one) on the chain locked up solid because of road salt. So freeing off the chain and adjusting is going to be my first job. What good is an X~ring chain if it doesn’t survive a couple months of winter?!…
If I'd just done a complete engine rebuild I wouldn't be messing around with a used chain with tight links. How will you feel if you end up with smashed crankcases?
And I'm not sure I'd want an O- or X-Ring chain on a 125 either; when they first appeared in the 80s, advice in the MX world was if you ride an 80 or a 125, stick with standard chains as O-Ring chains take an extra half a horsepower to turn. Now translate this to road bikes; in the cold light of day a well-sorted DT125R mates the power output of a YZ80 with the weight of an XR600, so you really don't want anything getting in the way of what power you have got reaching the rear wheel.
There's also another side to this which is, a lot of people seem to think a sealed chain is the equivalent of armour plating, i.e it requires no maintenance whatsoever and will never wear out. I've seen people in motorcycle shops adjust the pressure washer to a pinhead-sized jet and point it directly at the chain to avoid cleaning it properly. You can't expect any O-Ring to withstand that. Whereas spending 5 minutes with some Jizer and a paintbrush, you'd only need gentle mains water pressure to rinse it off.
Possibly more than anything else, chains are sensitive to how they're treated. A timing chain inside an engine can last hundreds of thousands of miles because it's in a completely clean environment with filtered oil being constantly sprayed at it all the time it's in motion. I used to work for a guy who owned a Yamaha 660 Raptor quad, he fitted a chain oiler and immediately experienced less chain wear in an entire year of Devon greenlaning than he previously got in a single outing. And quads have a lot of grip with those fat tyres meaning they're hard on chains. That thing was an animal, I rode it once and that was enough.
Here's a picture of a chain which regularly did a 40-mile loop of greenlaning and looked like this after every time I cleaned the bike. Nothing special, just 5 minutes scrubbing with Gunk/Jizer and a paint brush, rinse with the hose (a MX bike stand so you can rotate the rear wheel is essential), dry with WD40 (which corrodes nitrile rubber; another thing you can't do with a sealed chain) and bog roll and re-lube. I think it looks more beautiful than a highly polished fairing on a sportsbike, because that is my passport to scalded cat acceleration, reliability when freezing my bollocks off 50 miles from home and a left crankcase without a hole in it. It's a little bit like the passage in Zen and the Art of Motorcycle Maintenance where the author Robert M. Pirsig talks about trying to remove a stuck engine case screw and says, until you remove that stuck screw, it is worth the market value of the motorcycle so you have to re-value the screw. And if you're riding through a British winter with salt on the roads, you have to re-value the chain.

A top-of-the-line non-O-Ring D.I.D 428HD costs £25 and you can get the correct split links for like £1 each so any time it needs to come off you can just throw a new split link on. Other ways to bulletproof the drivetrain include using a new front sprocket nut and tab washer, cleaning the output shaft threads with a Dremel wire wheel and degreasing the shaft and nut threads with Brake Cleaner before using blue Loctite and tightening to 60Nm (one person can do this by sitting on the bike, holding the rear brake on and putting a fork leg on the end of the torque wrench with the old chain temporarily refitted), and using genuine rear sprocket bolts and nuts; the 35Nm Yamaha recommend for these is more than double the default 16Nm you'd expect to use on an M8 x 1.25 fastener.
I realise I've gone full Hermione Grainger over this (not the 1st time lol) but you've moved mountains doing a full rebuild in winter without having anywhere to work indoors, I think I would have found it very hard to achieve what you've done, and for the sake of a new chain and sprocket set all that work could be undone (plus the fact a snapped chain at highway speeds is bloody dangerous). Keep cleaning and re-lubing a non-O-ring chain and it'll stick two fingers up at the gritting lorry.
-
Interesting read as always @HOTSHOT-III
I know you're right in a lot of what you say, I always think if it cost more...it must be better.
I do need to replace my chain on my DT, not because it's worn or damaged, but because back when I built the bike, I was going for "Style" and therefore sourced a 520 pitch chain, but to be honest I'd rather reduce the reciprocating parasitic losses from the engine. That said, it's difficult for my build since I run RS125 wheels and the RS never came with a 428 Pitch chain thus sprockets aren't supported. Can use smaller chains, but I had that let go on my RS and I had to walk home
-
Link (@ least one) on the chain locked up solid because of road salt. So freeing off the chain and adjusting is going to be my first job. What good is an X~ring chain if it doesn’t survive a couple months of winter?!…
If I'd just done a complete engine rebuild I wouldn't be messing around with a used chain with tight links. How will you feel if you end up with smashed crankcases?
And I'm not sure I'd want an O- or X-Ring chain on a 125 either; when they first appeared in the 80s, advice in the MX world was if you ride an 80 or a 125, stick with standard chains as O-Ring chains take an extra half a horsepower to turn. Now translate this to road bikes; in the cold light of day a well-sorted DT125R mates the power output of a YZ80 with the weight of an XR600, so you really don't want anything getting in the way of what power you have got reaching the rear wheel.
There's also another side to this which is, a lot of people seem to think a sealed chain is the equivalent of armour plating, i.e it requires no maintenance whatsoever and will never wear out. I've seen people in motorcycle shops adjust the pressure washer to a pinhead-sized jet and point it directly at the chain to avoid cleaning it properly. You can't expect any O-Ring to withstand that. Whereas spending 5 minutes with some Jizer and a paintbrush, you'd only need gentle mains water pressure to rinse it off.
Possibly more than anything else, chains are sensitive to how they're treated. A timing chain inside an engine can last hundreds of thousands of miles because it's in a completely clean environment with filtered oil being constantly sprayed at it all the time it's in motion. I used to work for a guy who owned a Yamaha 660 Raptor quad, he fitted a chain oiler and immediately experienced less chain wear in an entire year of Devon greenlaning than he previously got in a single outing. And quads have a lot of grip with those fat tyres meaning they're hard on chains. That thing was an animal, I rode it once and that was enough.
Here's a picture of a chain which regularly did a 40-mile loop of greenlaning and looked like this after every time I cleaned the bike. Nothing special, just 5 minutes scrubbing with Gunk/Jizer and a paint brush, rinse with the hose (a MX bike stand so you can rotate the rear wheel is essential), dry with WD40 (which corrodes nitrile rubber; another thing you can't do with a sealed chain) and bog roll and re-lube. I think it looks more beautiful than a highly polished fairing on a sportsbike, because that is my passport to scalded cat acceleration, reliability when freezing my bollocks off 50 miles from home and a left crankcase without a hole in it. It's a little bit like the passage in Zen and the Art of Motorcycle Maintenance where the author Robert M. Pirsig talks about trying to remove a stuck engine case screw and says, until you remove that stuck screw, it is worth the market value of the motorcycle so you have to re-value the screw. And if you're riding through a British winter with salt on the roads, you have to re-value the chain.
A top-of-the-line non-O-Ring D.I.D 428HD costs £25 and you can get the correct split links for like £1 each so any time it needs to come off you can just throw a new split link on. Other ways to bulletproof the drivetrain include using a new front sprocket nut and tab washer, cleaning the output shaft threads with a Dremel wire wheel and degreasing the shaft and nut threads with Brake Cleaner before using blue Loctite and tightening to 60Nm (one person can do this by sitting on the bike, holding the rear brake on and putting a fork leg on the end of the torque wrench with the old chain temporarily refitted), and using genuine rear sprocket bolts and nuts; the 35Nm Yamaha recommend for these is more than double the default 16Nm you'd expect to use on an M8 x 1.25 fastener.
I realise I've gone full Hermione Grainger over this (not the 1st time lol) but you've moved mountains doing a full rebuild in winter without having anywhere to work indoors, I think I would have found it very hard to achieve what you've done, and for the sake of a new chain and sprocket set all that work could be undone (plus the fact a snapped chain at highway speeds is bloody dangerous). Keep cleaning and re-lubing a non-O-ring chain and it'll stick two fingers up at the gritting lorry.
Hey bud! I’ve just spent the afternoon fitting a new JT chain (o~ring!) I ordered for £20.50 yesterday. I can’t believe it turned up so quick! I wish I had a hose pipe! Fuxin salt kills me every (snowless!) winter. Luckily I had sprockets around from before when I had monies!…

SHINY!!…
the chain!
-
Hey bud! I’ve just spent the afternoon fitting a new JT chain (o~ring!) I ordered for £20.50 yesterday. I can’t believe it turned up so quick! I wish I had a hose pipe! Fuxin salt kills me every (snowless!) winter. Luckily I had sprockets around from before when I had monies!…
SHINY!!…
the chain!
@SpookDog Cool, my views on O-ring chains on smaller bikes are just an opinion but you have a new chain and that's the main thing

@Calum I ran a 520 conversion drivetrain on a 3DB DTR at one time and never had an issue, including a trip from Southampton to Donington Park for the 1998 British GP. Including campsite mayhem (now sadly banned by the nanny state) I must have done about 600 miles that weekend and the old round slide carb '88 never missed a beat!
https://www.youtube.com/watch?v=tbSCsNda4e0&t=67s
-
@SpookDog Cool, my views on O-ring chains on smaller bikes are just an opinion but you have a new chain and that's the main thing
@Calum I ran a 520 conversion drivetrain on a 3DB DTR at one time and never had an issue, including a trip from Southampton to Donington Park for the 1998 British GP. Including campsite mayhem (now sadly banned by the nanny state) I must have done about 600 miles that weekend and the old round slide carb '88 never missed a beat!
https://www.youtube.com/watch?v=tbSCsNda4e0&t=67s
-
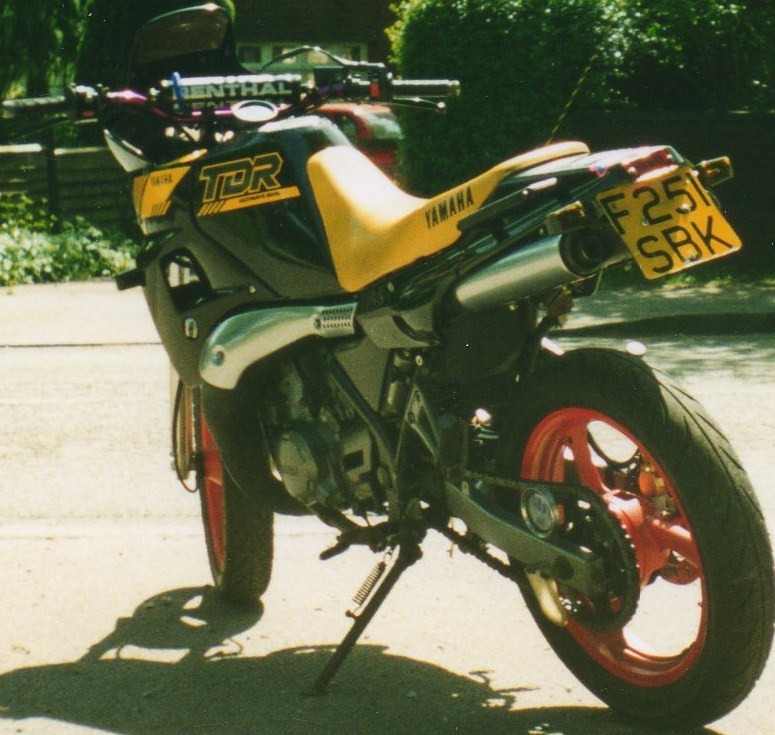
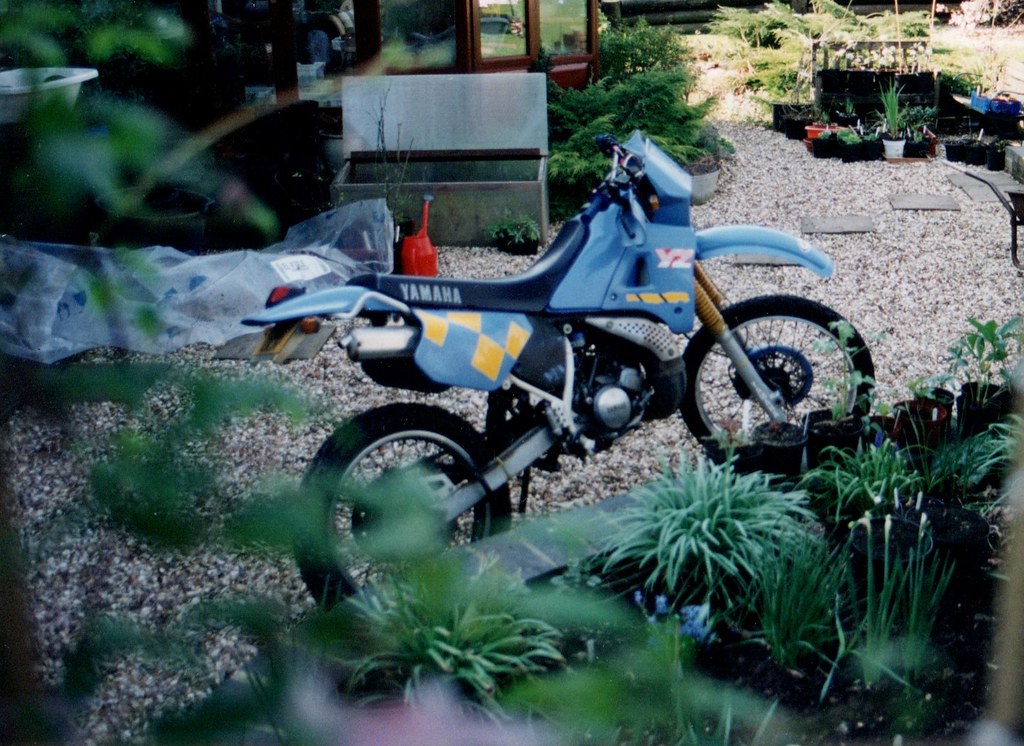
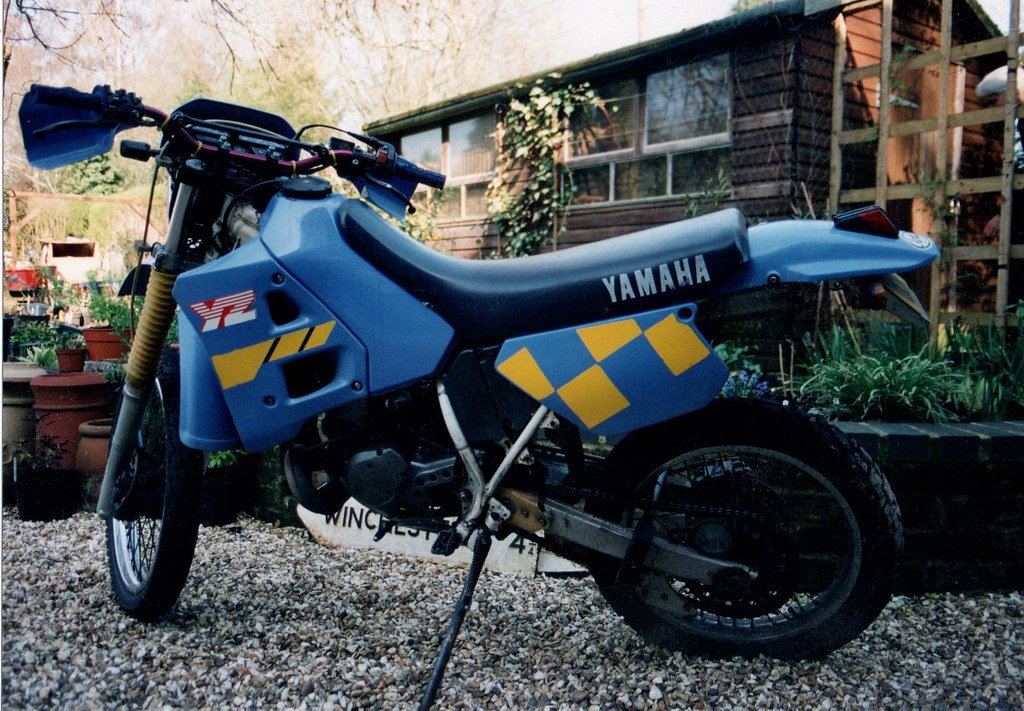
Ahh! Real deal endo blue, not like my shabby pretender was! Interesting tail end setup. Was there a number plate light up under?…
@SpookDog Thanks bud, yes what I did was to make a U-shaped piece of 1mm thick steel with the centre section the same width as the distance across the indicator mounts on the grabrail. The parts each side were about 30mm at the top tapering to 20mm at the bottom and I then mounted it fitted over the indicator mounts, sloping downwards at the same angle. Although not visible in the pic there was enough space under the blue rear mudguard to fit one of those little oval standalone number plate lights, nicked off a Kawasaki Eliminator down the breakers IIRC. Taillight is one of those scaled down TS125R pattern lights and always worked very well, the only drawback being it took a 21/5W stop/tail bulb with a smaller glass about the same size as a 10W bulb which were difficult to get hold of:
Back in the 90s no-one had thought of making tail tidys, all the grey import 400s and 250s had much nicer rear lights and indicators than UK versions of the same bike, so it was something of a pastime to try and emulate that if like me you were stuck in a low-paid job (in a grey import shop ironically) and couldn't afford a V-Twin TZR250 fresh off the container from BAT Motorcycles etc.
Here's a TDR250 with a home-made rear light I made out of 2mm aluminium and a rear reflector lens from a Honda FireBlade. It had a twin bulb holder from a Yamaha Virago which has the rear light bulbs very close together (I cut out the part I needed with a junior hacksaw and screwed it to the alloy backplate before sealing up the holes around the edge with JB Weld). It was extremely bright and passed several MOT tests, and I had to line the inside of the tailpiece with heatproof tape to stop it melting. It also featured tool-free mounting as the TDR250 tailpiece has a shallow ridge on the inside so I shaped it to clip into that and then you just refitted the tailpiece/grab rails and it was pushed against the rear subframe and couldn't go anywhere. Once myself and a mate who had a TZR250 Parallel Twin swapped bikes, I was behind him and I couldn't believe I looked like that, it just looked illegal and against the laws of physics cranked over with 6" of space above the rear wheel. Eventually I sold it to buy a Kawasaki KR1-S, the buyer complained it wasn't original, then about a year later I bought another TDR250 cheap so I contacted him and said do you want to swap the custom rear light assembly for a stock one? He said OK so I rode over to his house and we changed them over. I thought more fool him, the stock TDR250 looks bloody awful with the numberplate stuck below the tailpipes, almost as bad as later KMX125s with the rear mudflap 2 feet long!