The Leviathan Project
-
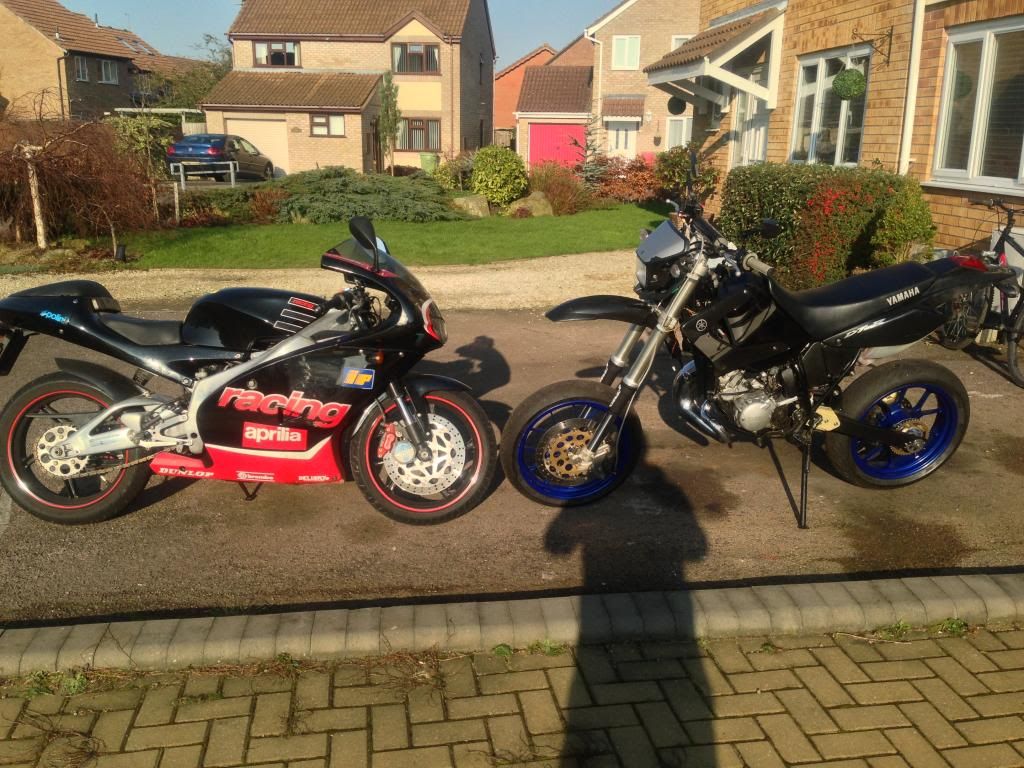
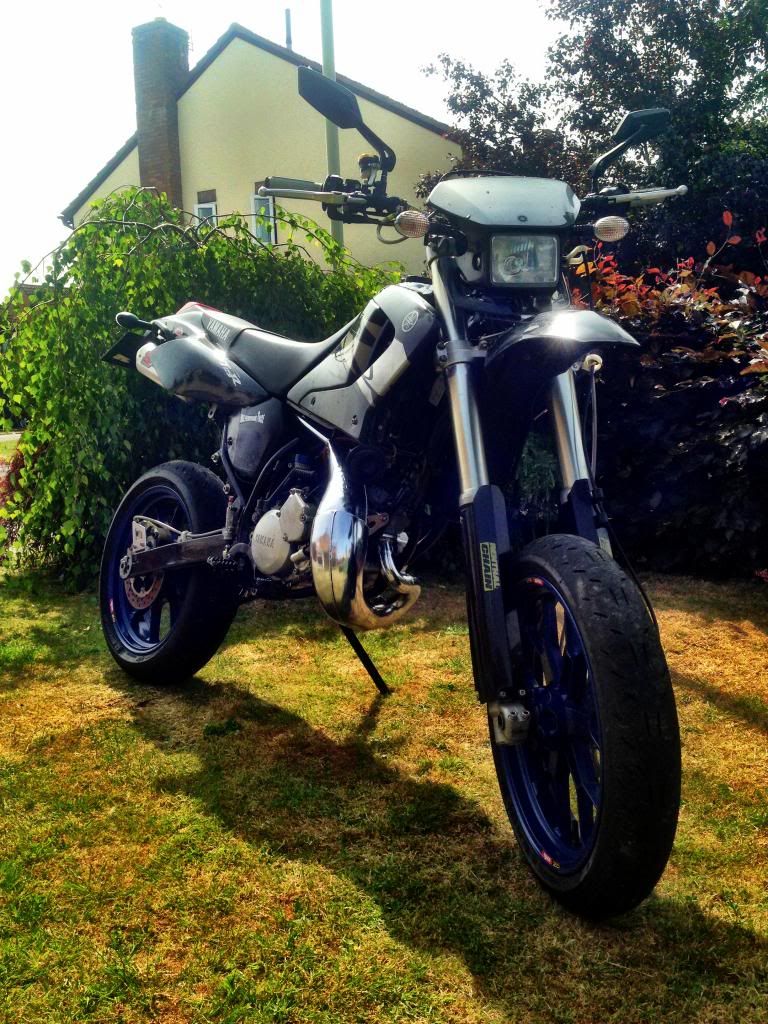
I just so love the SM bad ass setup , would love to do one but would not want to do mine that way I want to keep that one what I call oily rag looking used and abused but every thing working as it should , not 26 years old and looking as if it has just come out of the showroom , but a SM job I would like it to look right and ye cool dude , but would want it to go as well as it looked , no no no I can't afford it , get behind me temptation , she would kill you just for thinking about if she knew
-
I just so love the SM bad ass setup , would love to do one but would not want to do mine that way I want to keep that one what I call oily rag looking used and abused but every thing working as it should , not 26 years old and looking as if it has just come out of the showroom , but a SM job I would like it to look right and ye cool dude , but would want it to go as well as it looked , no no no I can't afford it , get behind me temptation , she would kill you just for thinking about if she knew
@Steady-Eddy eddy you made a post! I'm so pleased for you I know its not easy!
I don't know how to respond to thatvEddy, this is my baby after all. I would have kept it standard but it got nicked and abused. What can I say, I didn't want the scrotes thinking they won!
Post 2
Just porting my Project to the new forum!
Yo Yo Yo!
Been working on my project for months now as some of you may know. I wanted to start a project thread when enough work had been done. I wanted to have photos of the frame stripped down and powdercoated. I wanted this project to follow some logical order. But it hasn't. Maybe I will rearrange it once i've finished it to make it nice to follow.
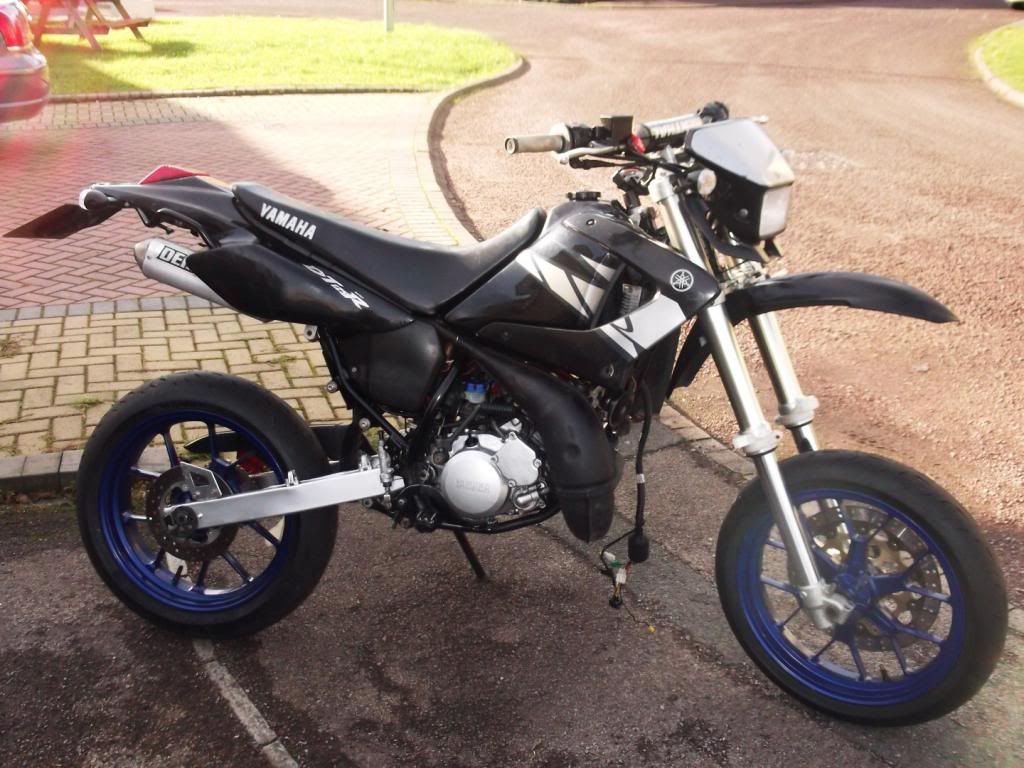
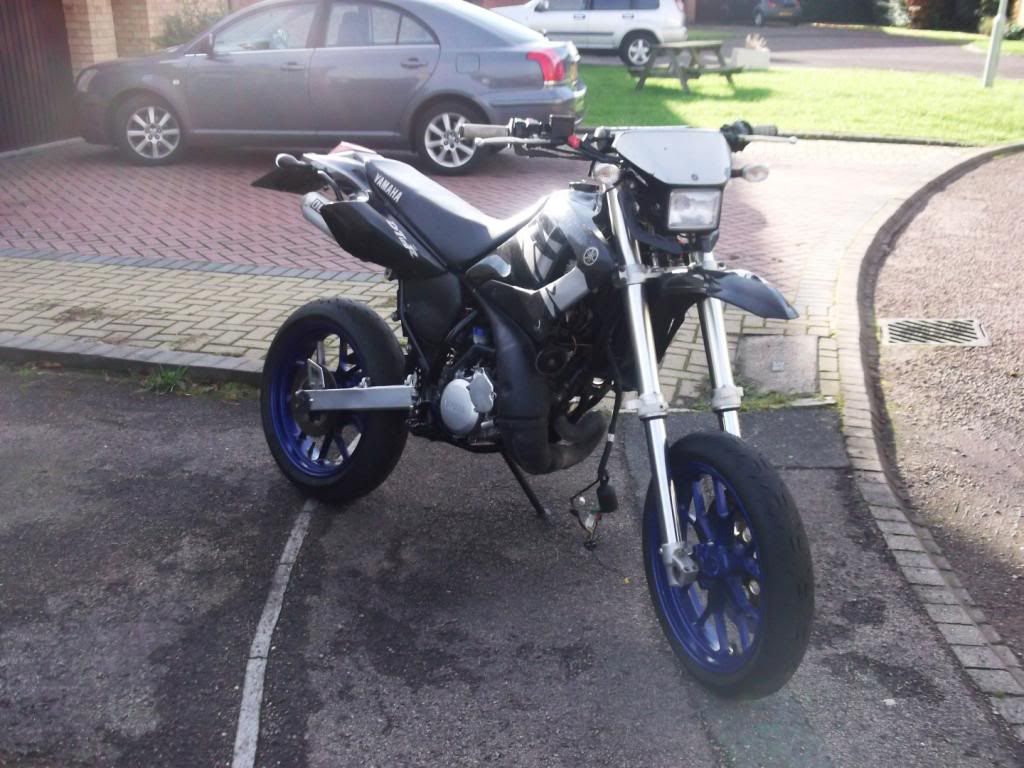
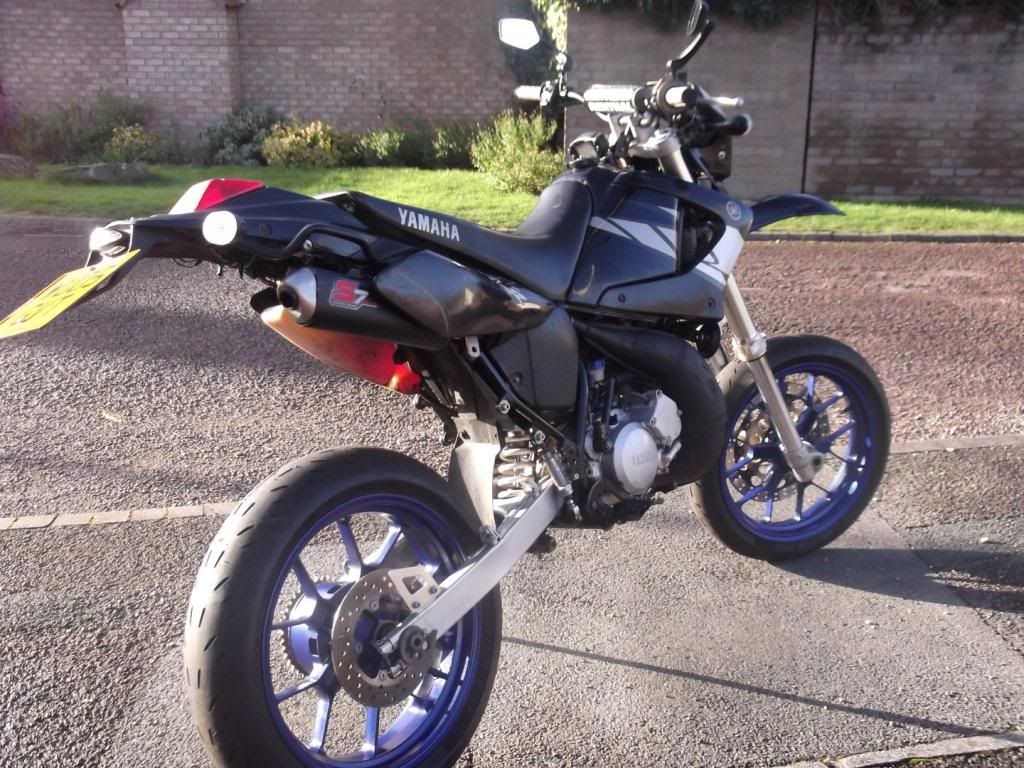
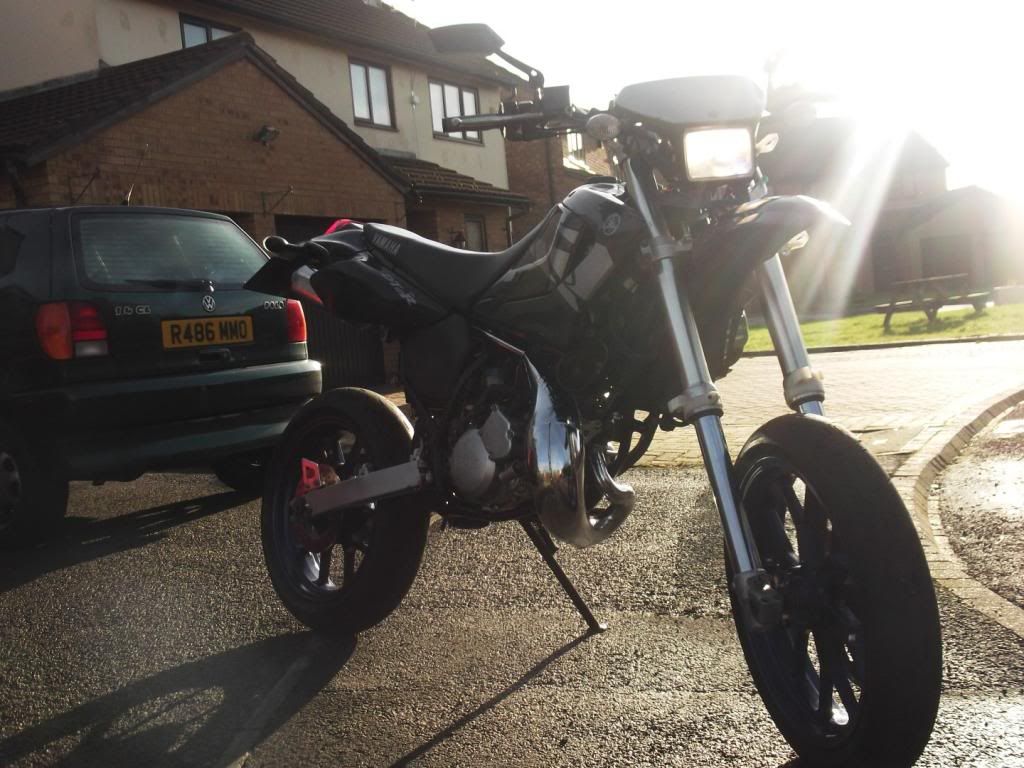
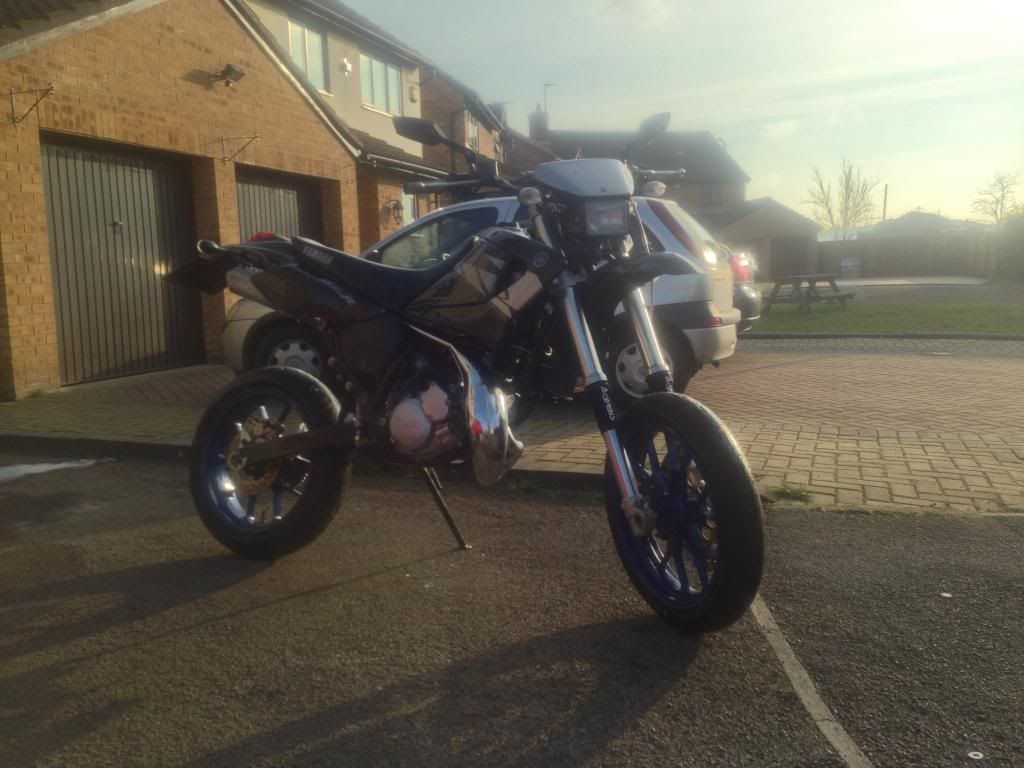
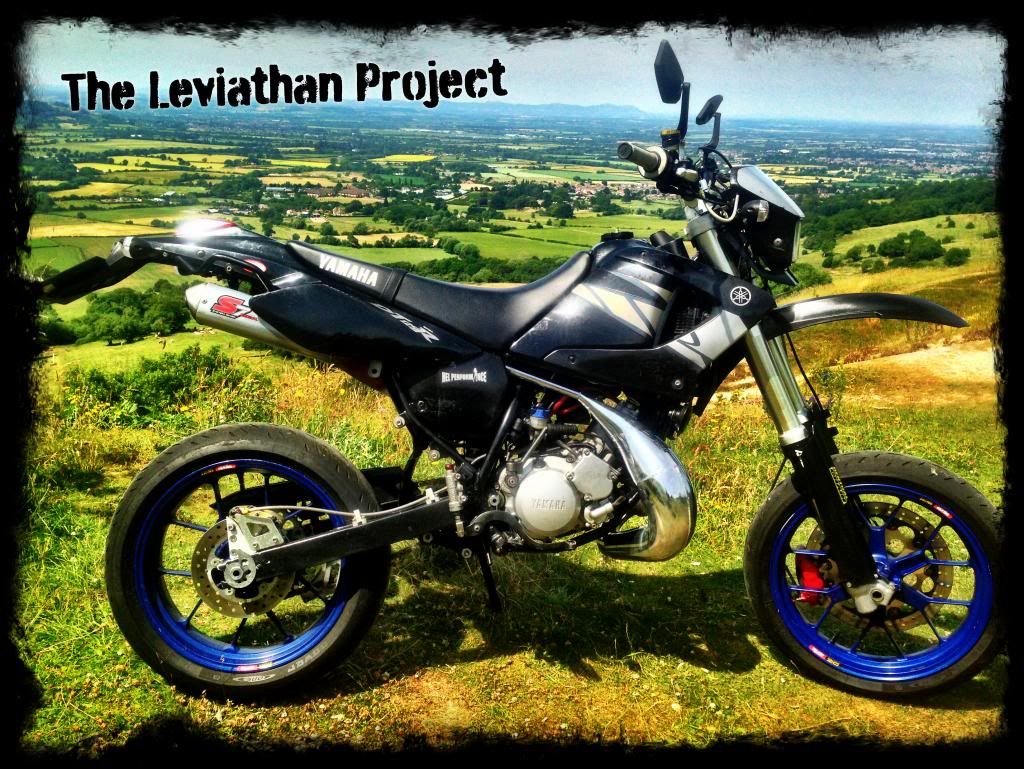
So here we go. Here is my project. It's inspired from my first bike. Funnily enough it was only AFTER I bought my supermoto wheels that I realised Bradders had pretty much EXACTLY the same idea. So we've been feeding off each other for help and ideas. Cheers mate.
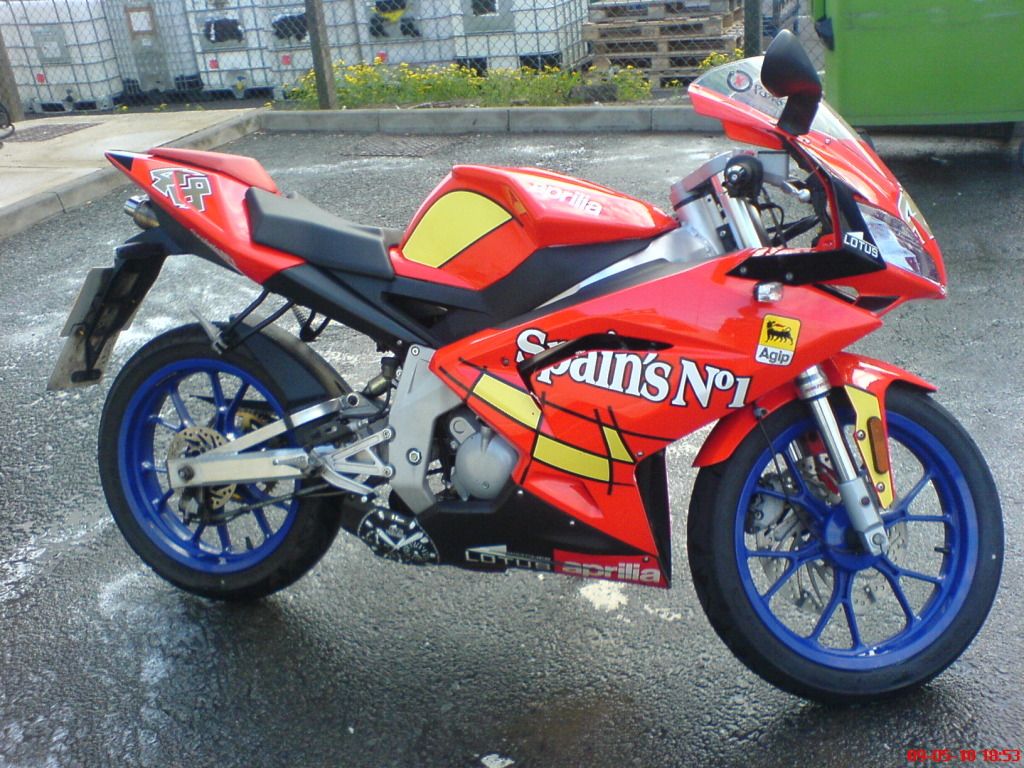
Inspiration came from this baby.
So here's my project.
Got the bike like this.
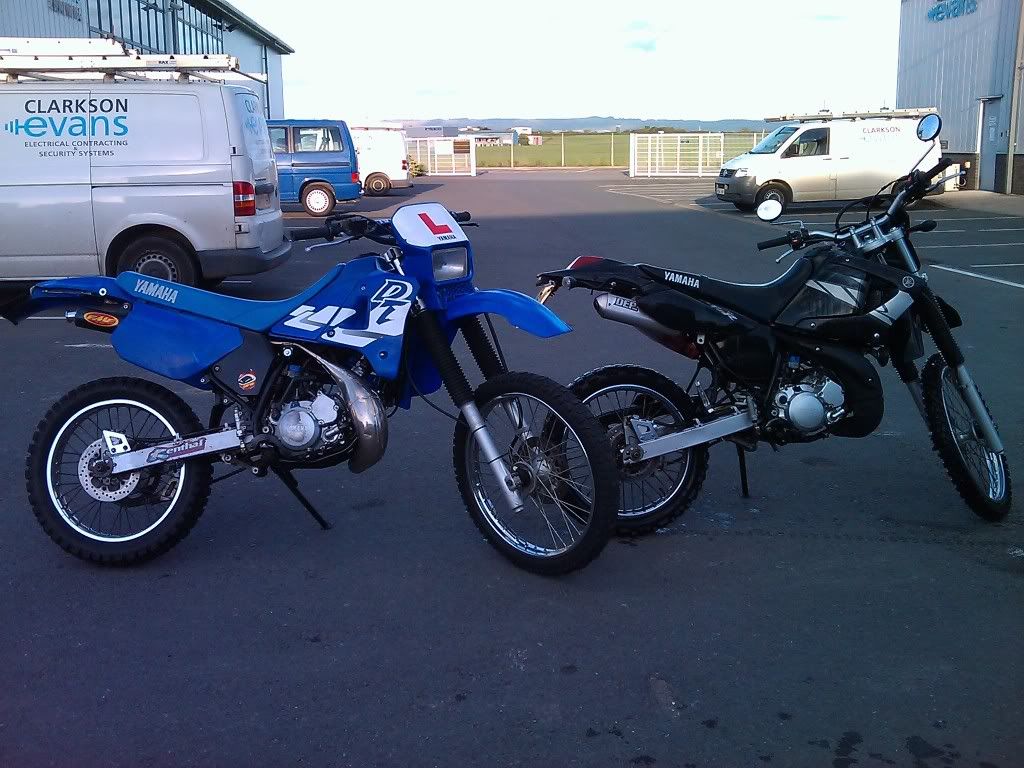
The black one...
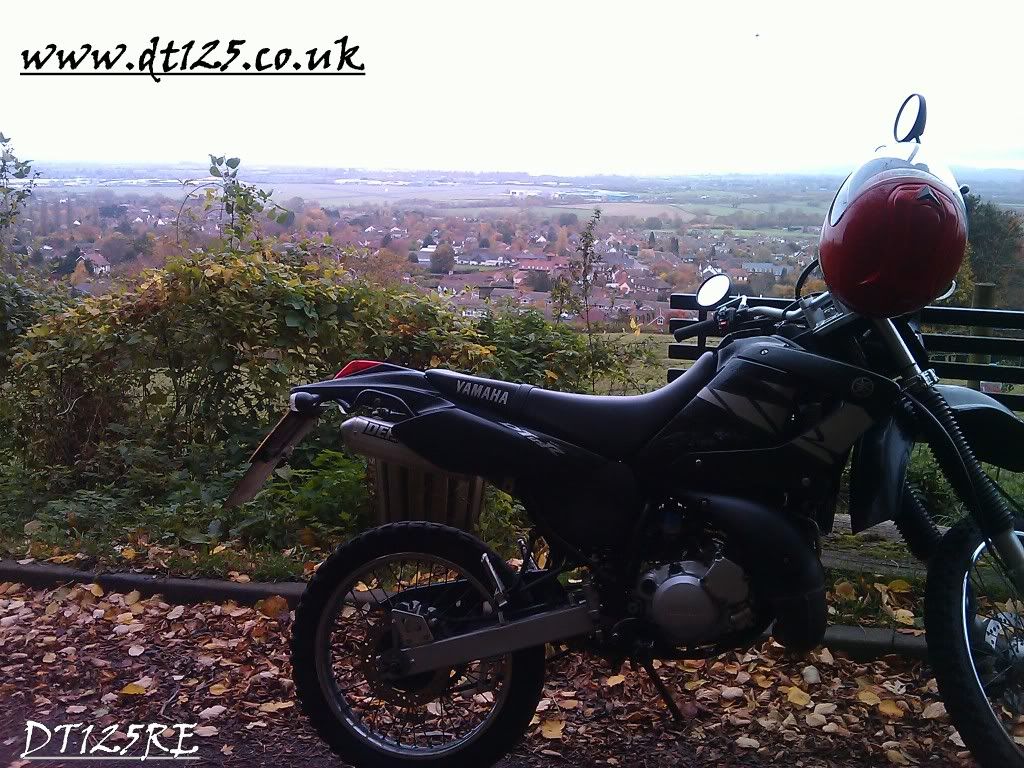
First things first was that I installed a kickstart to my bike. I also made a tutorial for anyone who would like to do it.

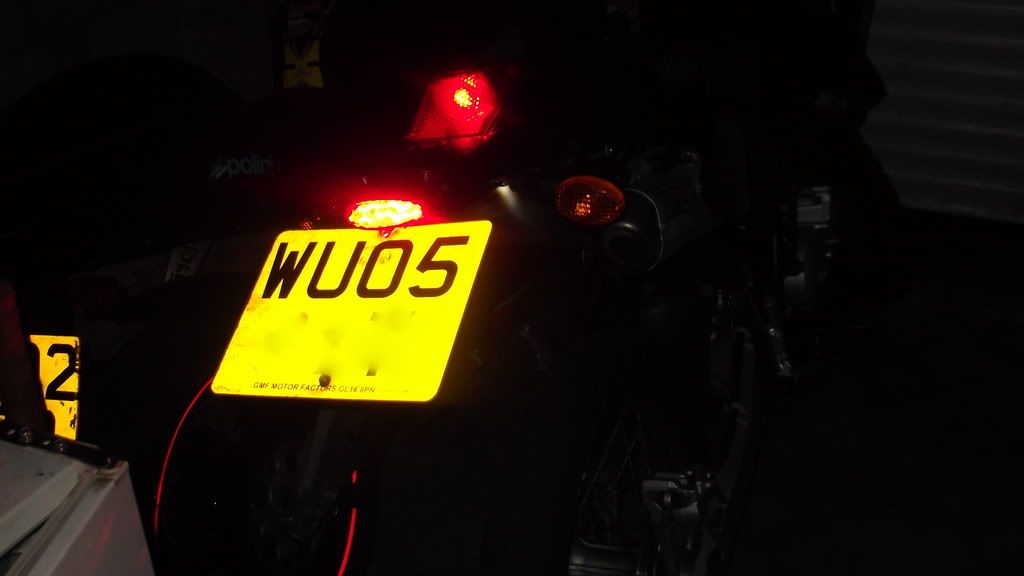
Then I went out and sorted out the numberplate. I may change this still. I've seen some on here done really well. I'm thinking maybe a 7X5 Metal plate. Would look sweet.
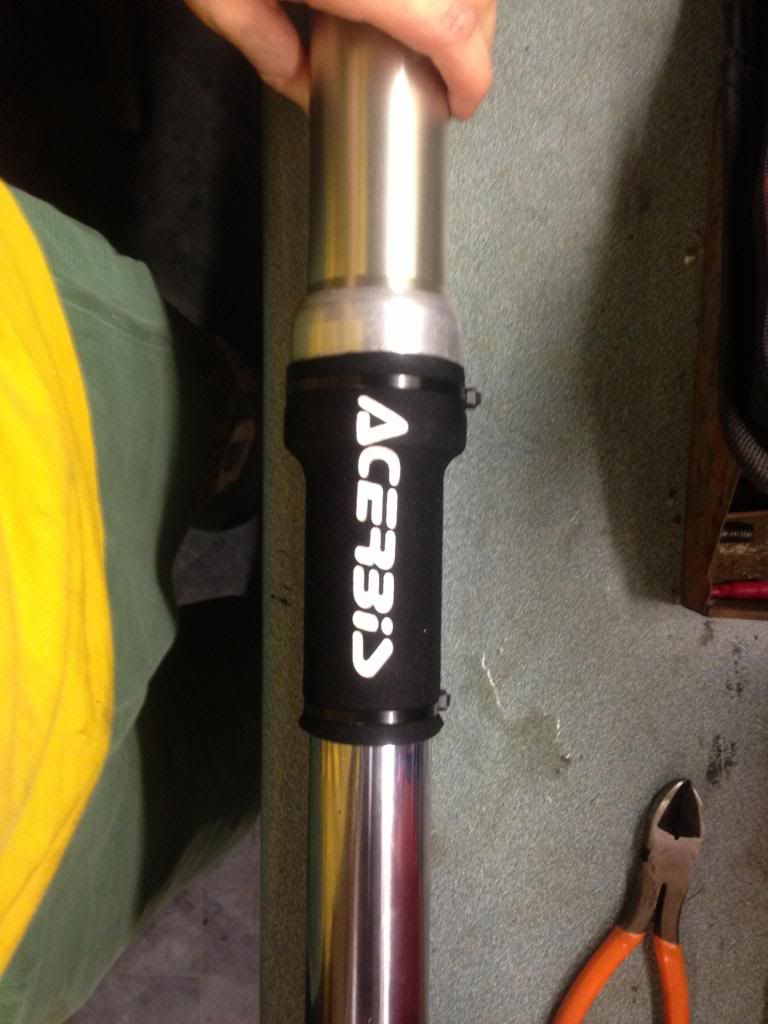
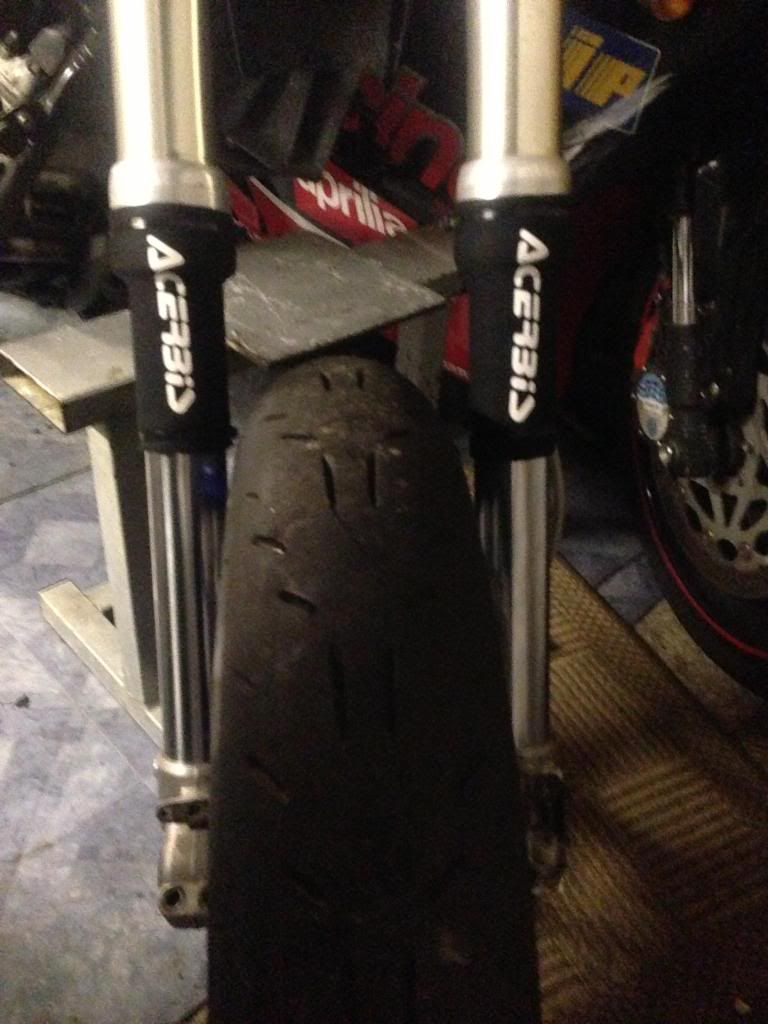
I Bought a Acerbis tailtidy. I like it. It's sweet!
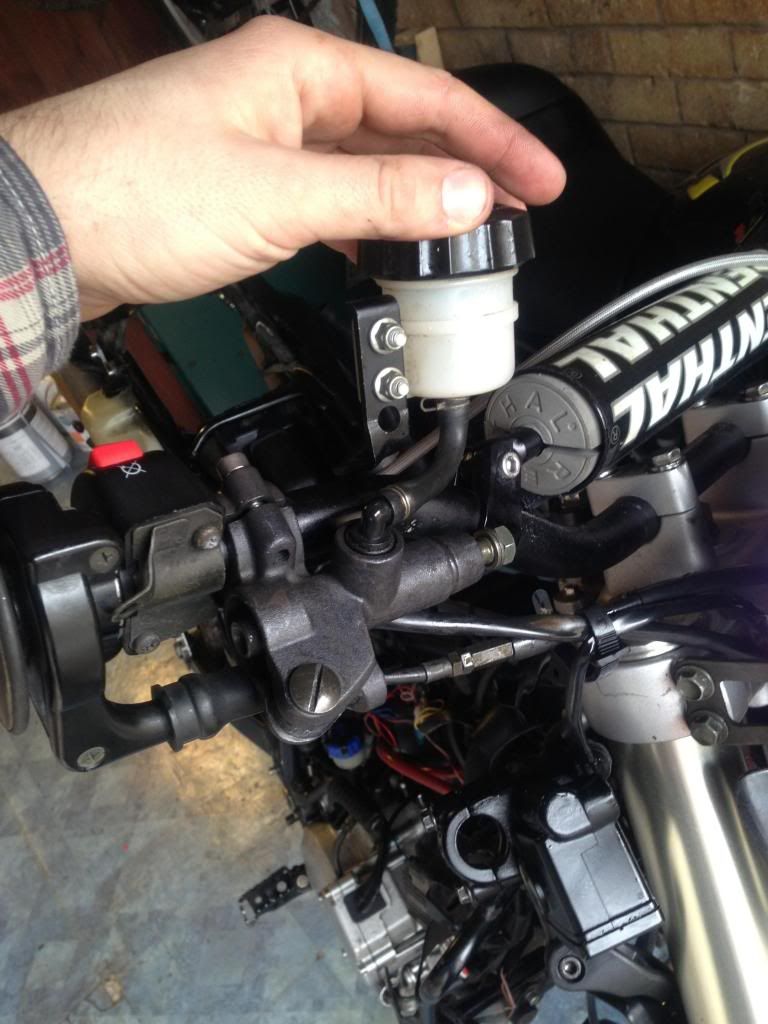
Gotta keep an eye on that oil level. Especially at night

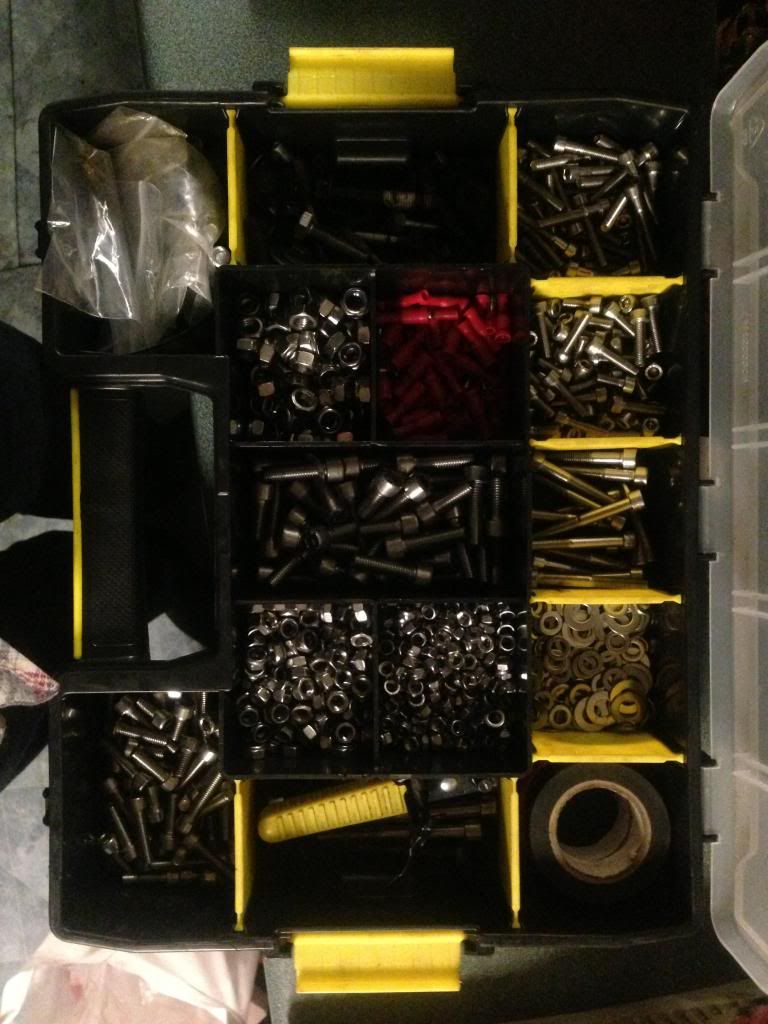
Definitely get yourself some of these.
They are so handy when you're doing a project. Just replacing all the rusted bolts in your bike. Helpful.
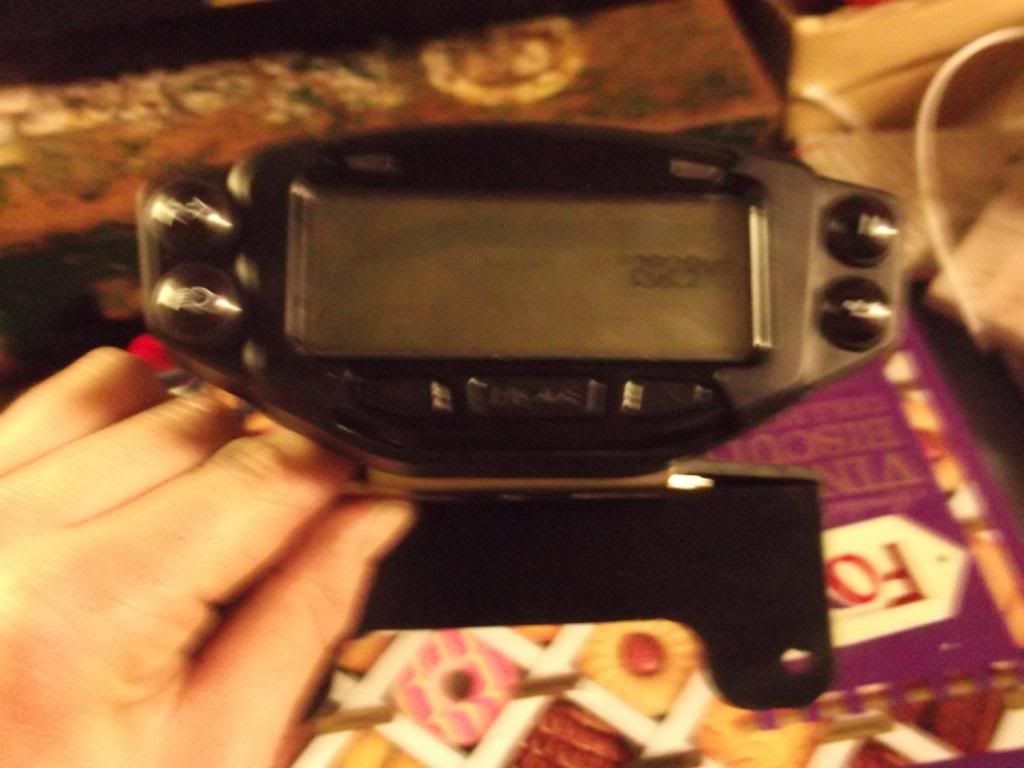
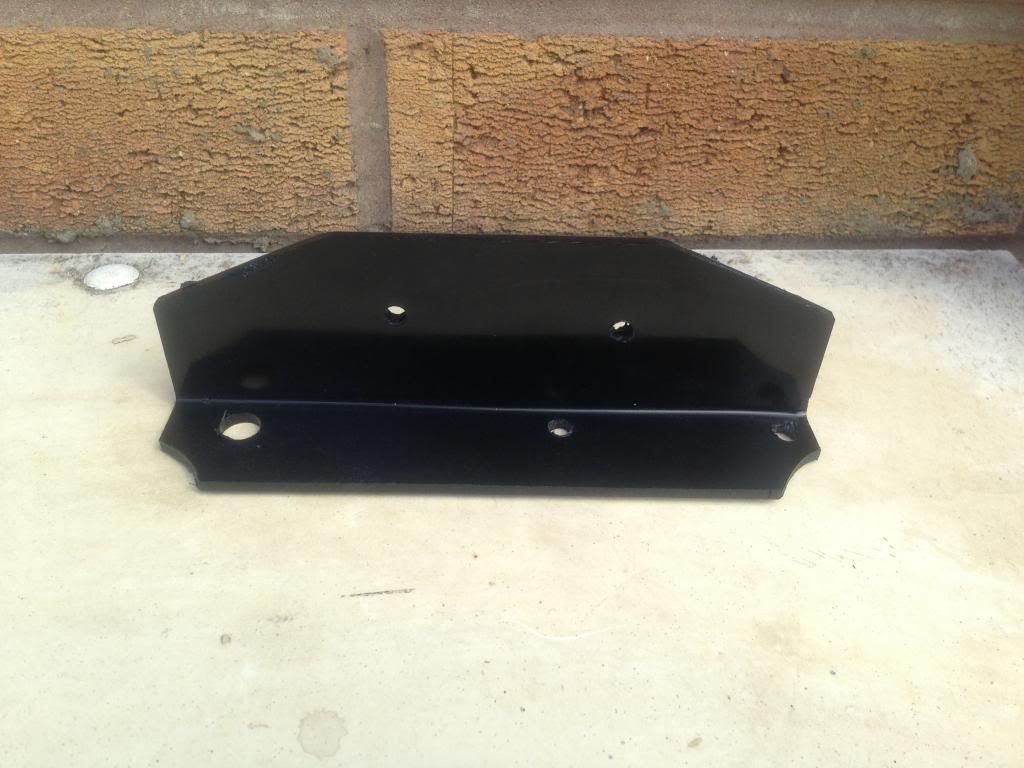
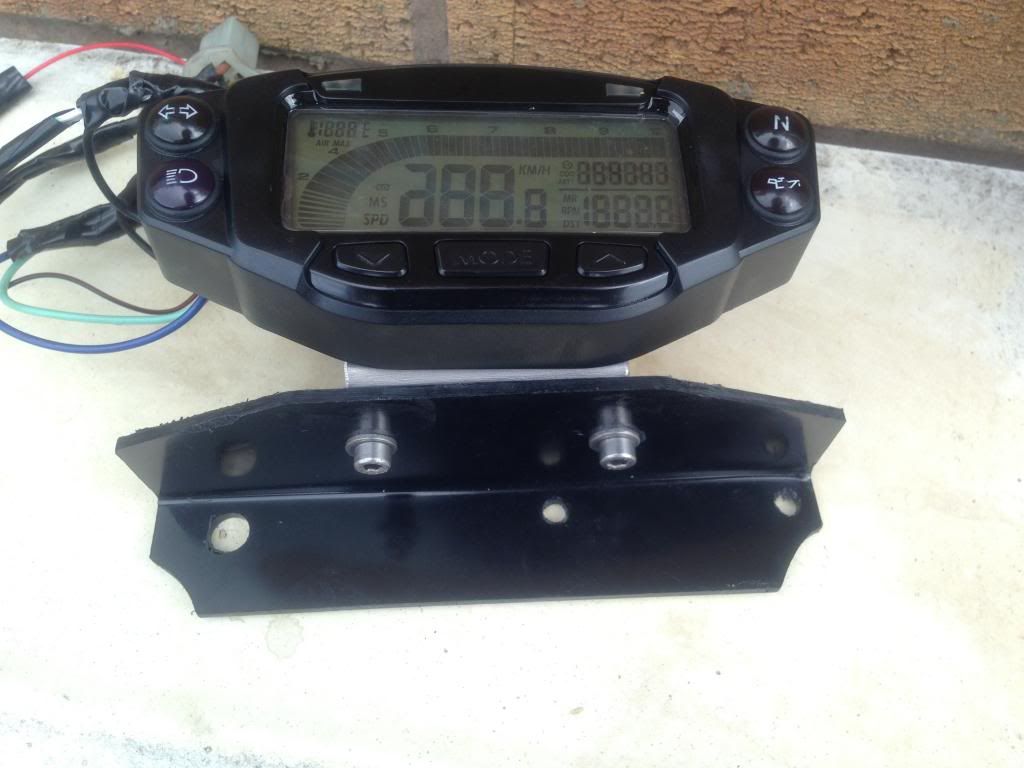
I then sorted myself out one of these.
Trial Tech Vapor Unit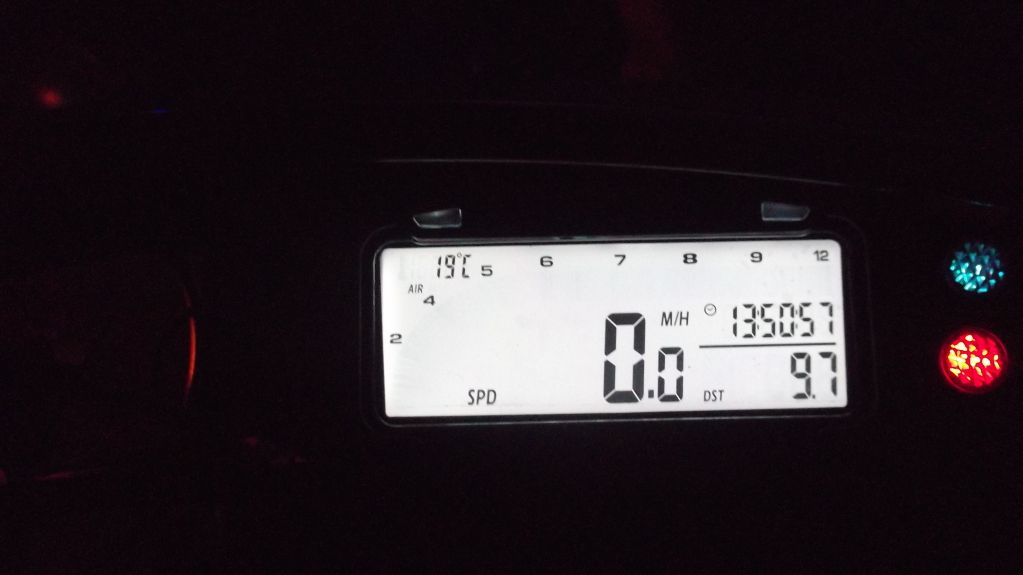
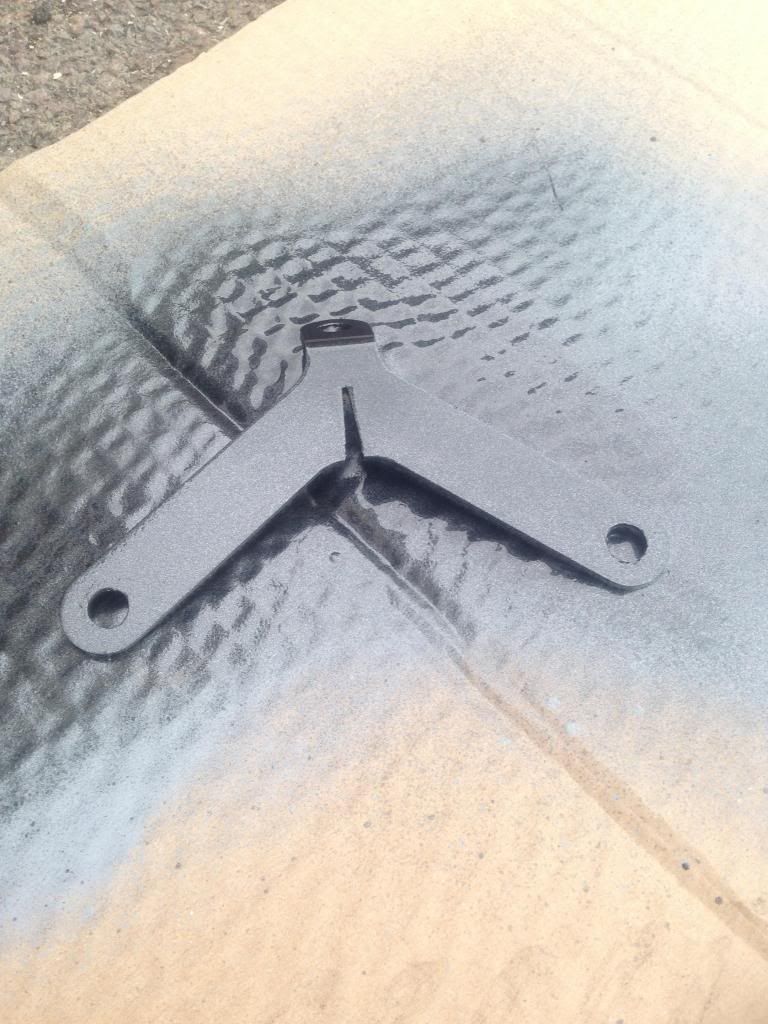
Had a sweet little bracket it made up. Did a sweet job too!
Gone to a good home now though. Will have a new bracket made up in the near future.
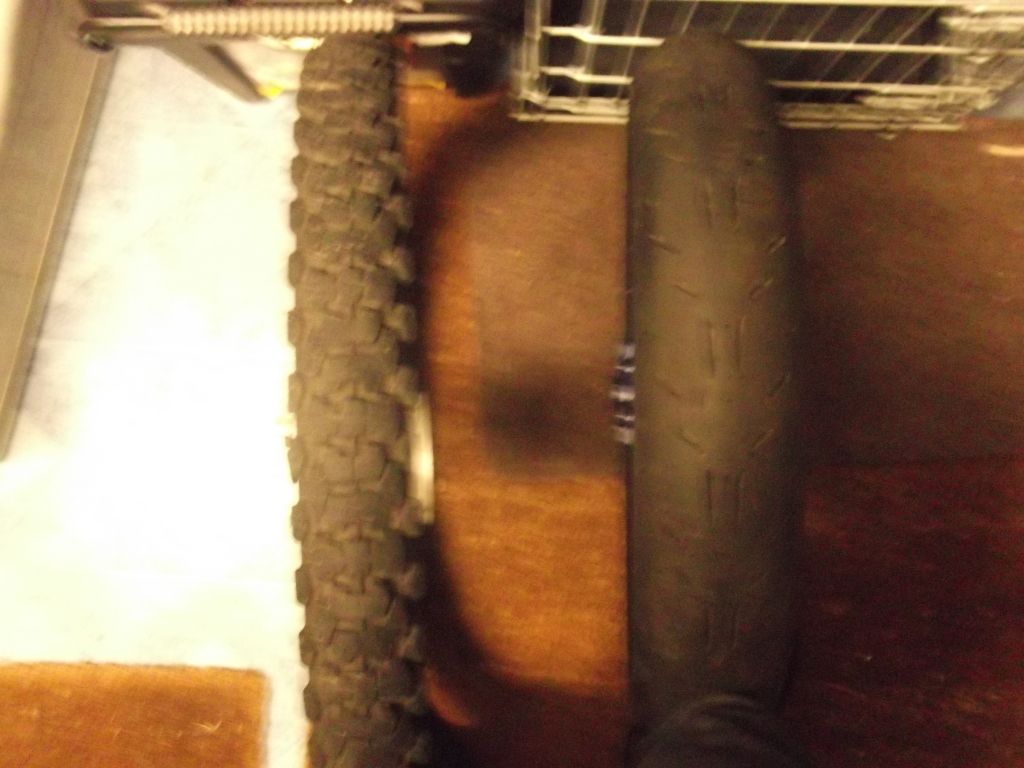
After this I got serious with the project. I decided to go down the sumo route since all my friends got rid of their bikes and didn't fancy going off roading alone

So £300 later these arrived.
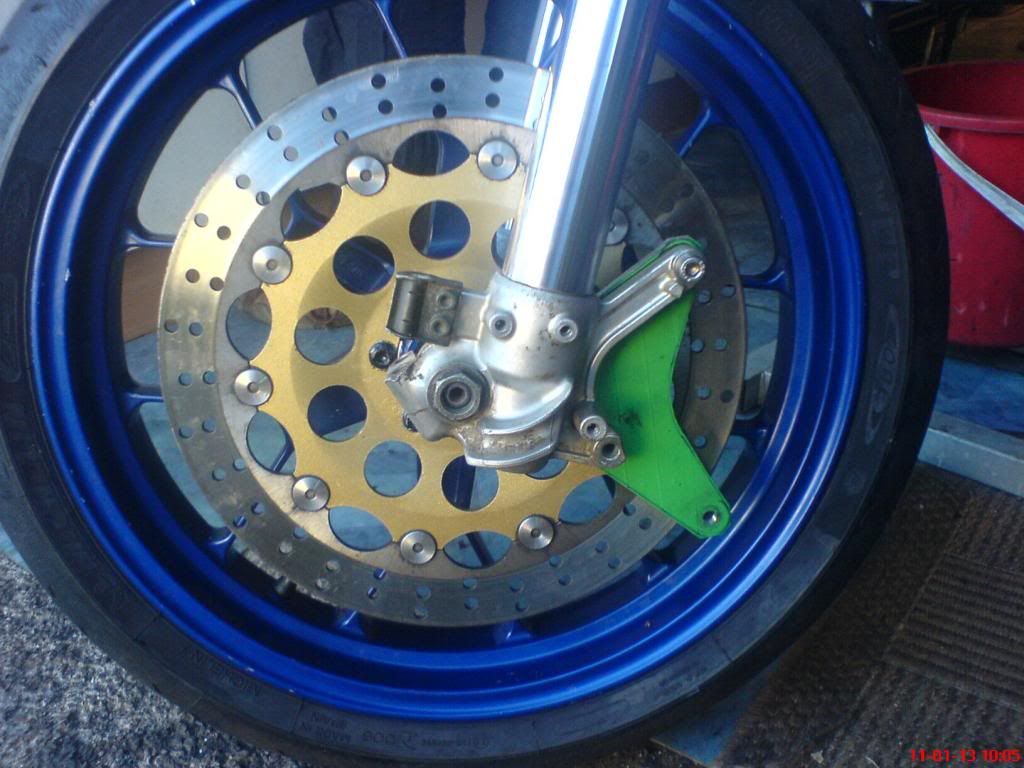
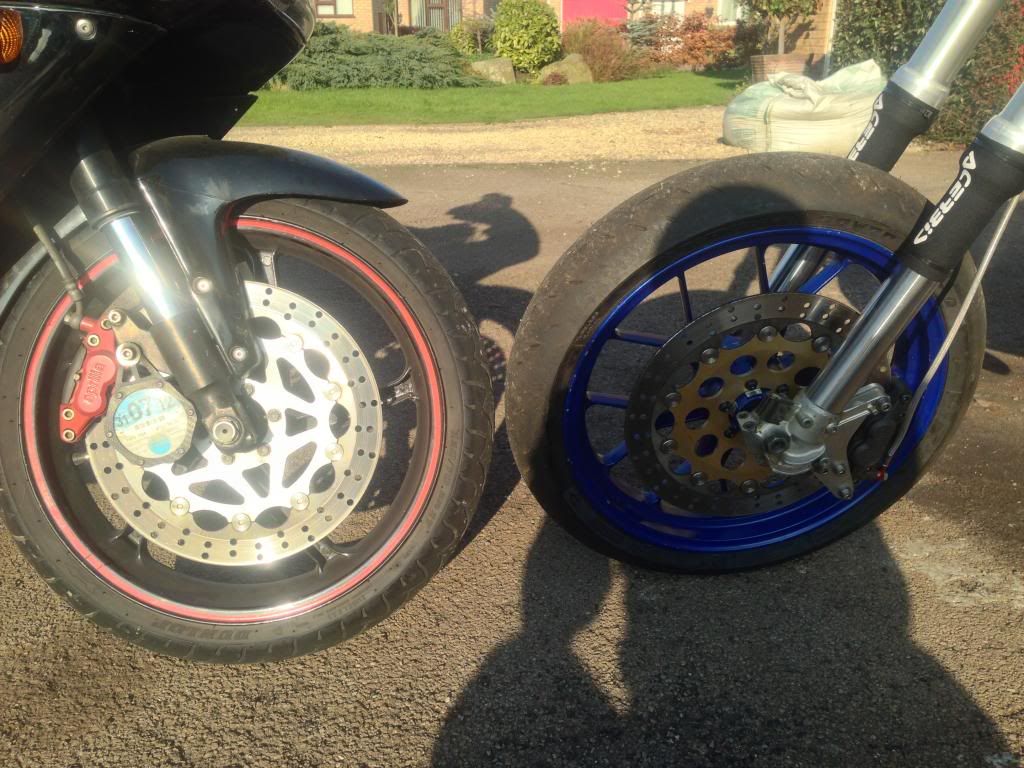
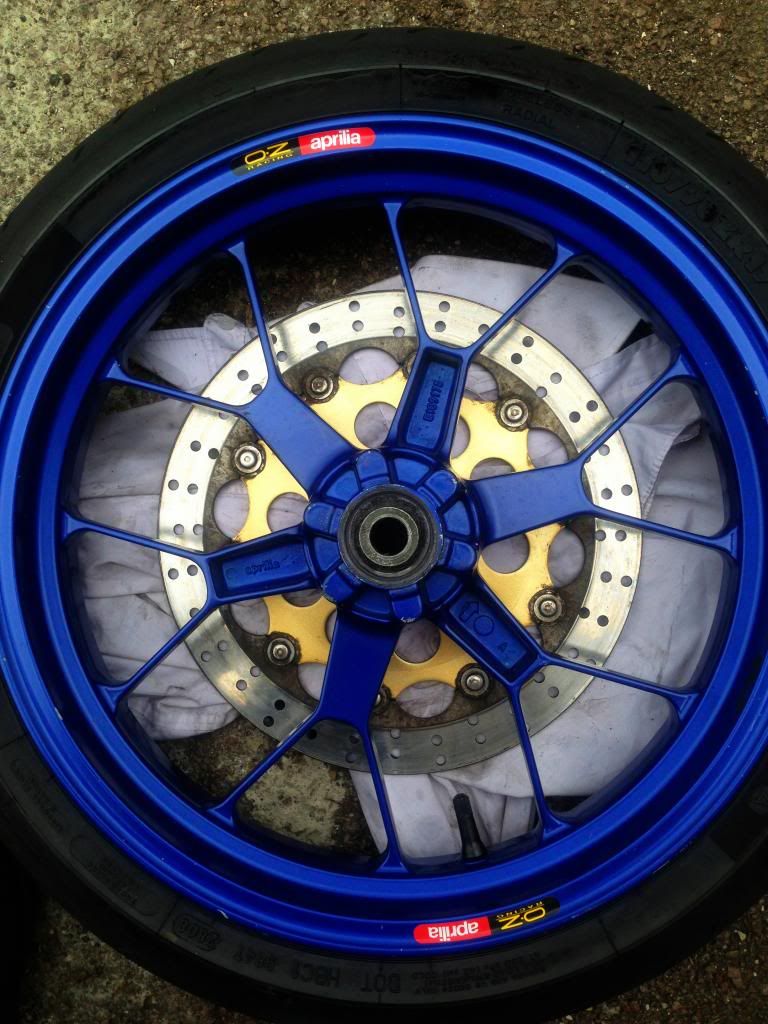
Front Wheel
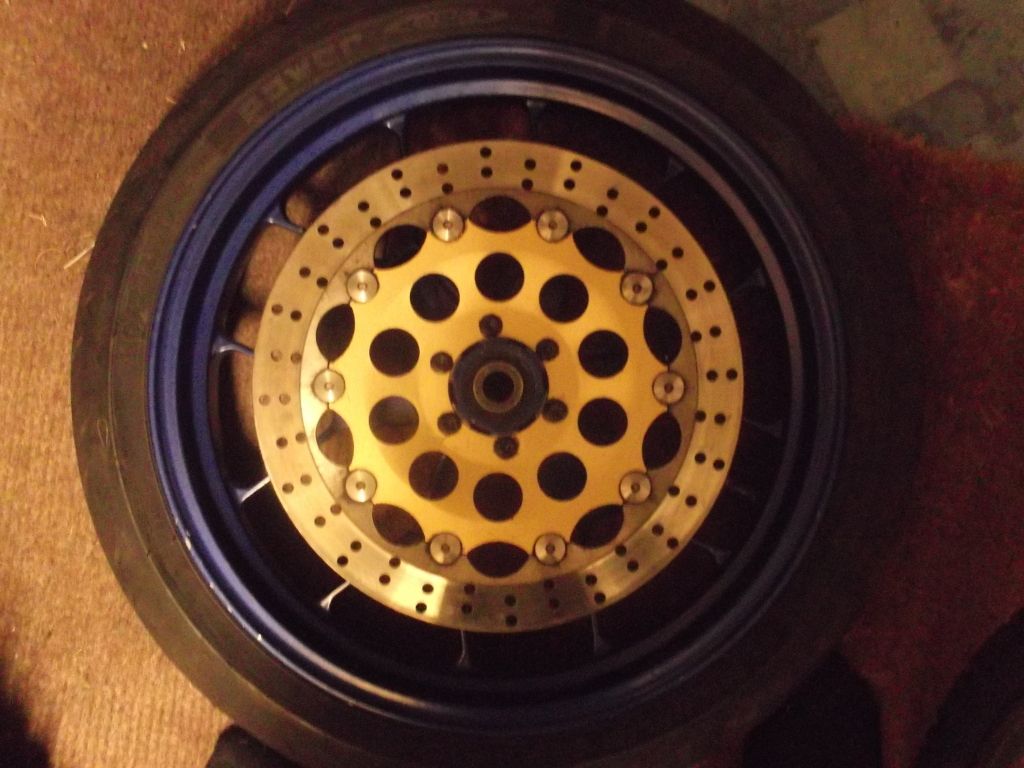
Rear Wheel
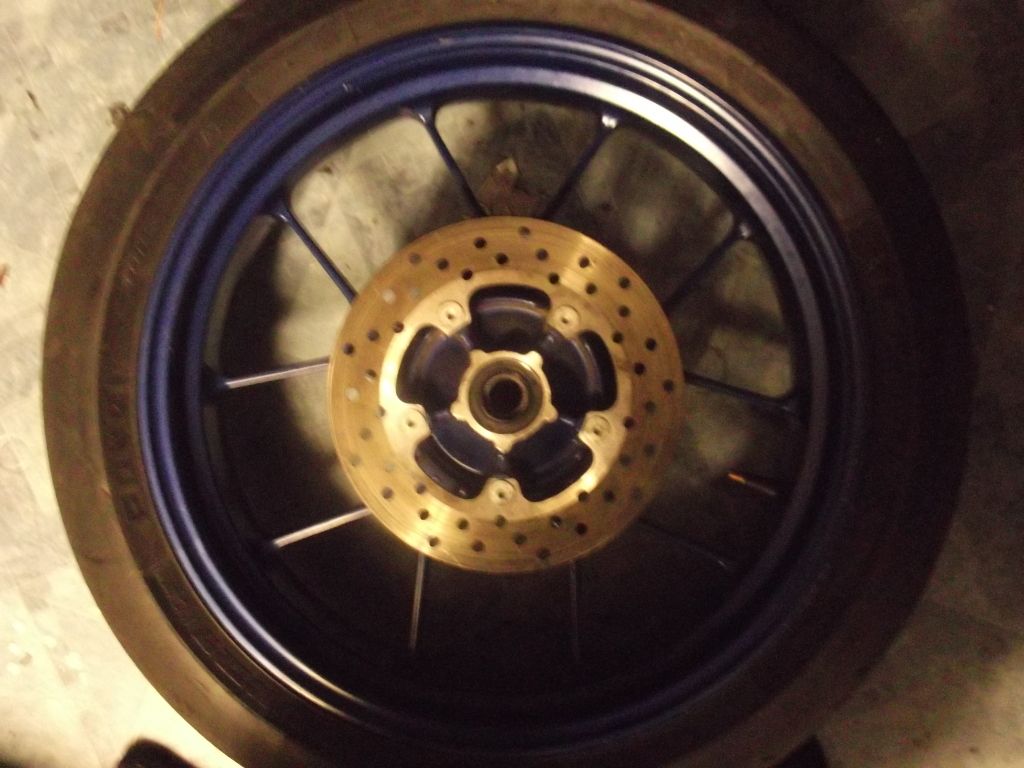
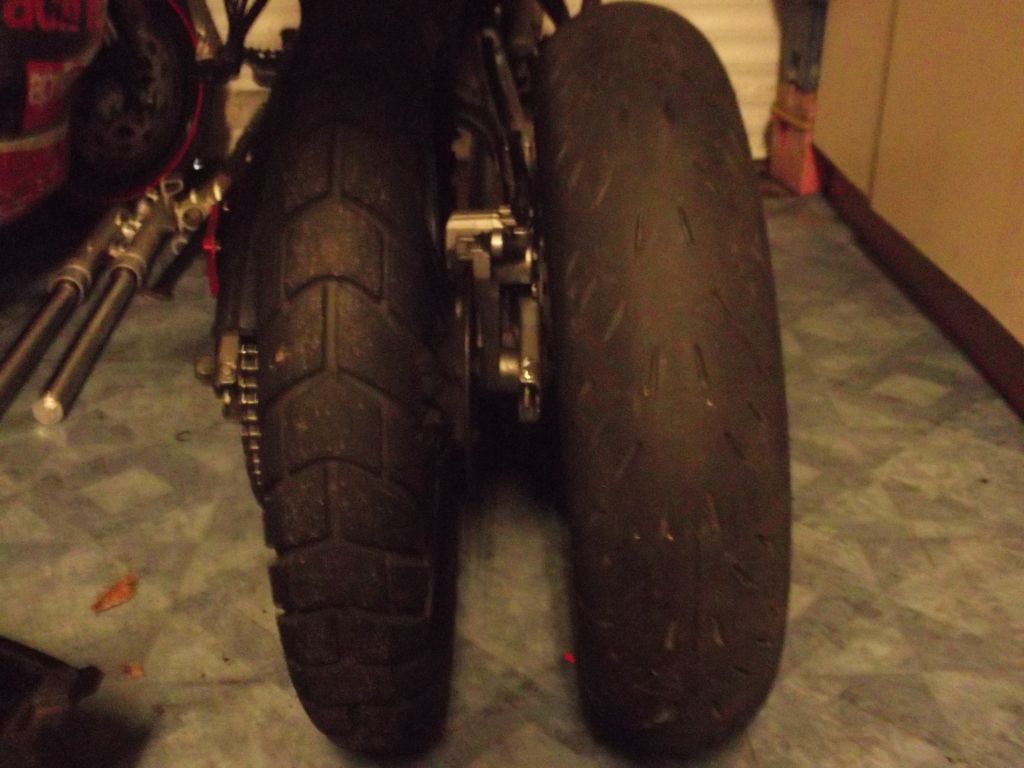
Comparing Front Wheels
Comparing Rear Wheels
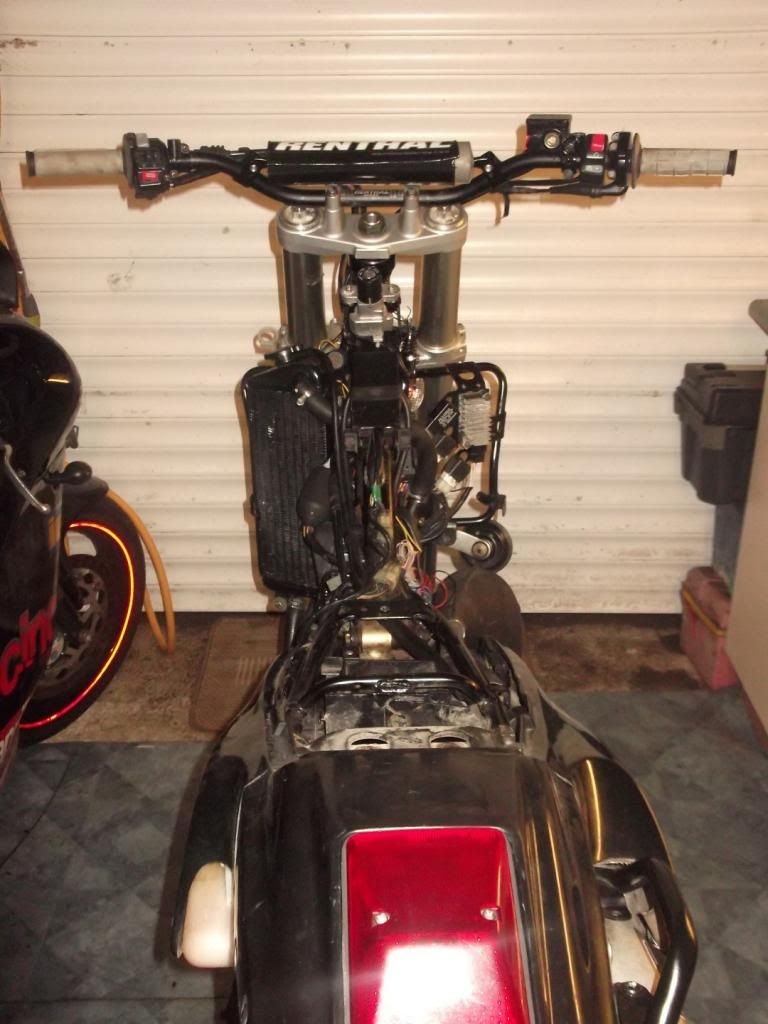
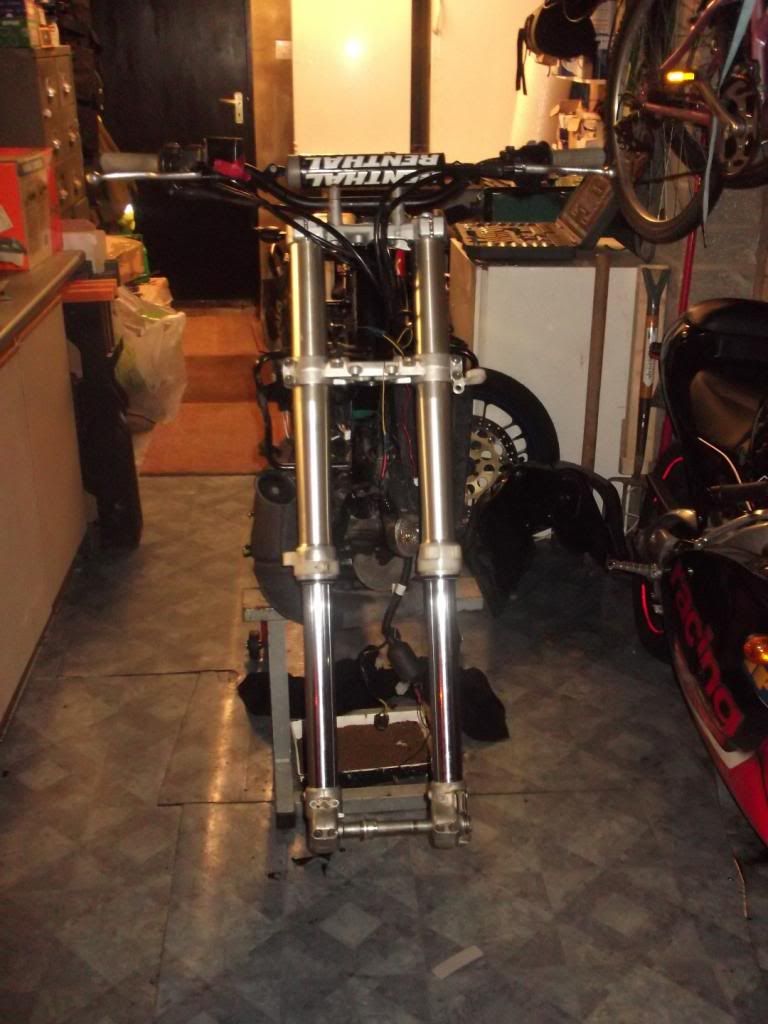
I also decided to go down the usd route
If you're interested in how I went about how the conversion please see my thread on it.
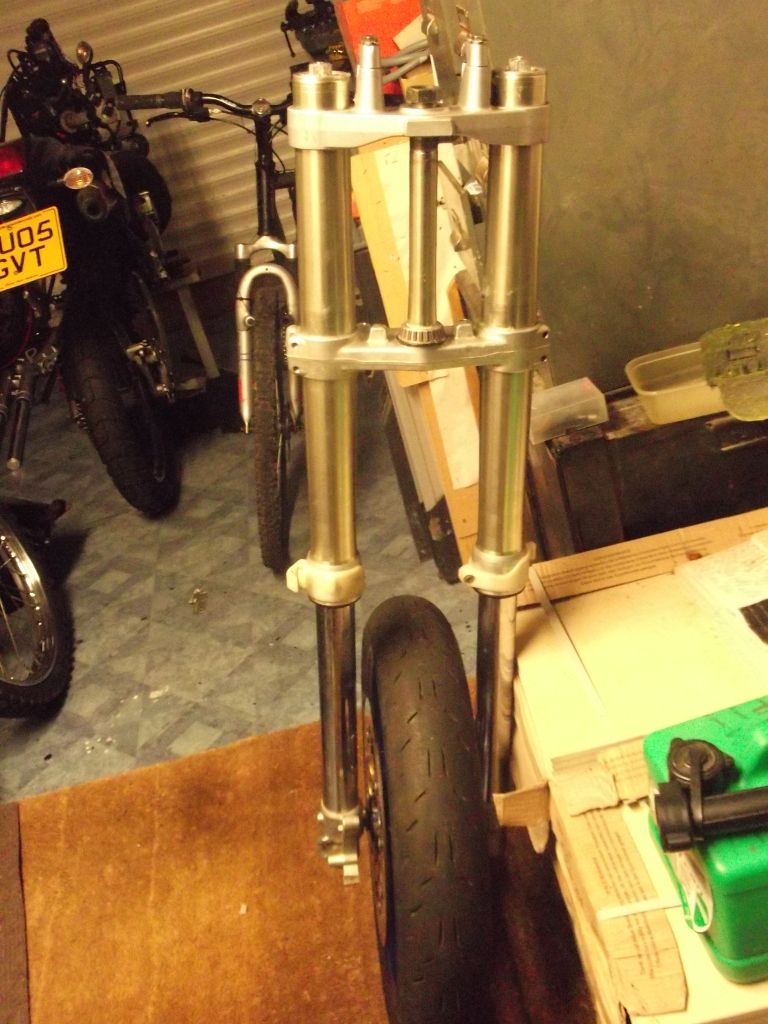
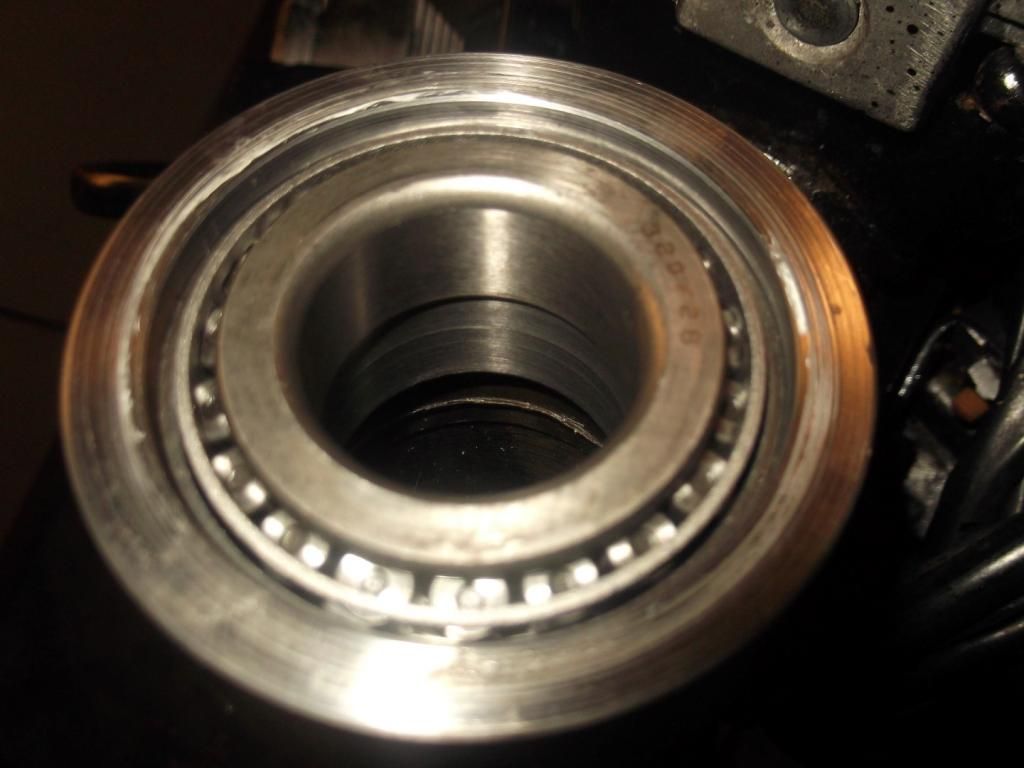
Working out how to fit the USD's
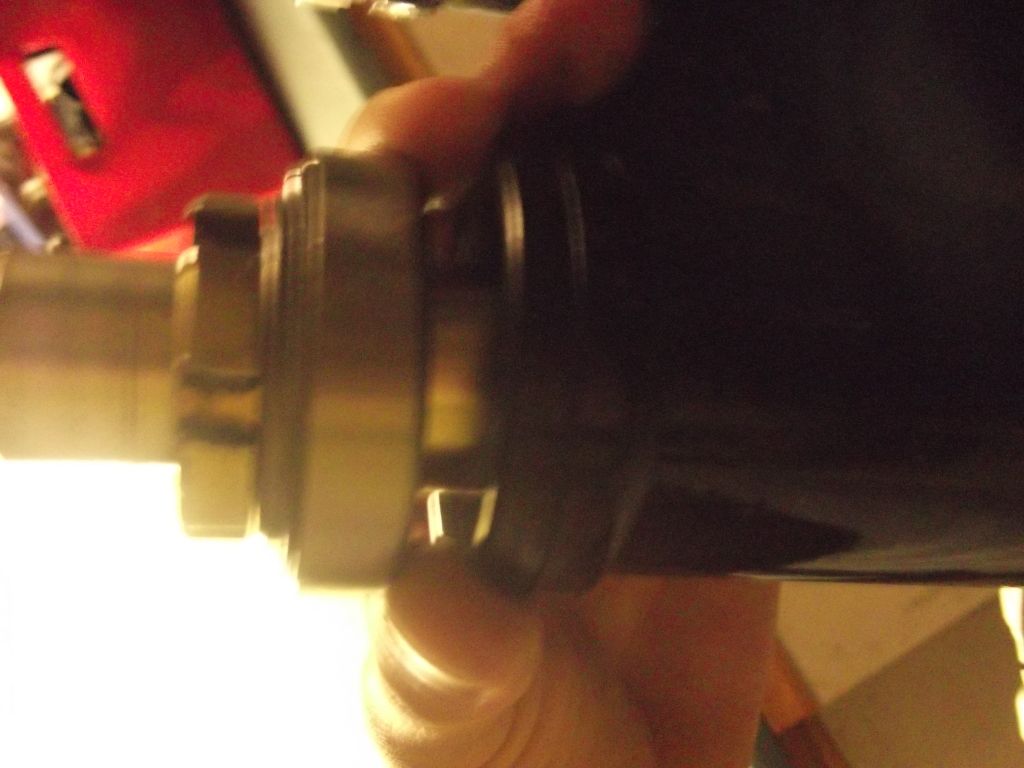
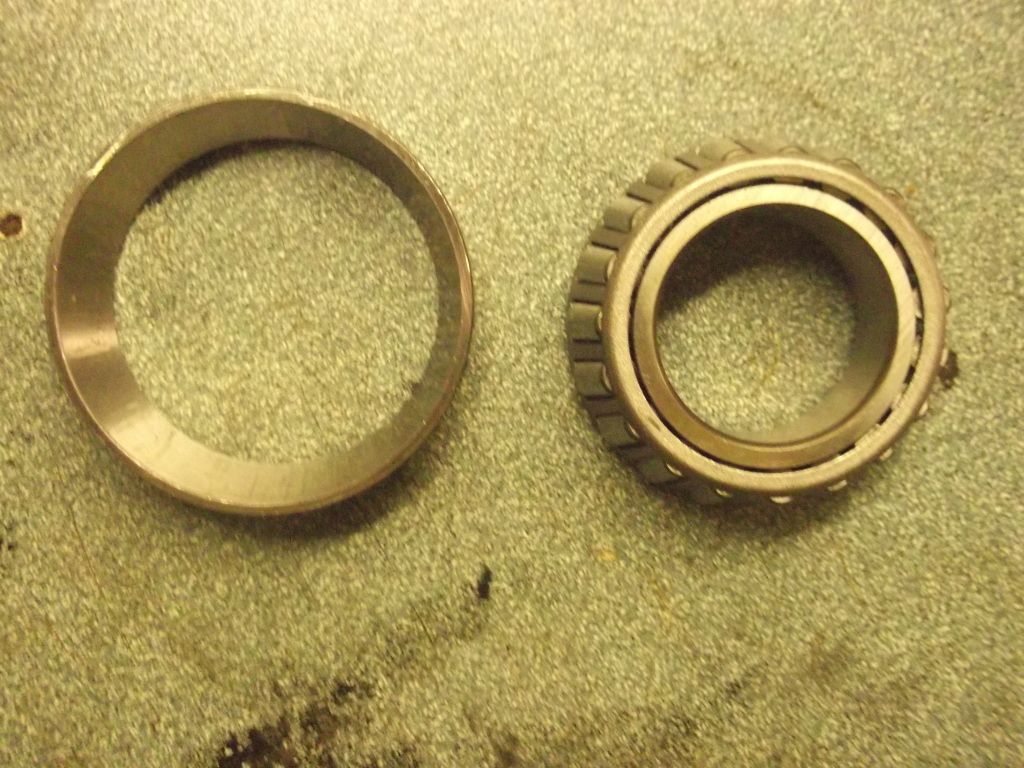
Replacing the standard DT top bearings for these
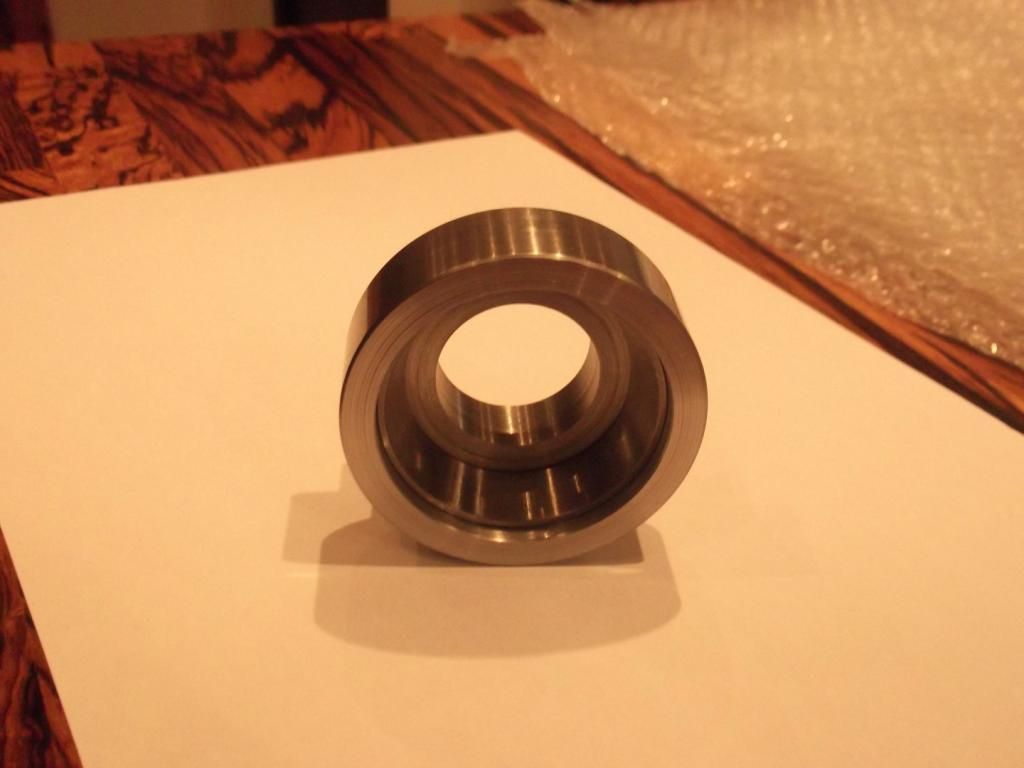
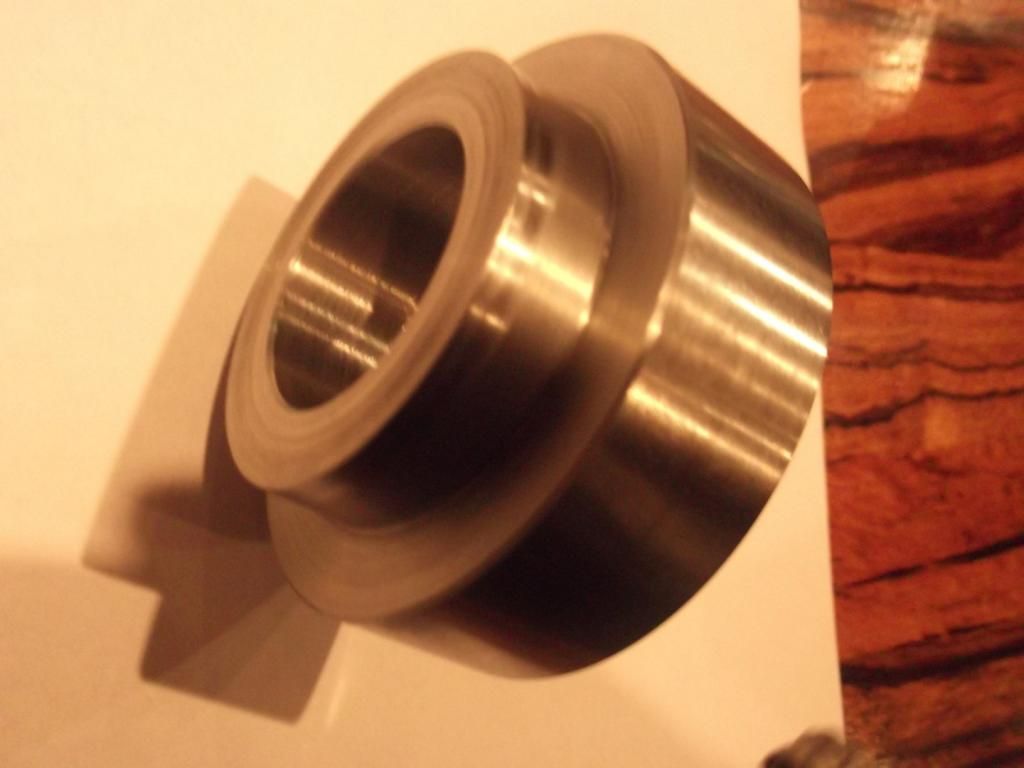
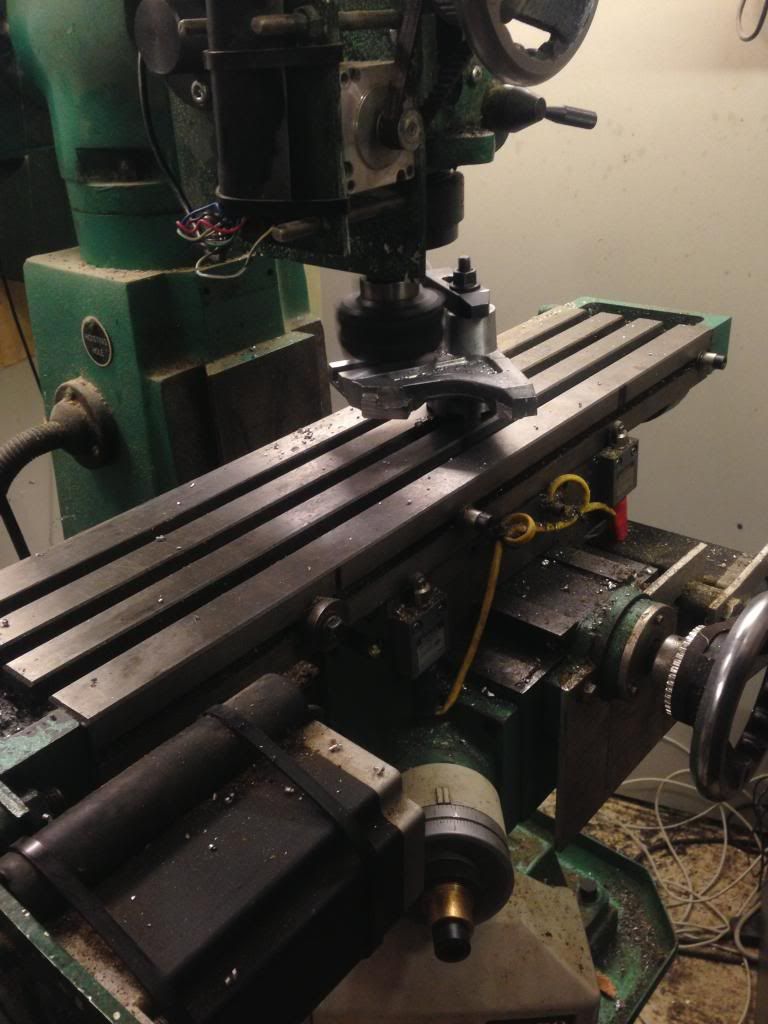
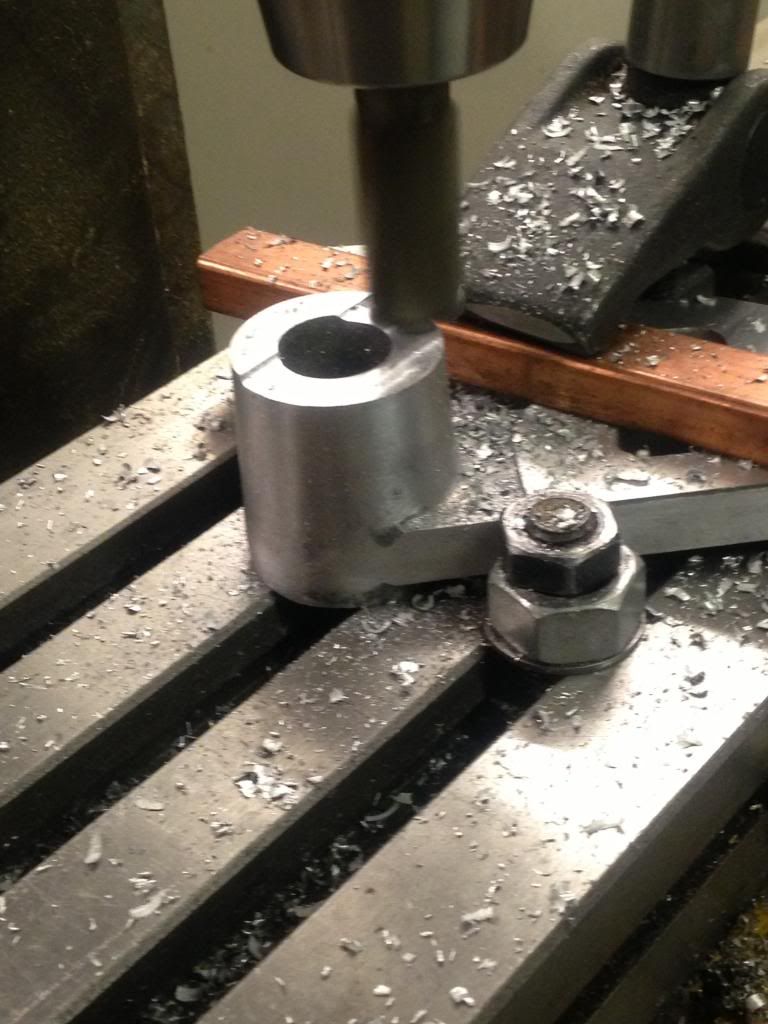
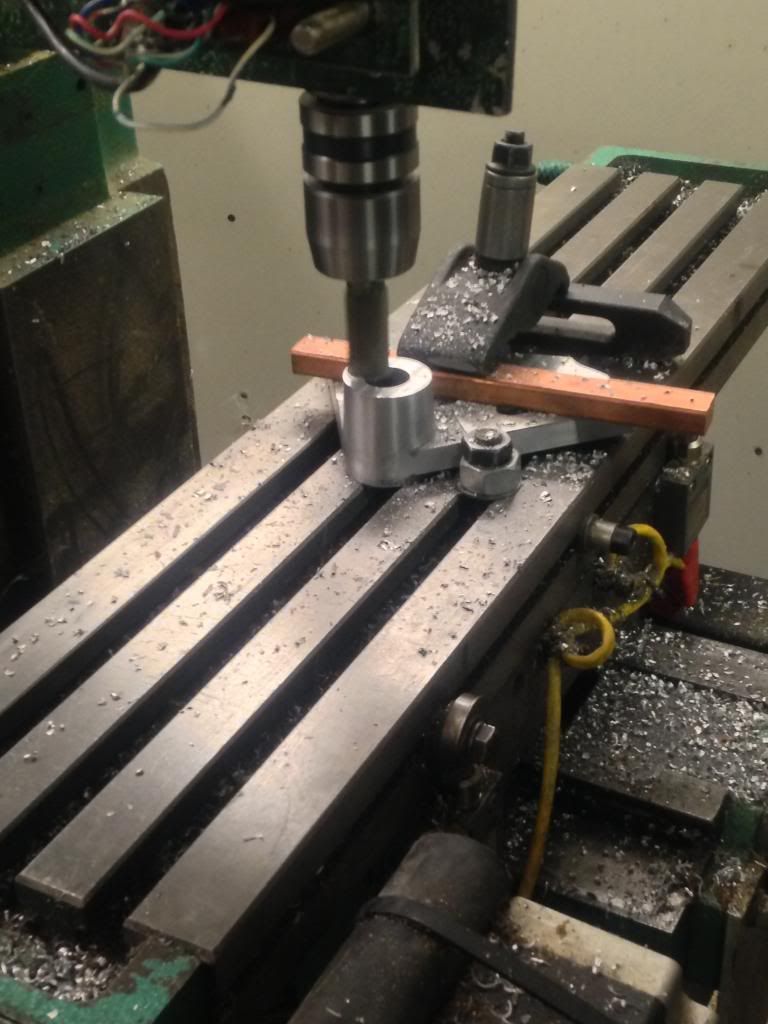
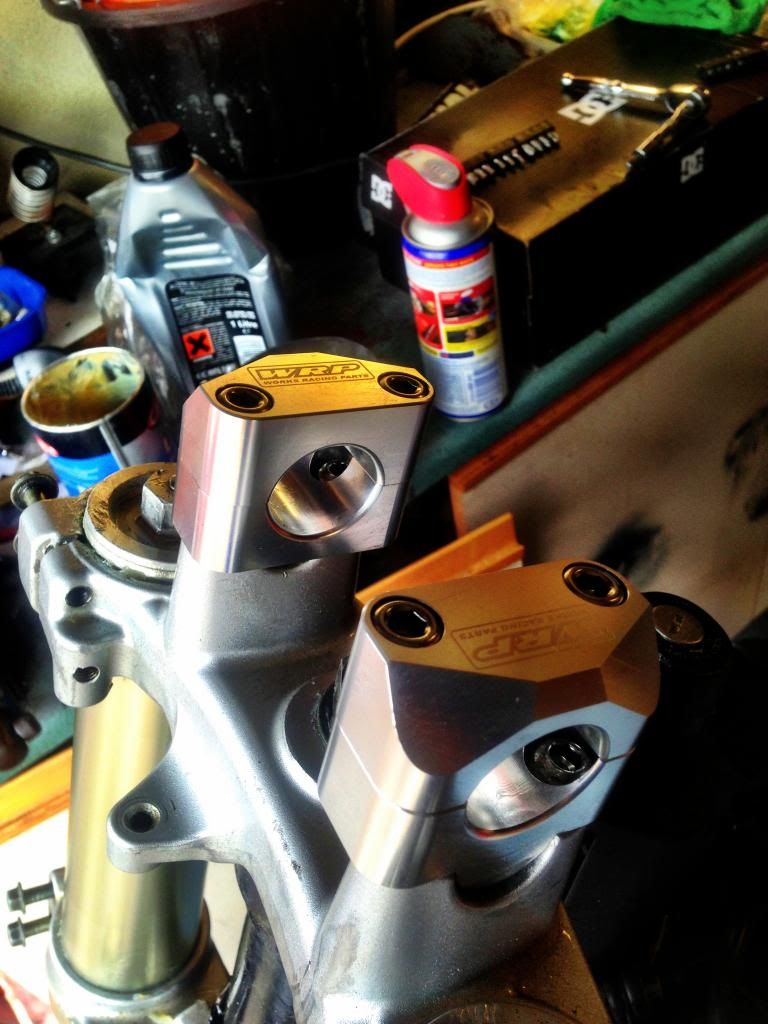
Had this part custom made.
Fitting it to the head stock
A bit of work needs doing
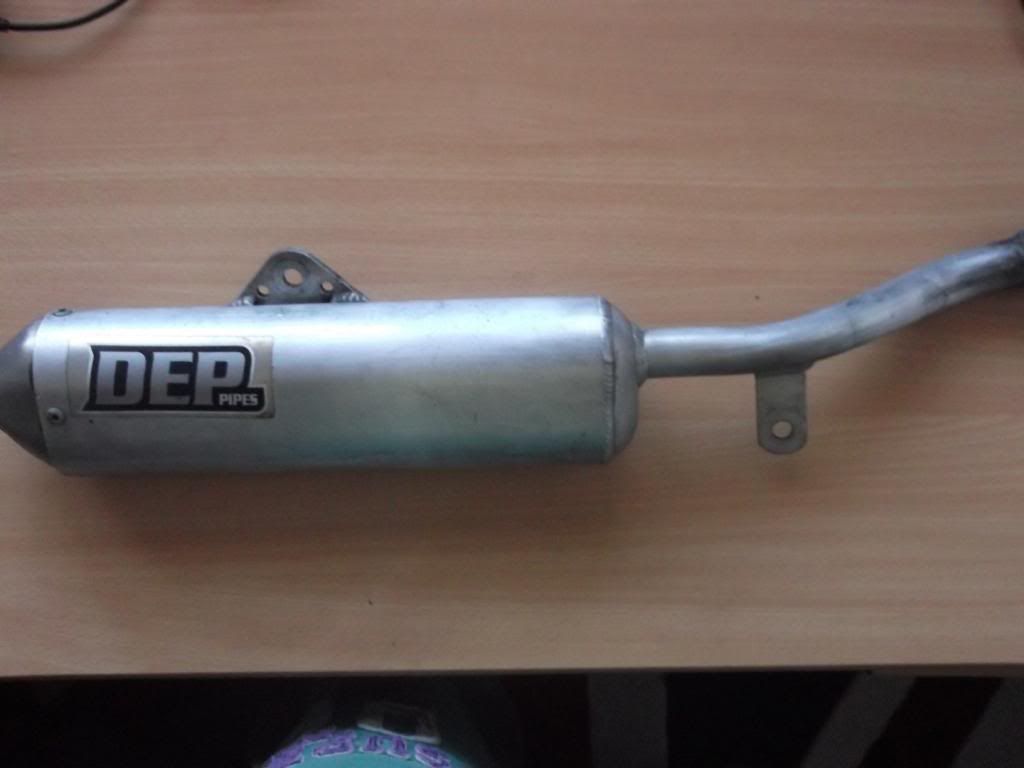
Tried sorting out the DEP
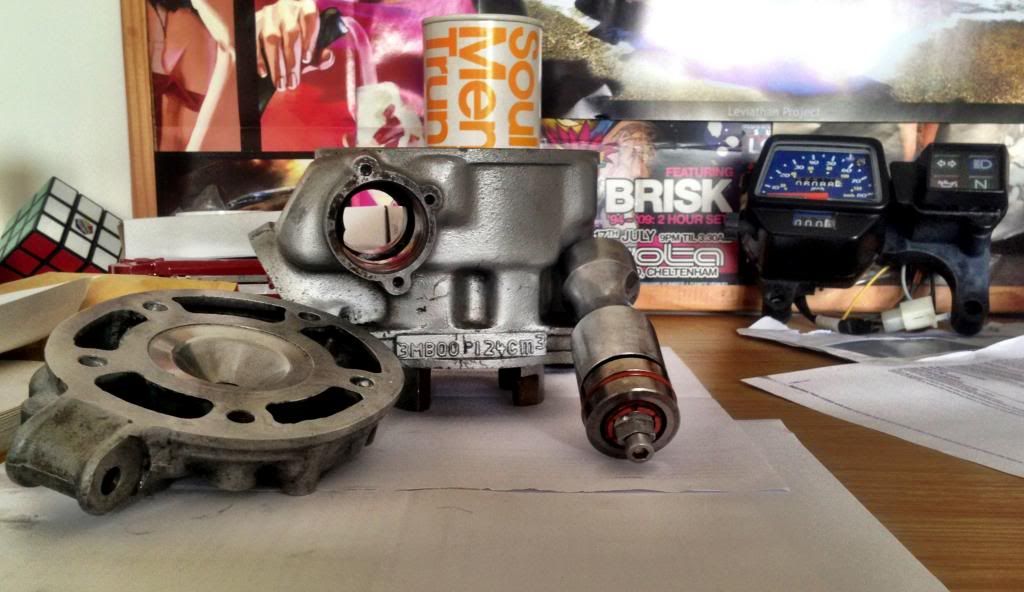
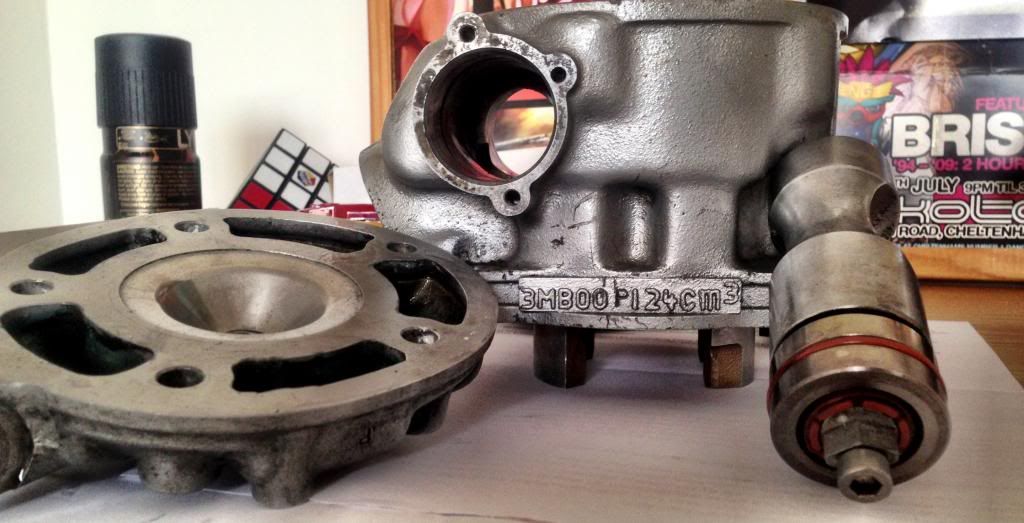
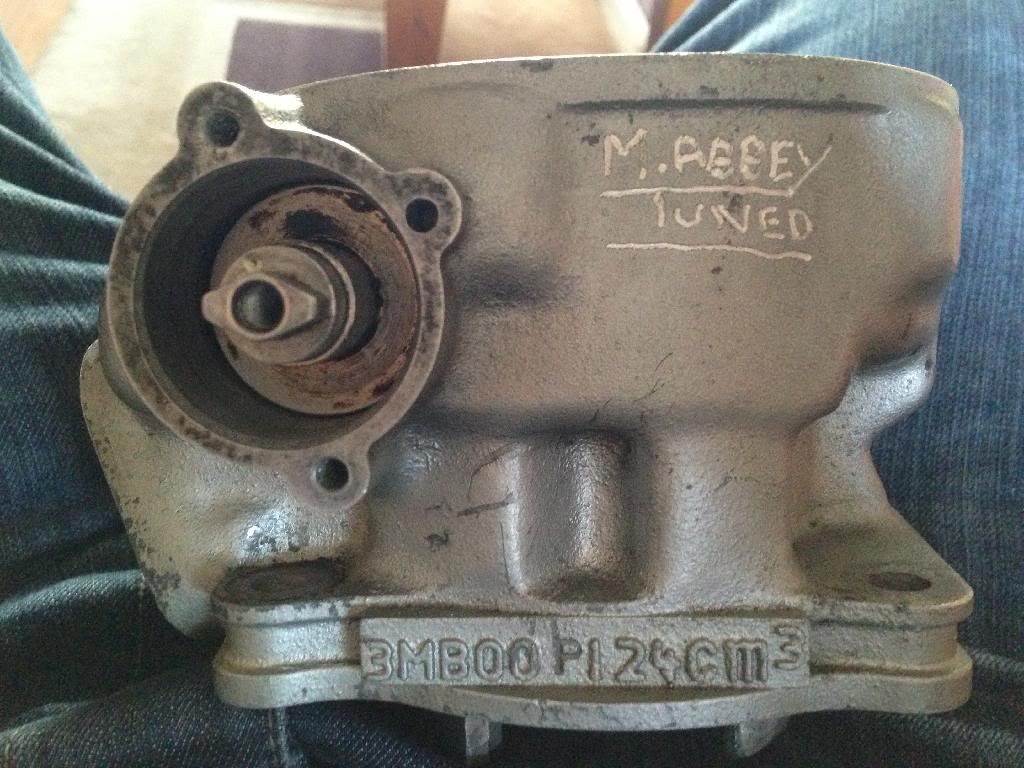
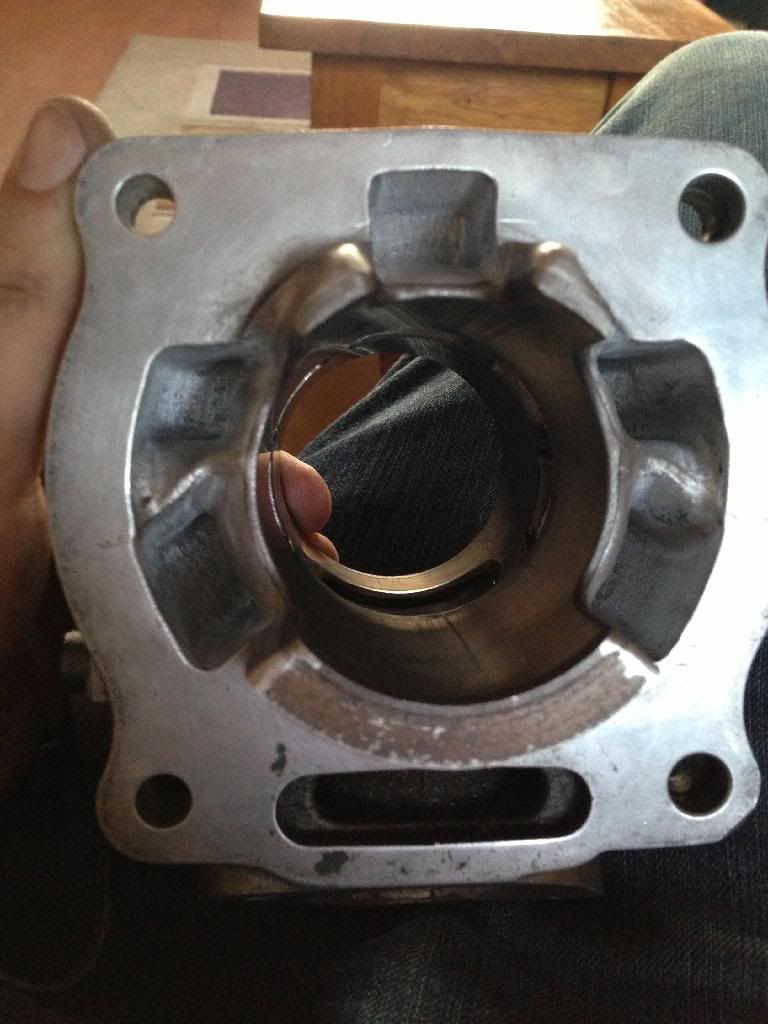
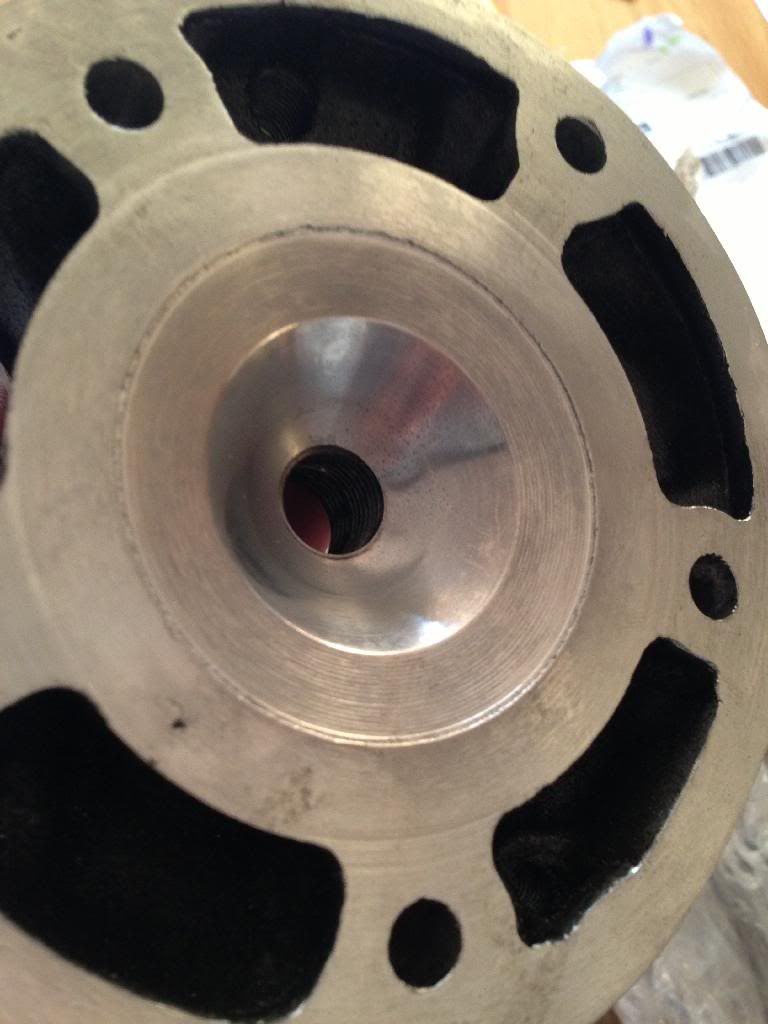
Need to get some power out of the engine. I've heard that these cylinders get better power out the engine. So thanks to the main man Bradders £20 for this beauty.

Haven't got it fitted yet. Managed to get a powervalve and end caps for it. At the moment it's just an ornament

Managed to get it all together
B-E-A-UTIFUL!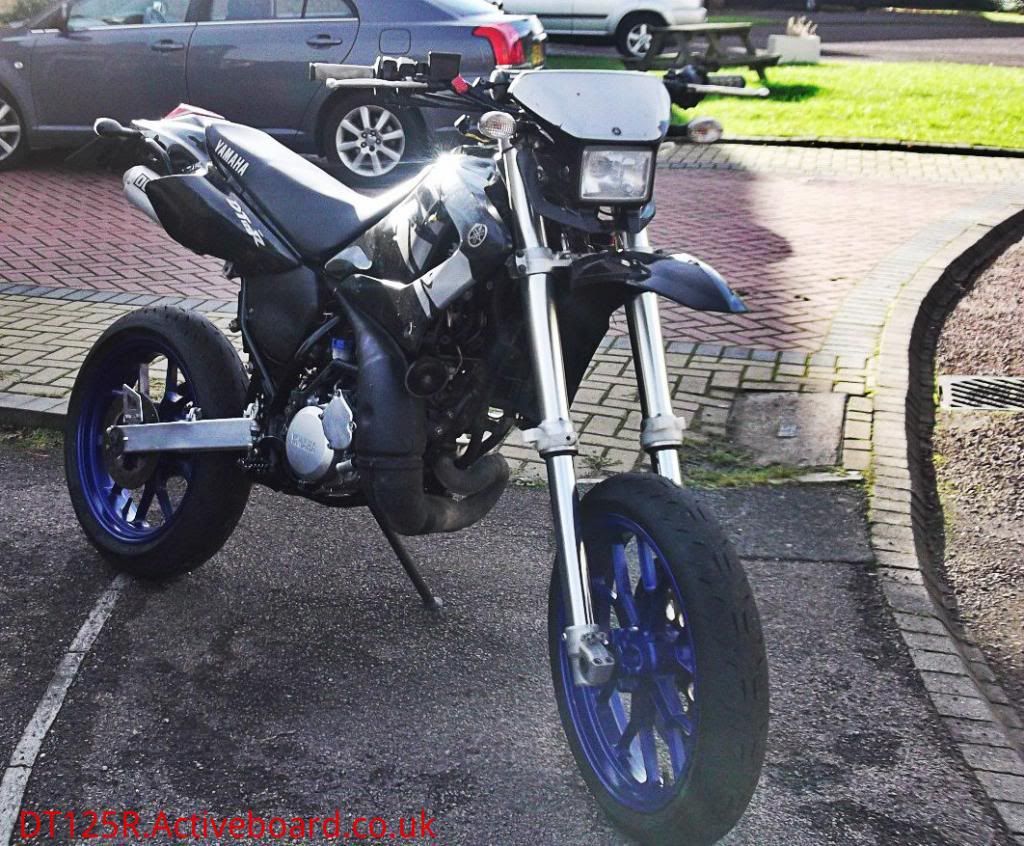
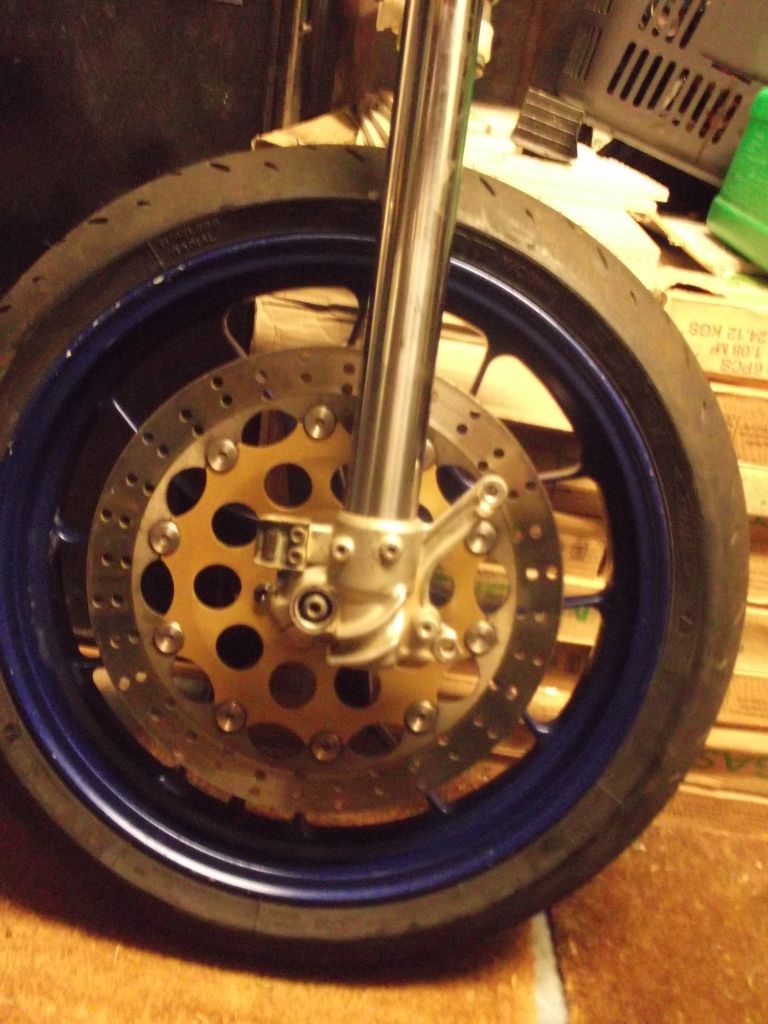
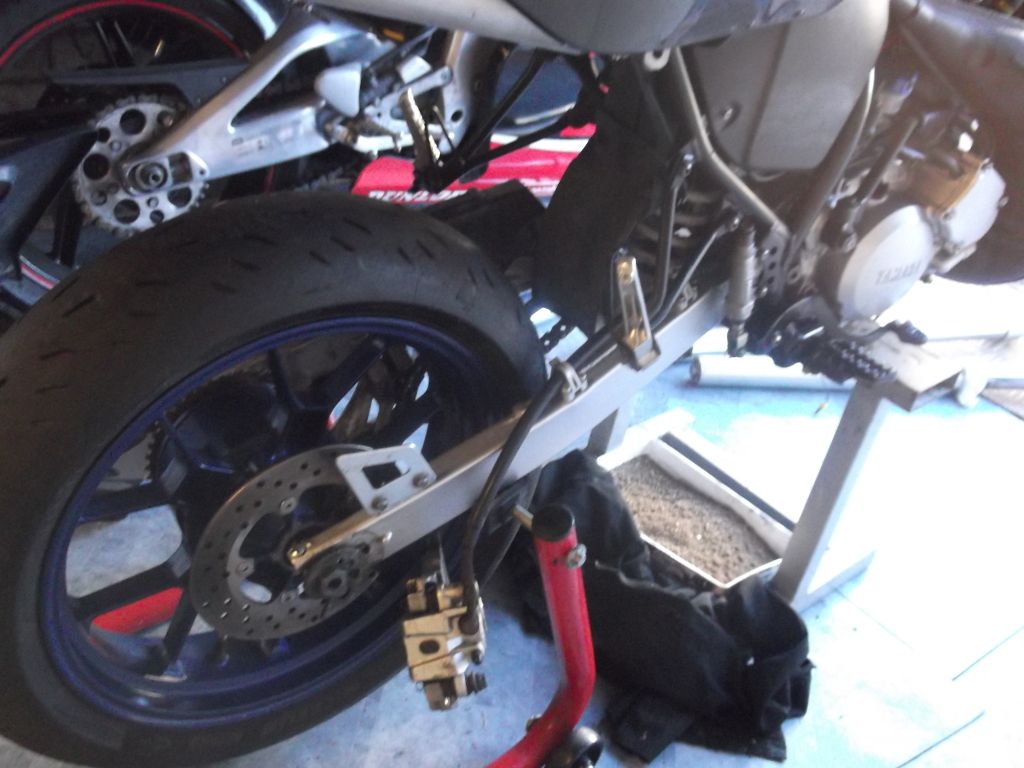
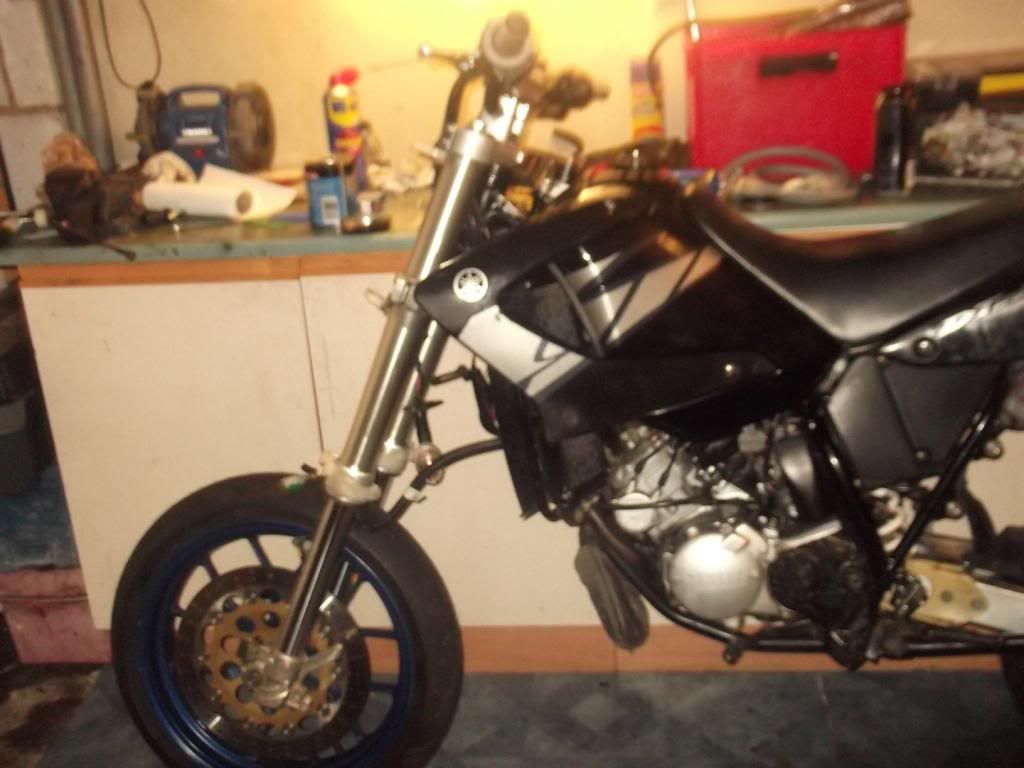
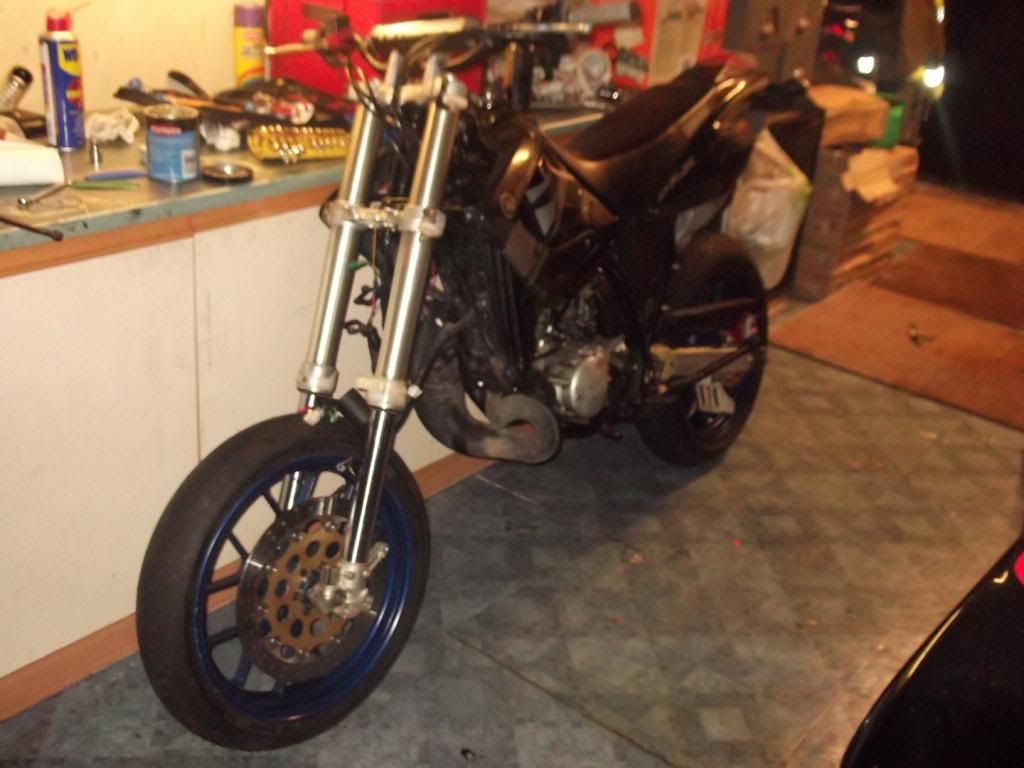
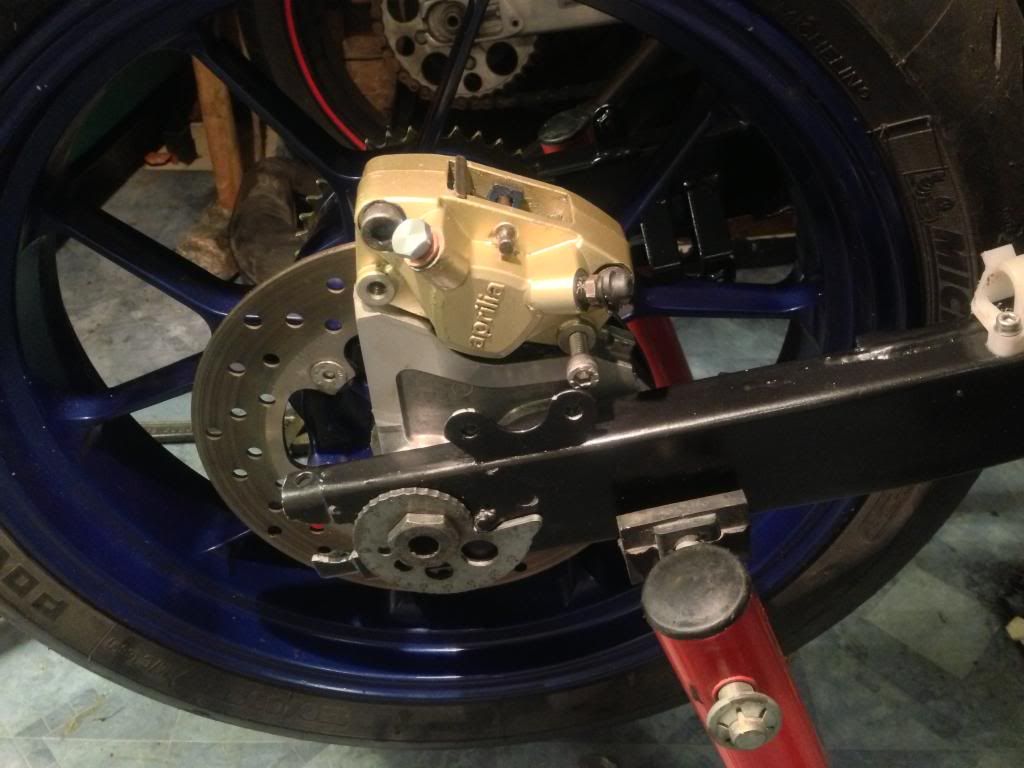
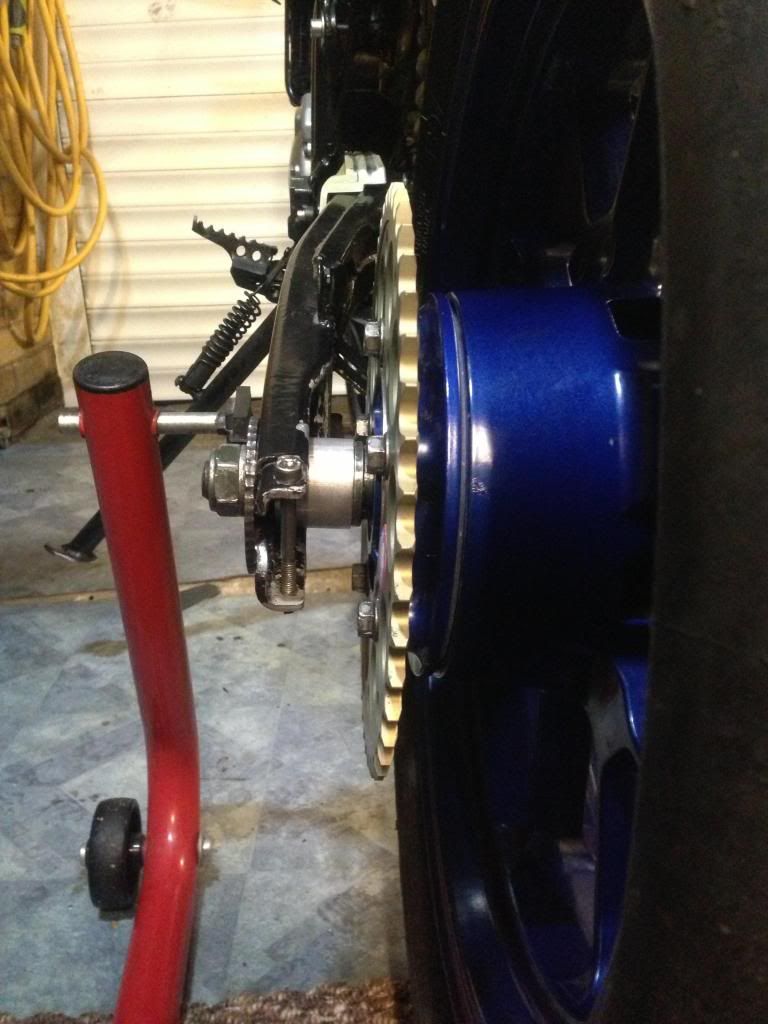
OK so in this photo the bike has had no spacers made up or brake brackets made up. This is in very early stages of the sumo setup. Wierdly enough the front wheel needed no spacers AND the spindle fitter perfectly! Was excellent!
The way I saw it was this. If i've got make custom this custom that I might as well go the whole way. Improve the bikes handling all together.
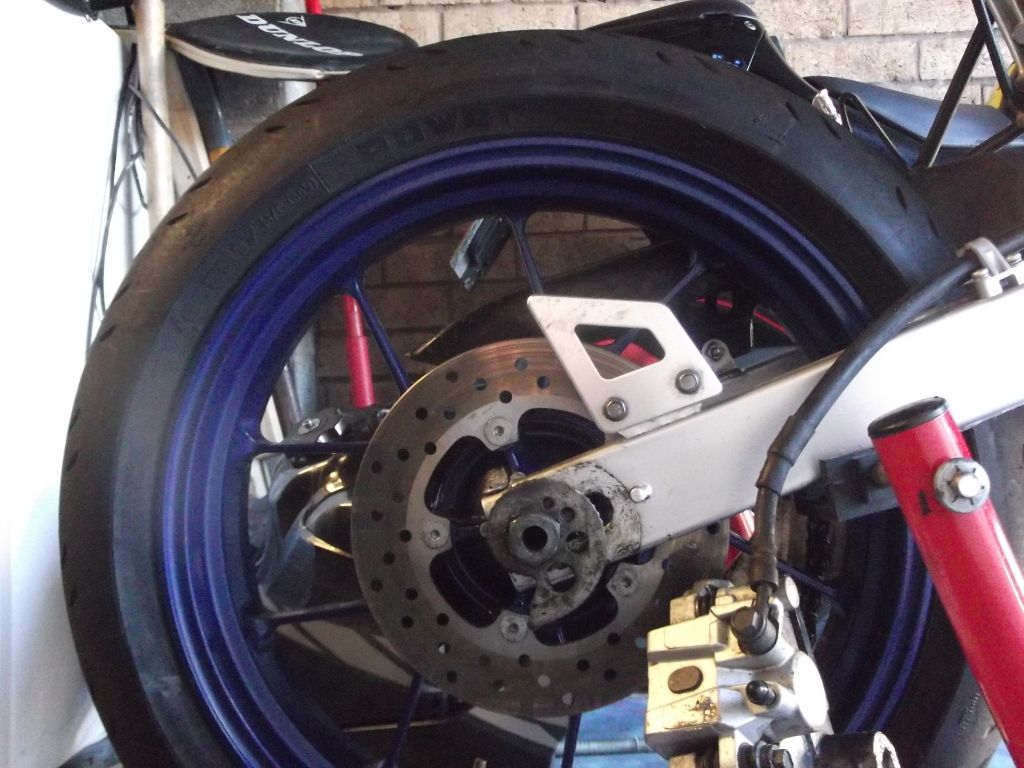
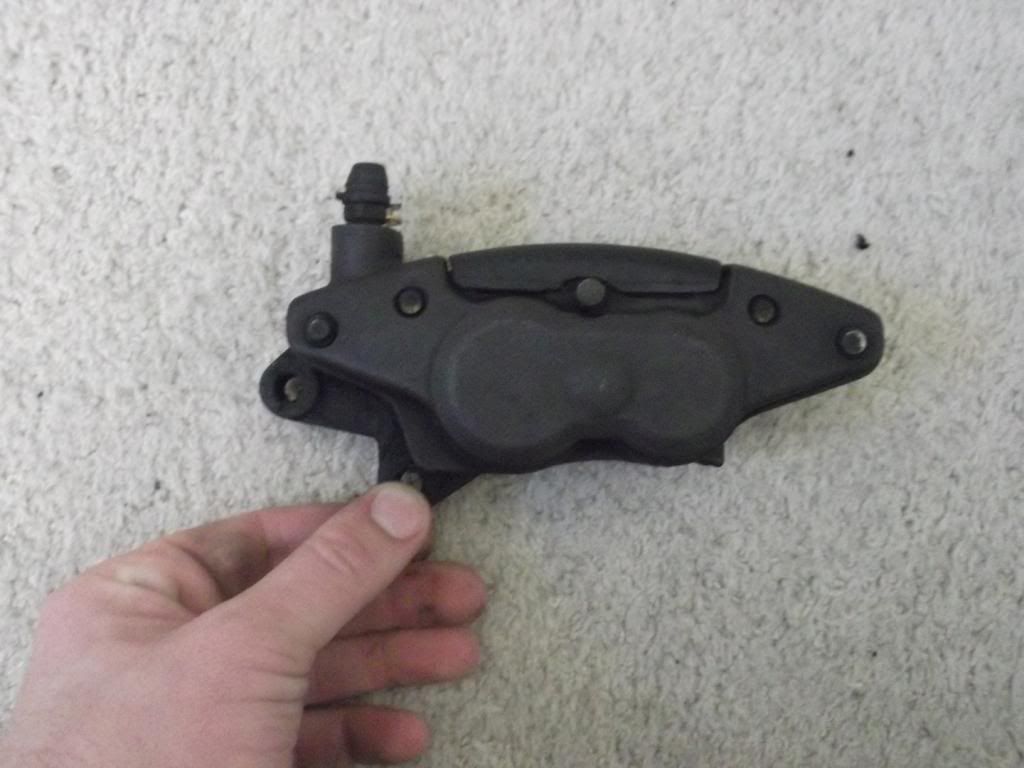
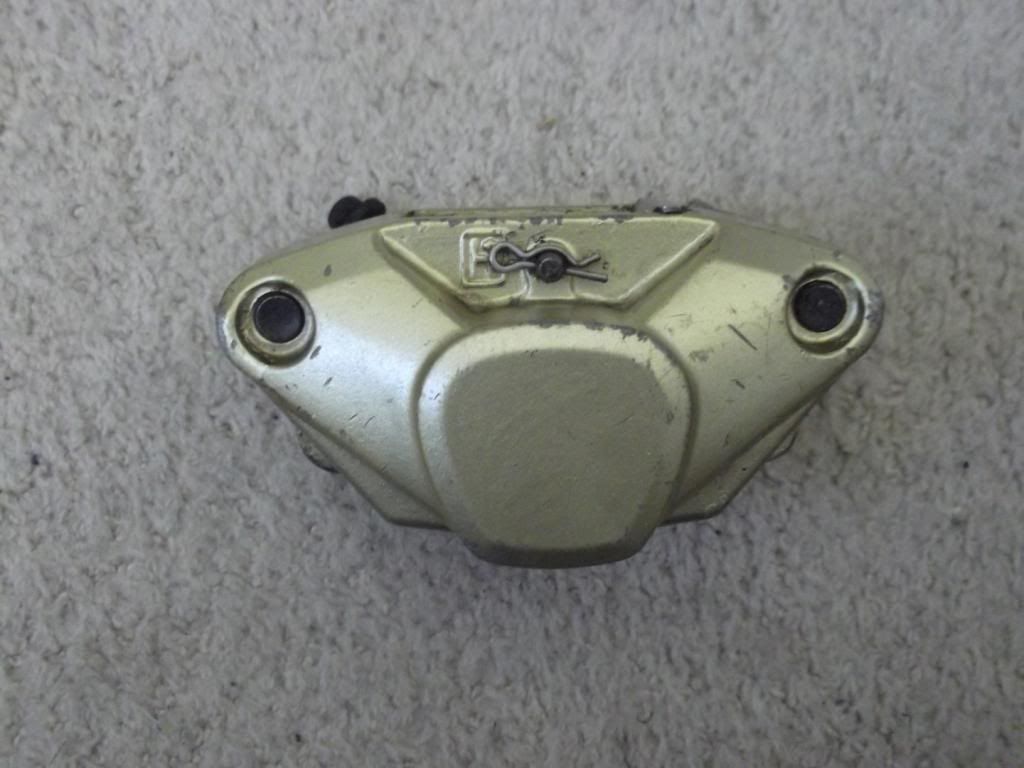
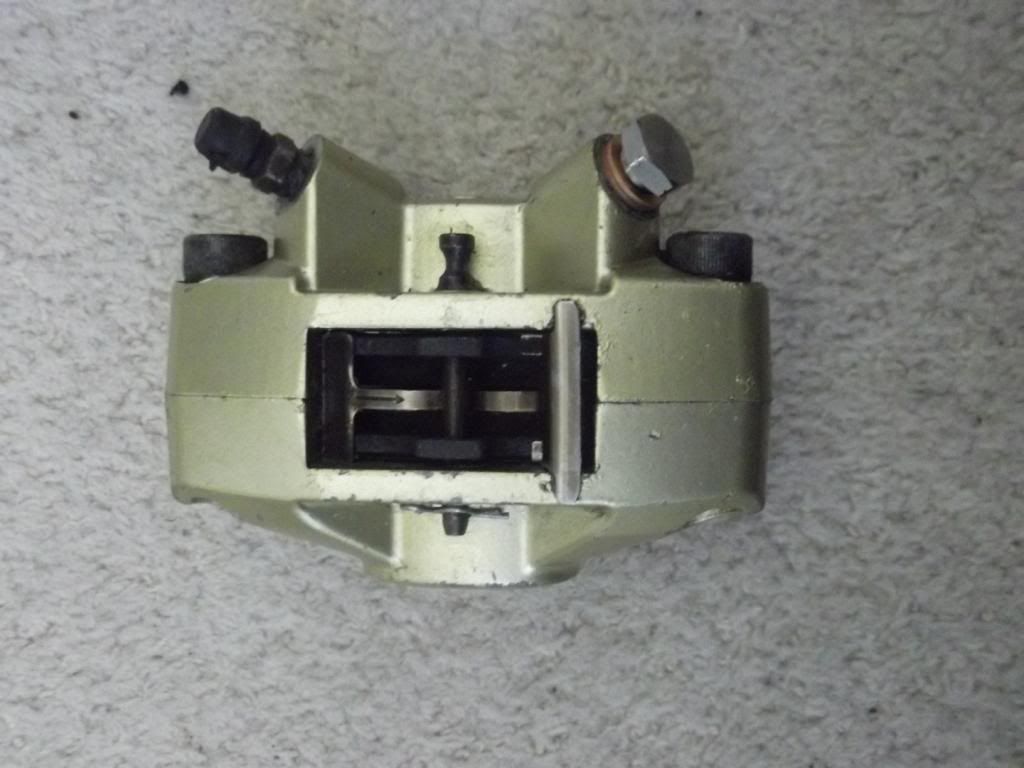
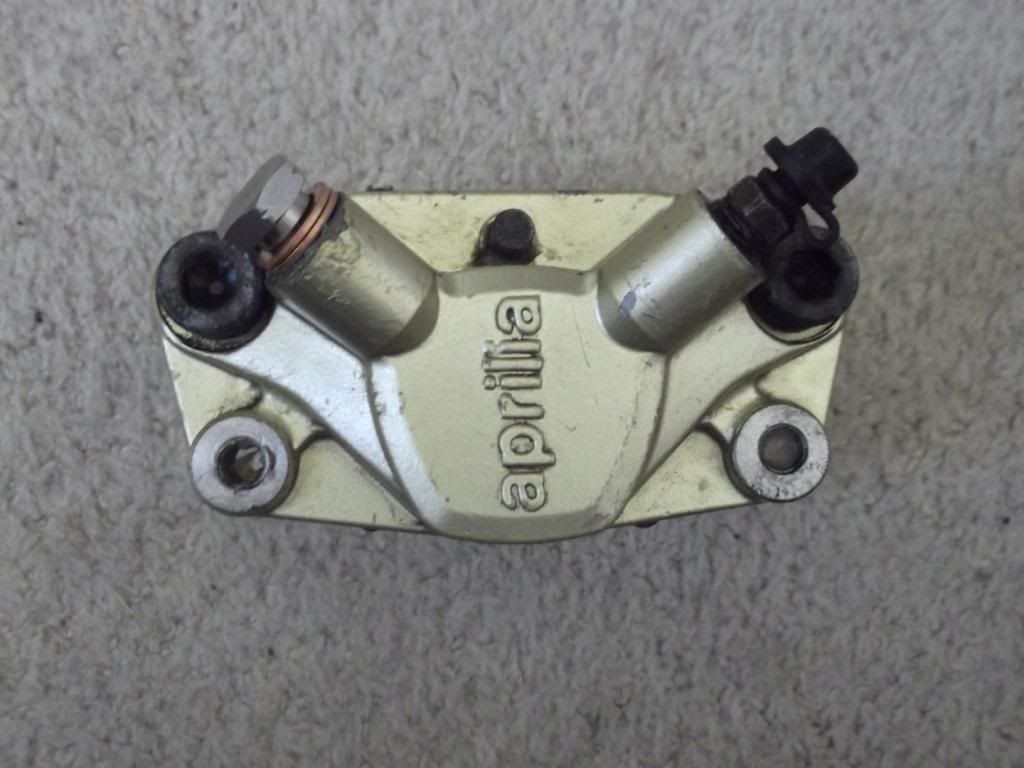
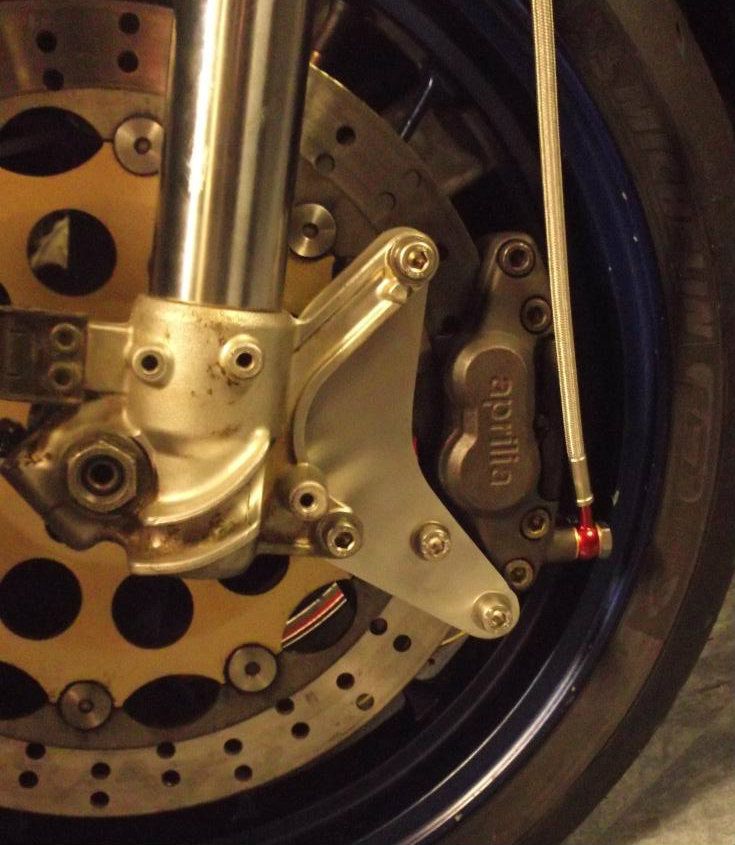
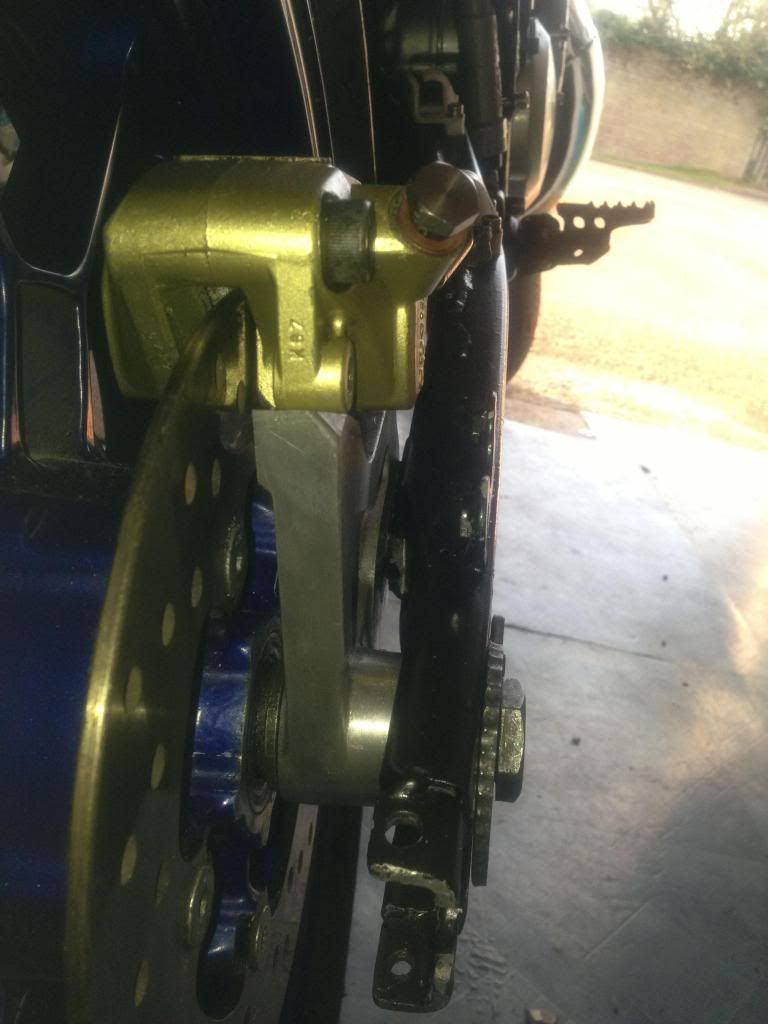
Managed to get my hands on these!
Four Pot Caliper Front Brake
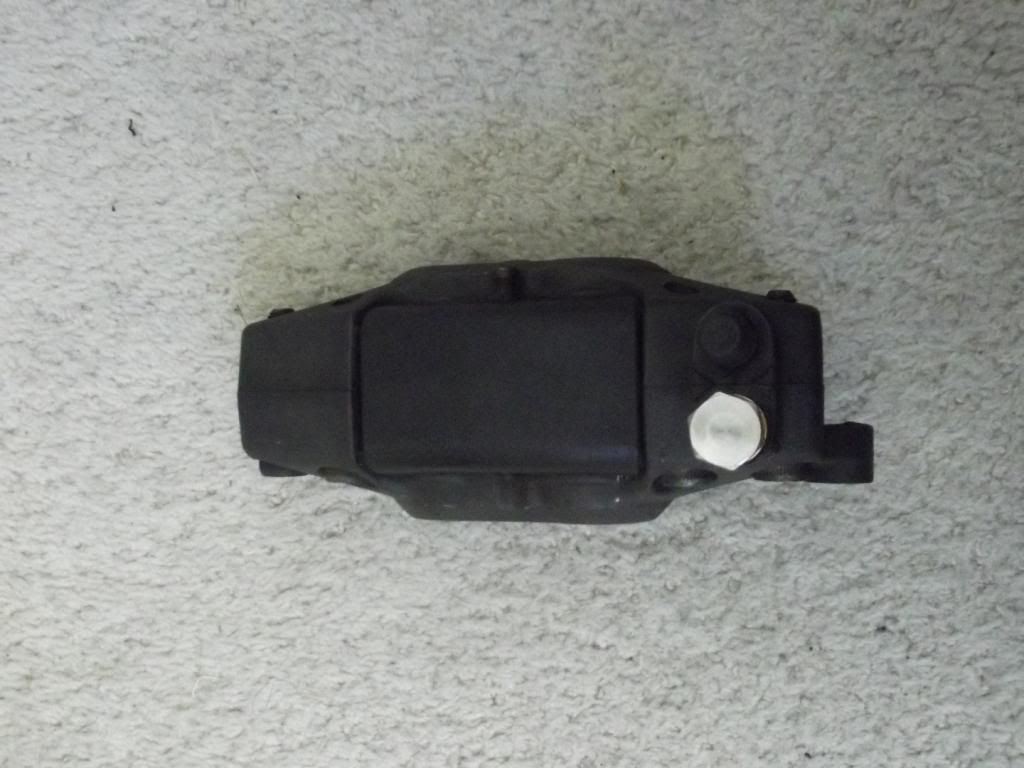
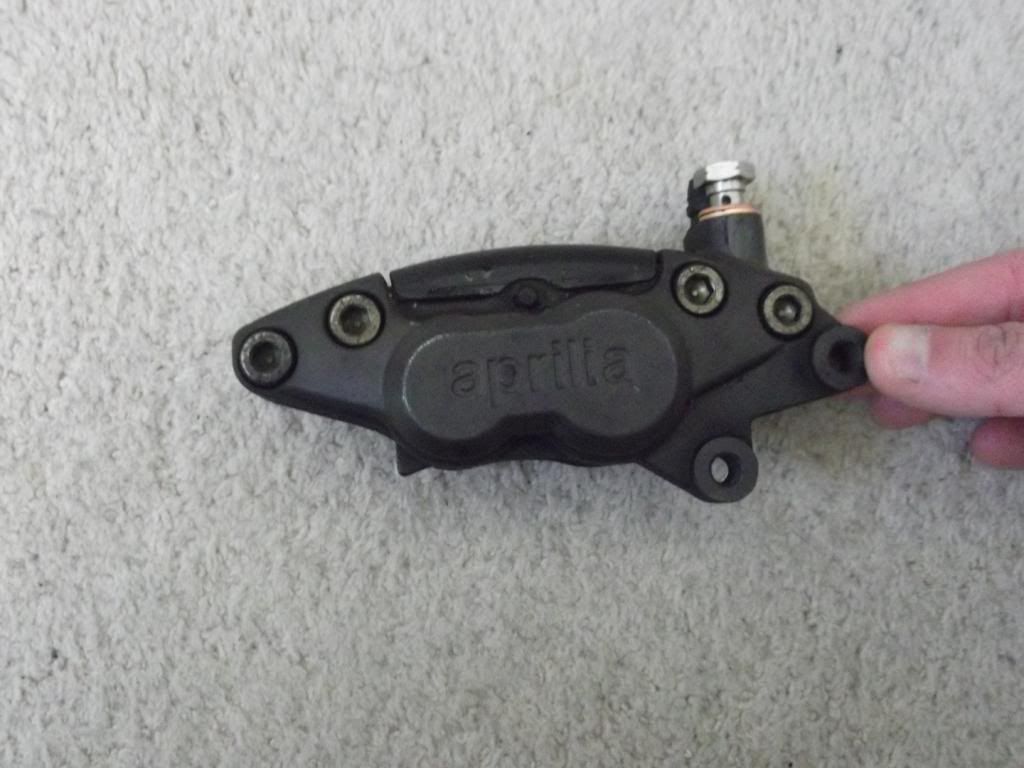
Dual Pot Caliper Rear Brake
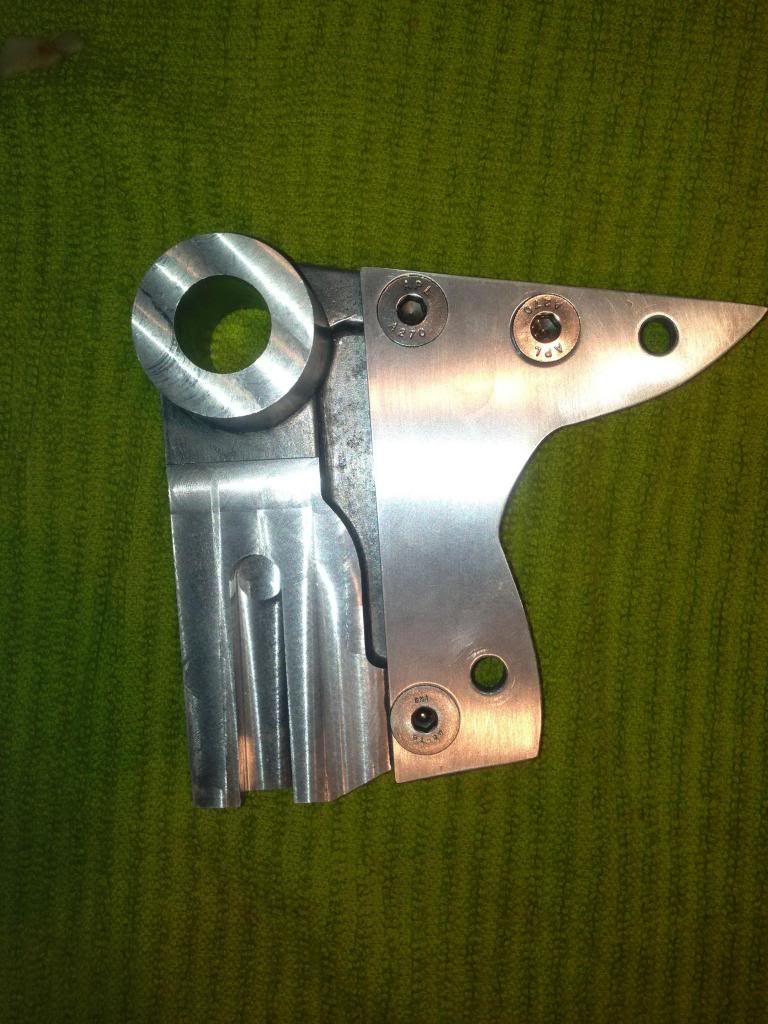
Foolishly I sold my brake Bracket! But thanks to
DeeteemxI managed to get a broken one which is spot on! Keep reading to see why!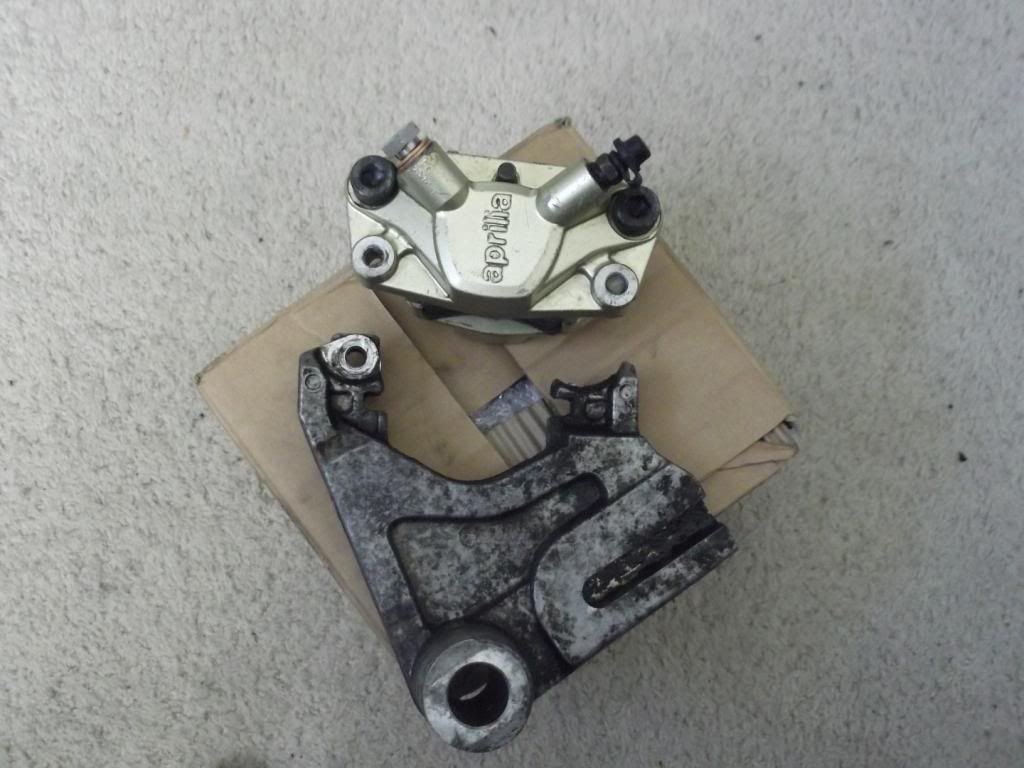
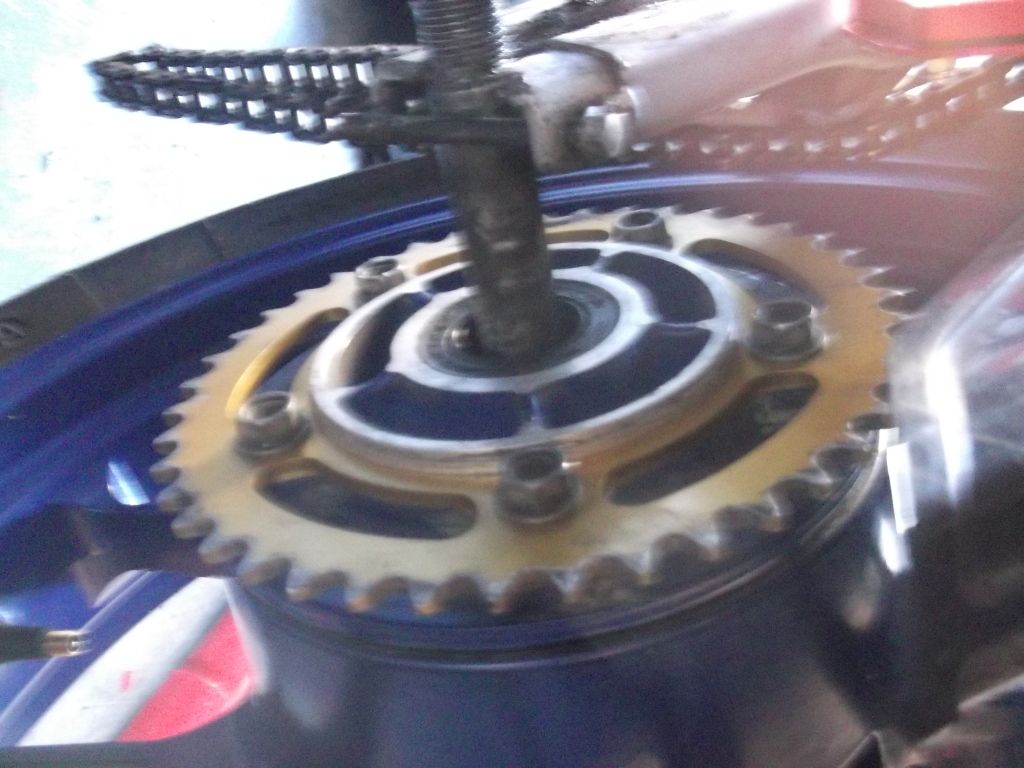
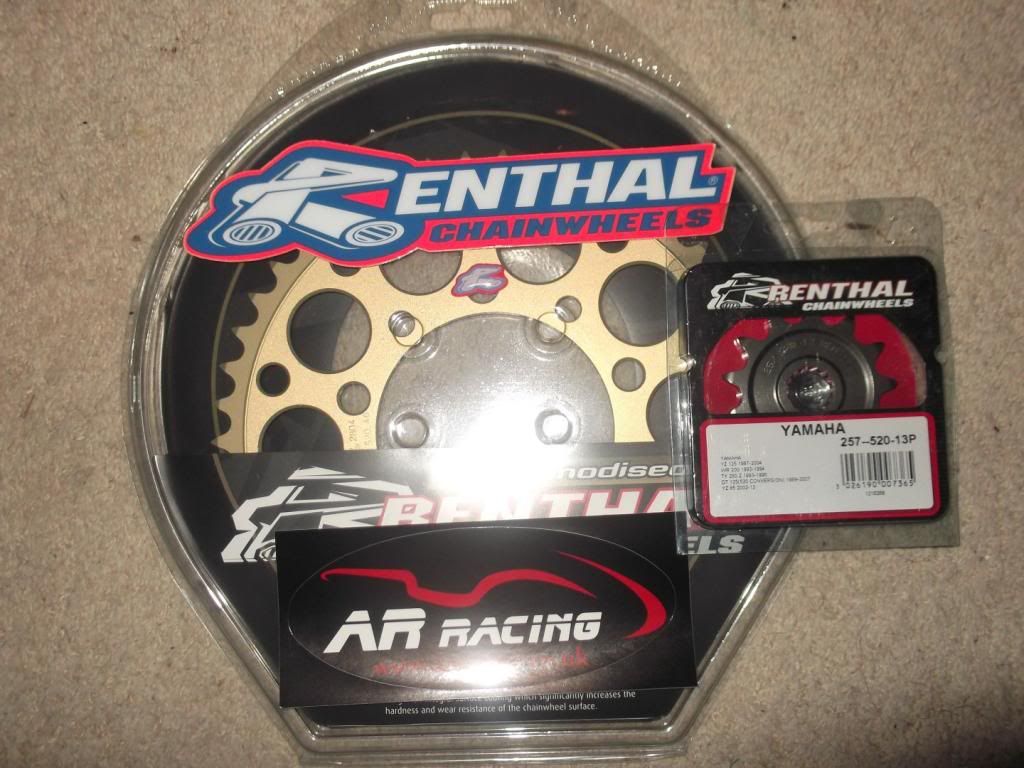
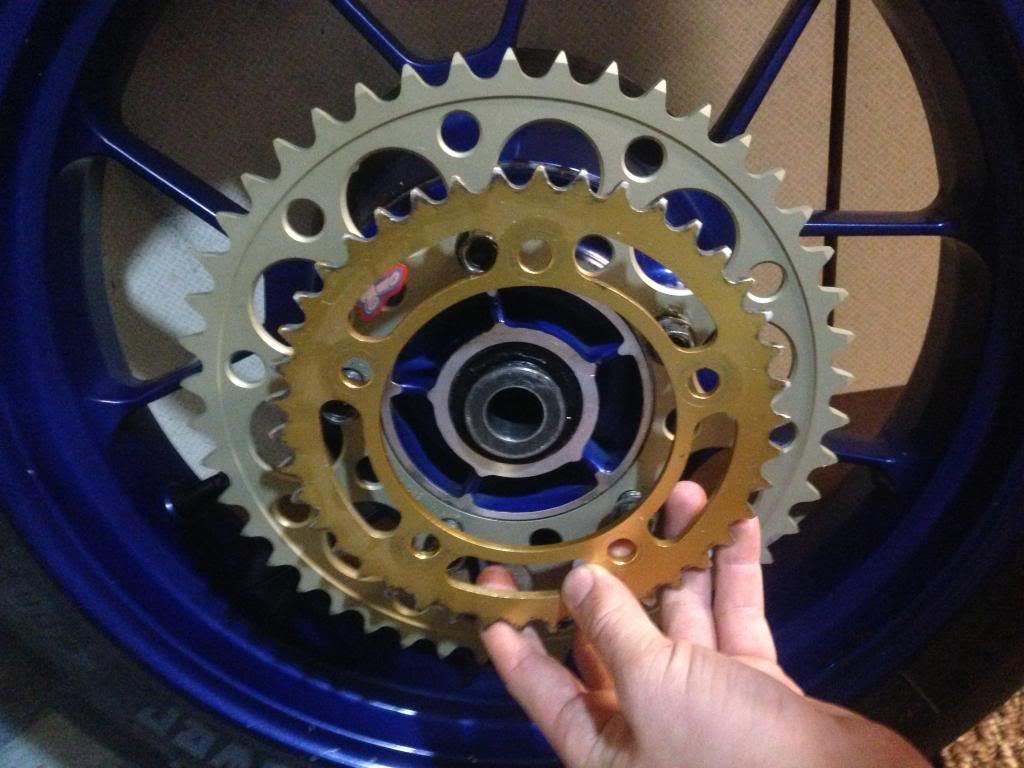
The Aprilia Wheels use 520 pitch chain and sprockets. So I need to get my hands on the conversion for the DT.
The current Sprocket setup was 16 tooth front and 57 rear!
Now the DT out the factory is setup more for bottom end. Where as the aprilia is setup more for top end.
SO! I saw a little bit of a problem. The only sprockets I could find was 42 rear! I wasn't going to be able to go anywhere like that.
The closest I could find was to get 13 tooth front 520 pitch and 46 rear!
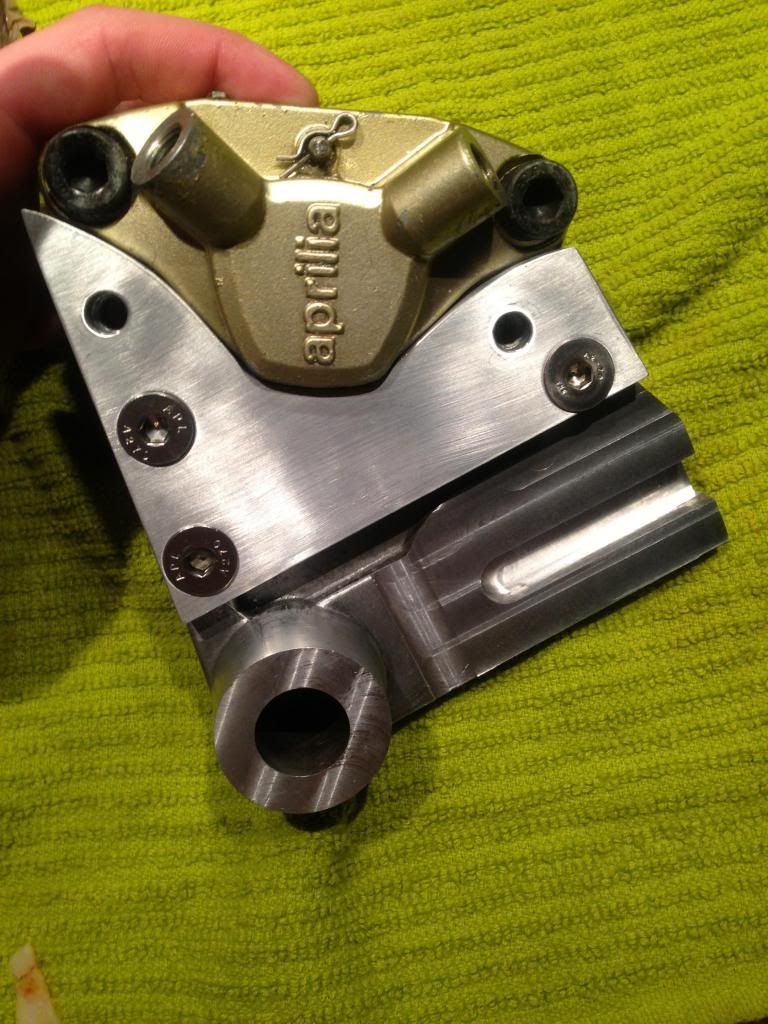
First attempt at the front brake.
Managaed to get it refined down to this
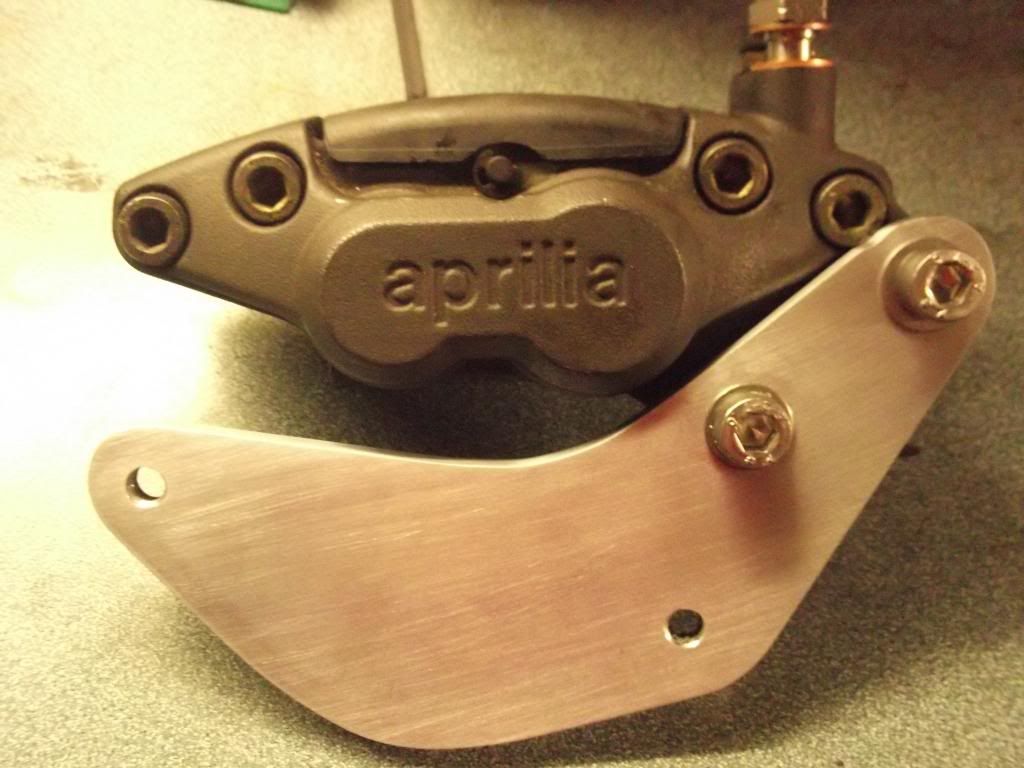
Attempt two with lines installed.
See like a normal RS
Then looked at getting this installed
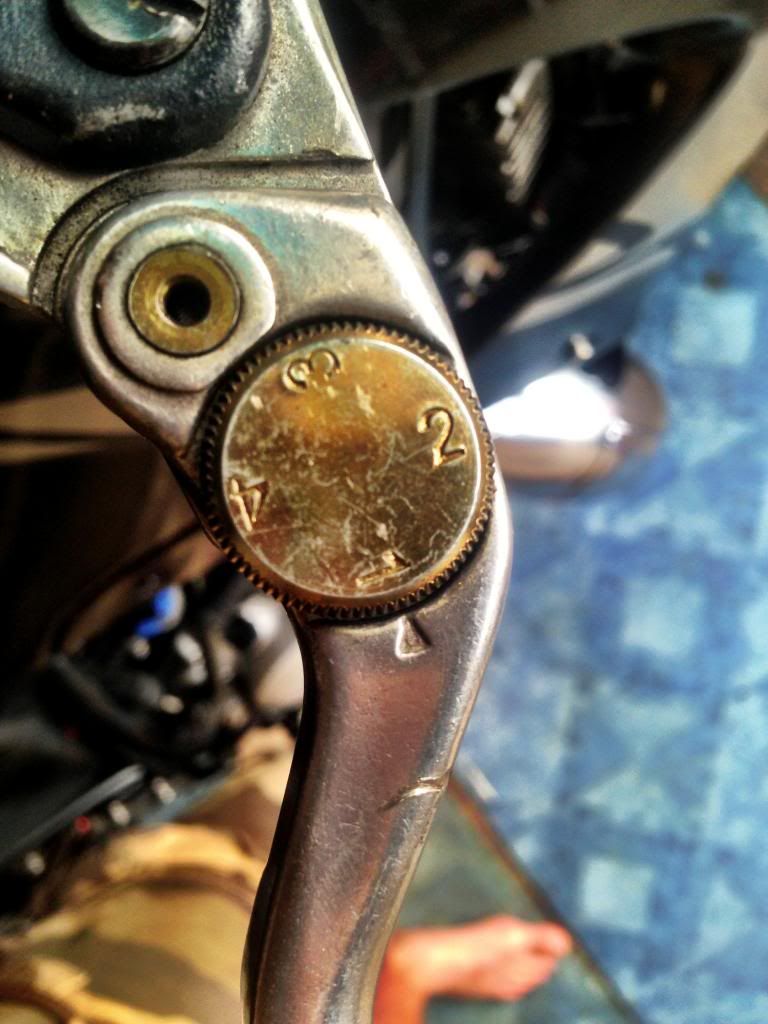
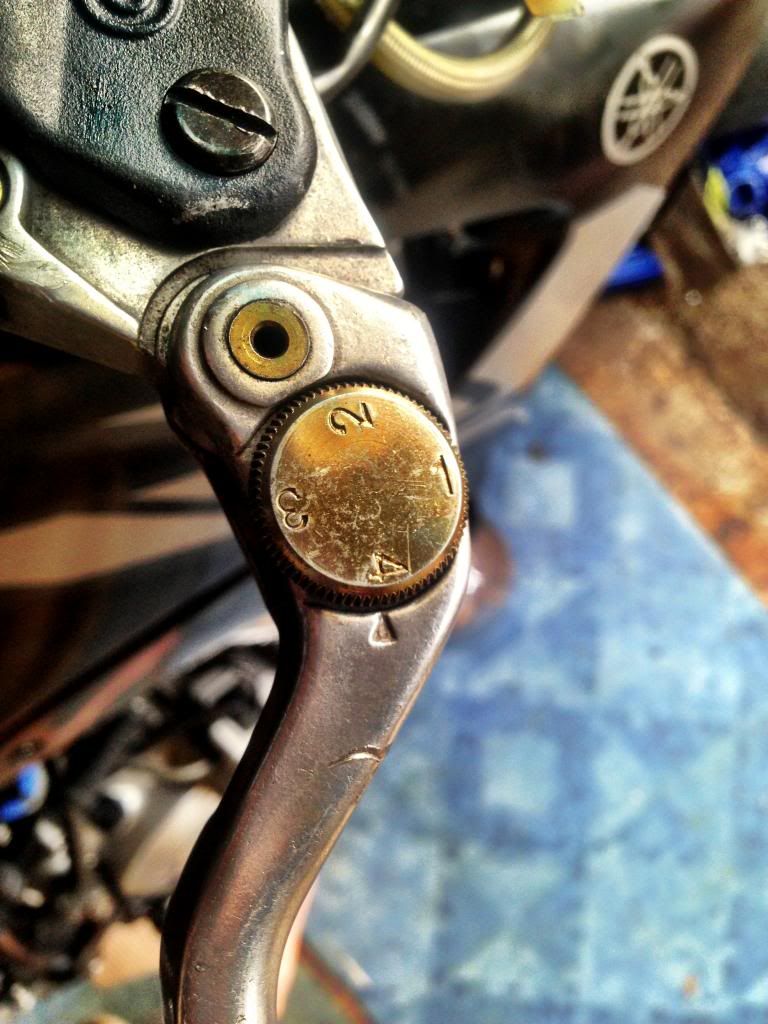
For the life of me could not bleed the system. Took me 3 months to pressurise the front brake. Gave up using the RS125 and bought a RSV Mille 1000 Master. Very nice and can take ASV levers with no modification.
Paid about £100 for this. Then the ASV levers are another £80 but it will look very nice!
What you reckon?

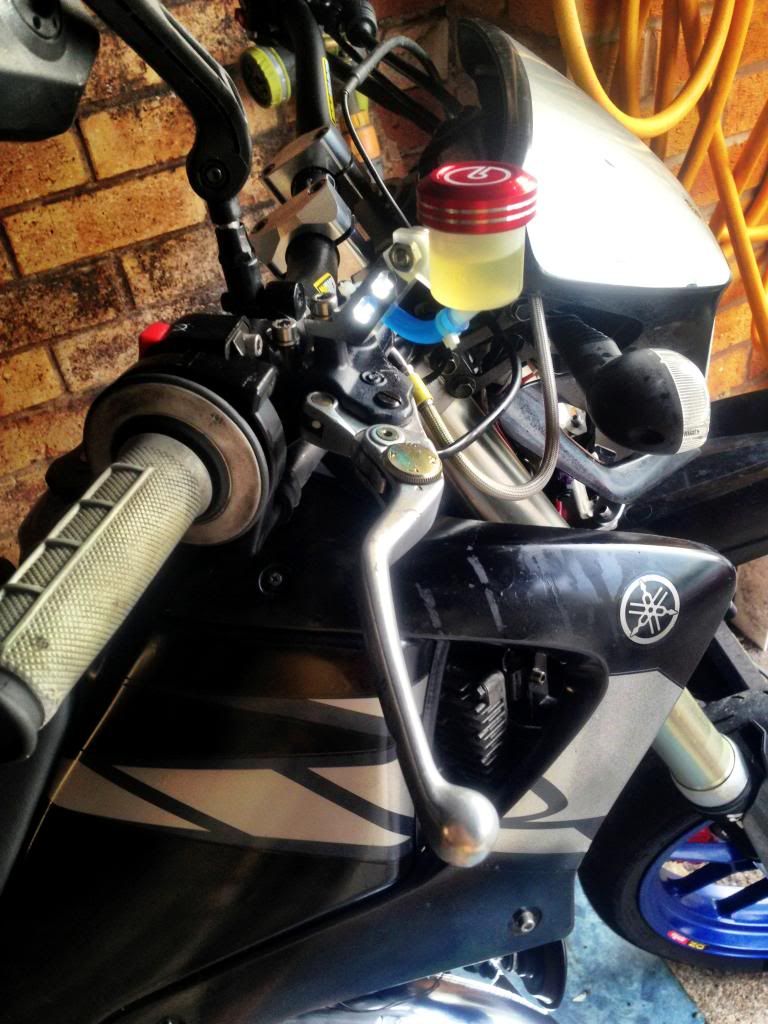
It's really nice. You can Adjust it on the fly to get it to suit your riding style.
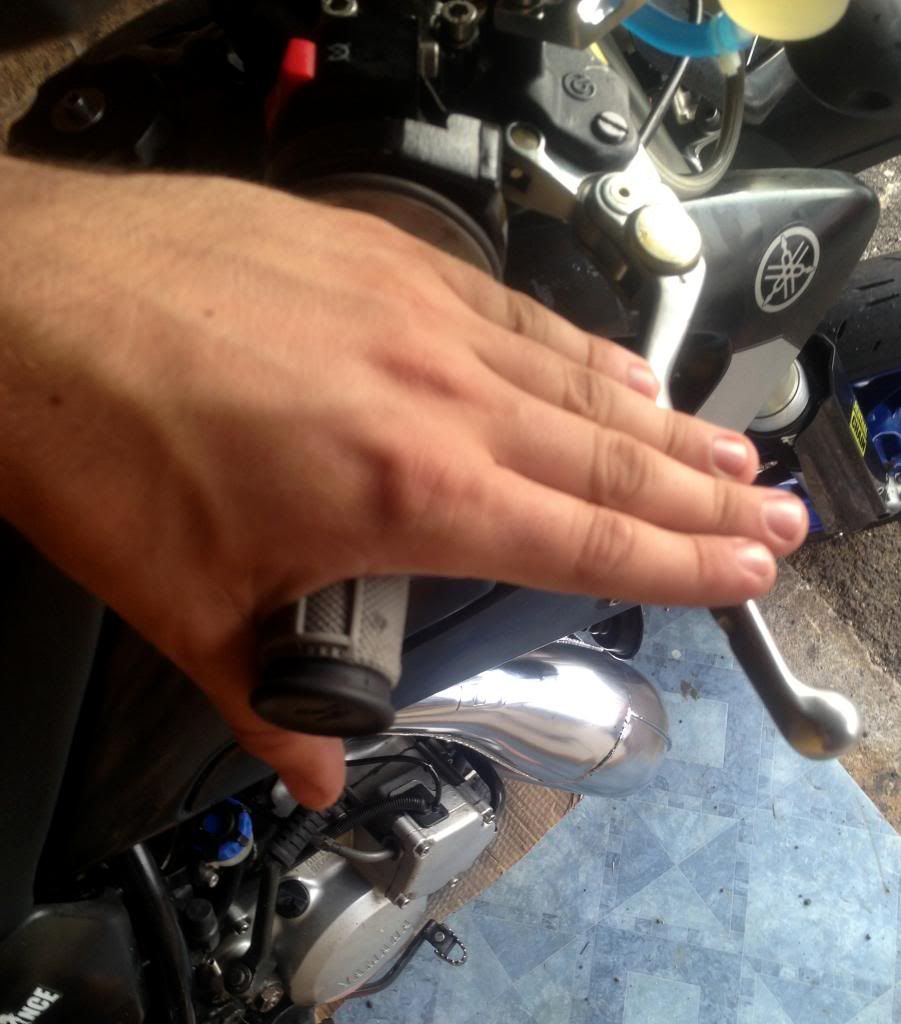
That was maximum Setup
Minimum setup
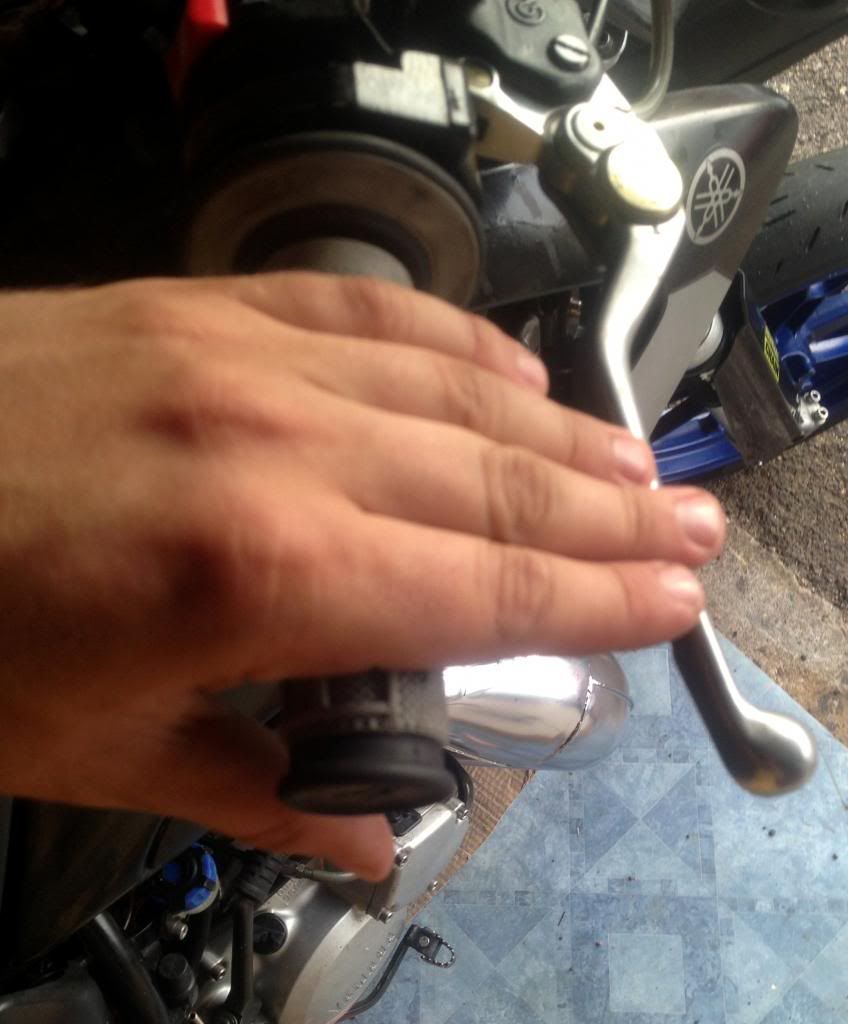
Hopefully you can see that it has brought the lever back way to the grips.
We decided that the front was the easiest to do first So we did.
We've started cracking on with the rear. Taking time but should look sweet!
Here's that old broken bracket. We've managed to give it a new purpose.
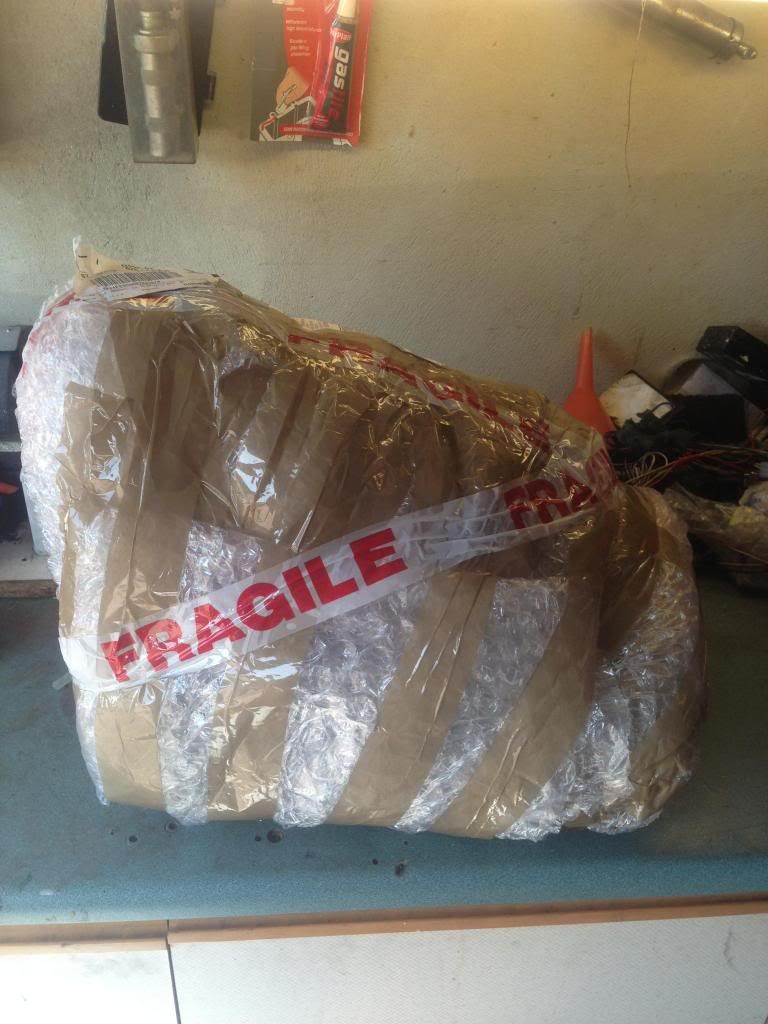
Come back from work one night to find this on my desk....
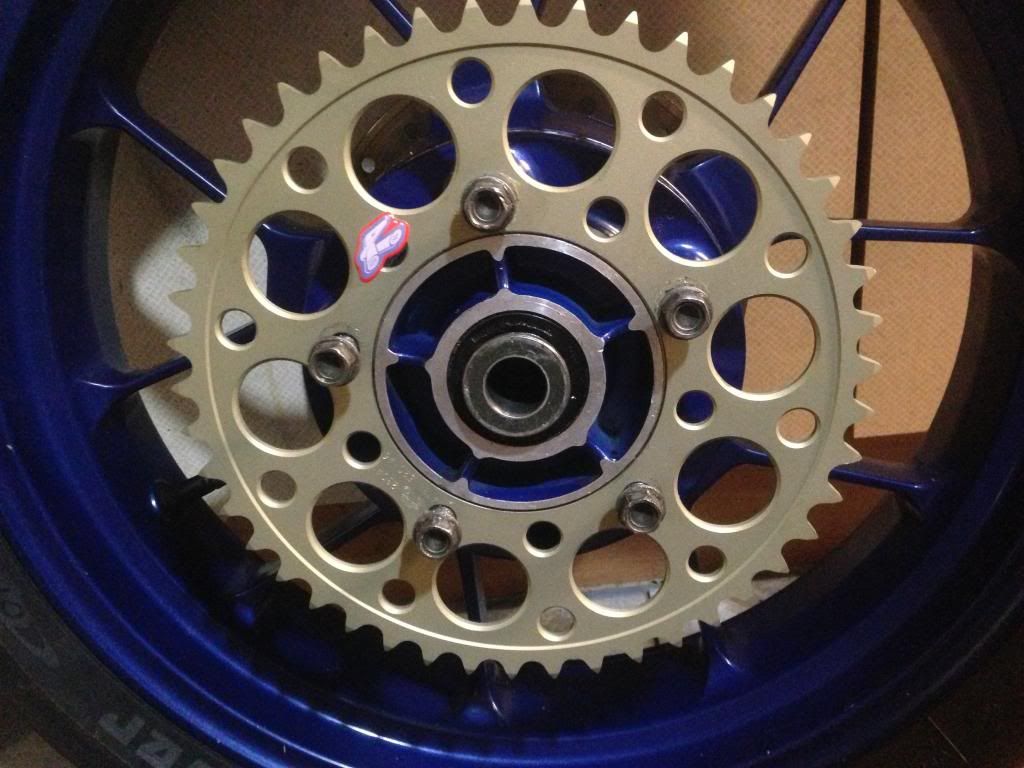
In the photo below you'll see I've placed washers behind the sprocket. The reason for this is that although I've lined up the front and back wheel. The wheel is actually wider than the original DT wheel. So this means that the sprockets are not longer inline. If the sprockets are not inline then the chain will be at an angle and will cause accellerated wear...
Hmm too close for comfort!
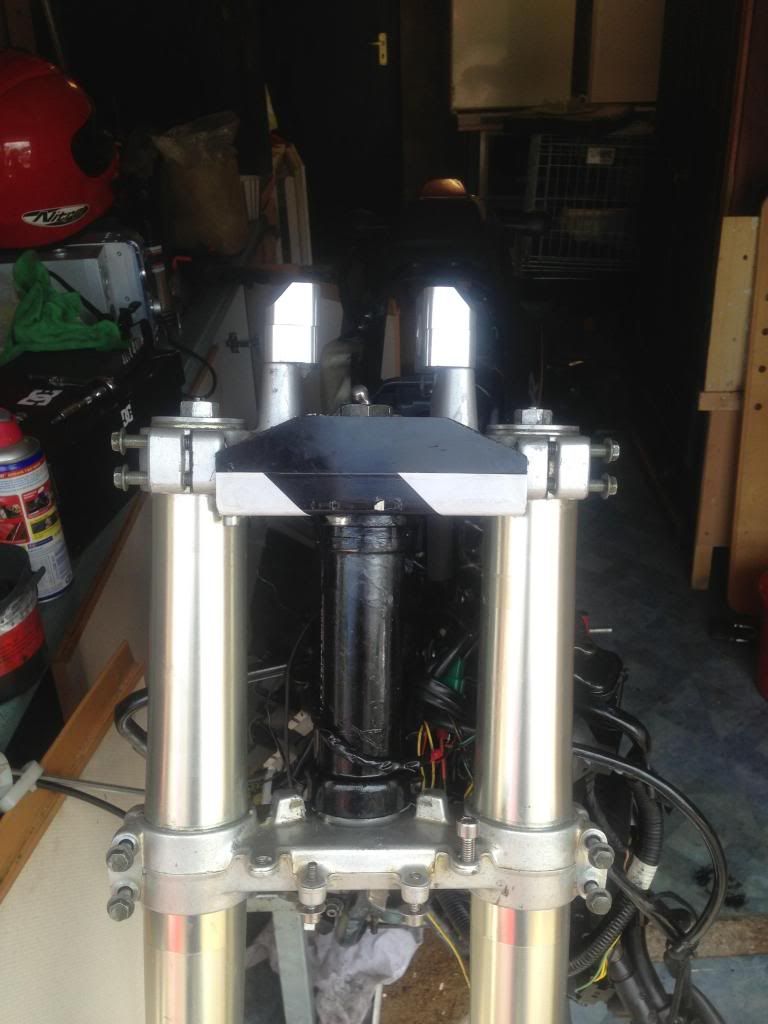
I had these on my old forks. I liked them. decided to get them for the USD's. In my opinion not as nice as the ones you can get for the normal ones. But worth having. Bit of a pain to get on!
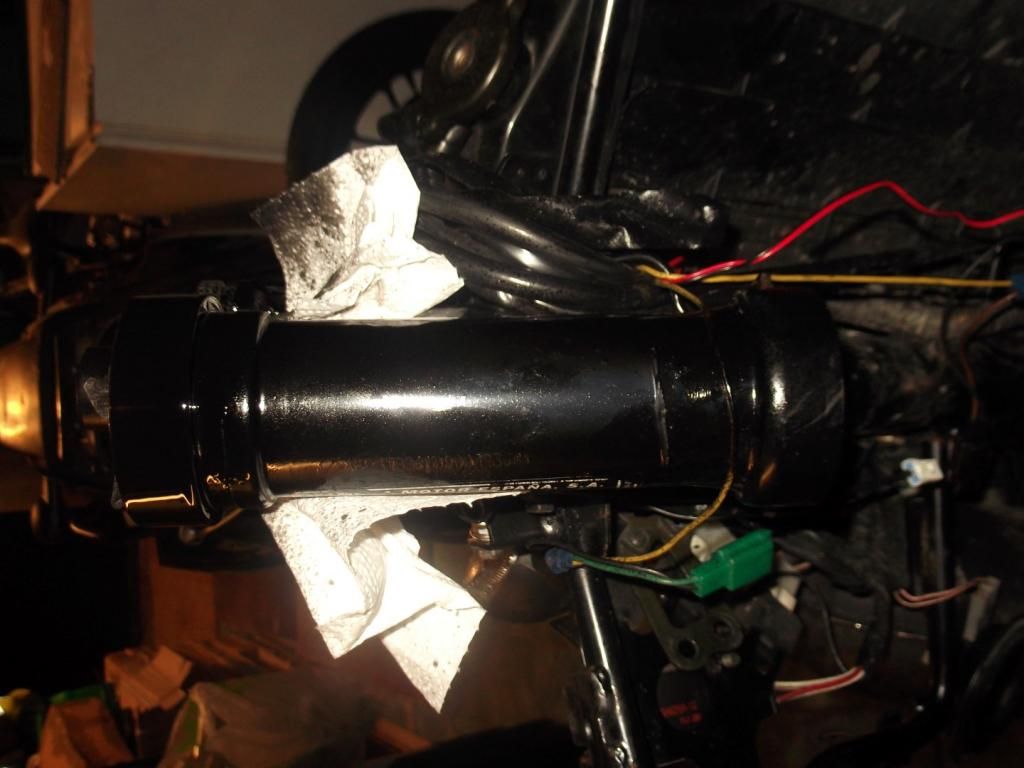
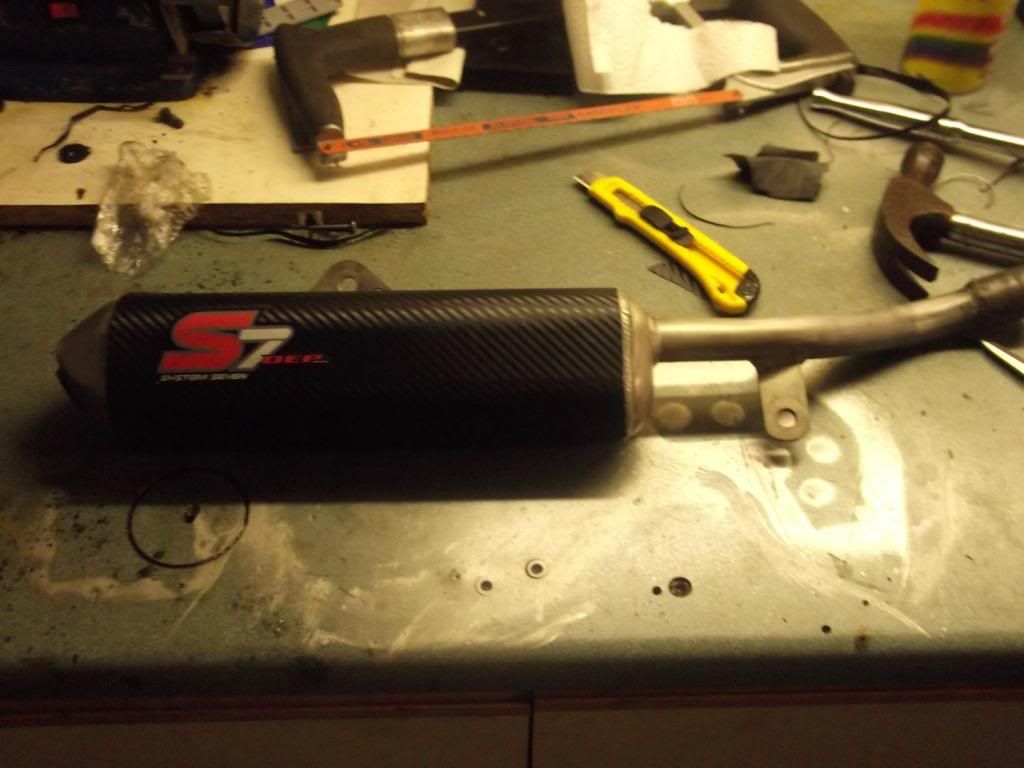
I also invested in a brand spanking new DEP expansion. A beautiful crisp sounding pipe.
Also upjetted the carb to
240 main jetand installedcarbon fibre reeds.Haven't actually taken the bike for a ride since I don't actually having the wheels sorted out
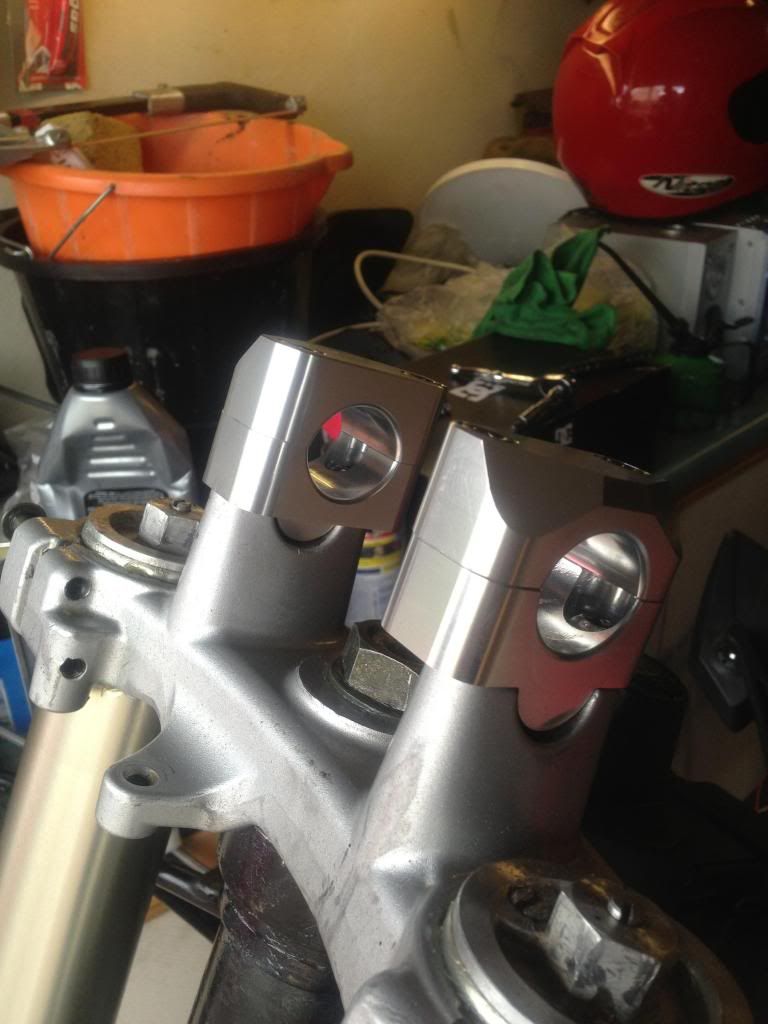
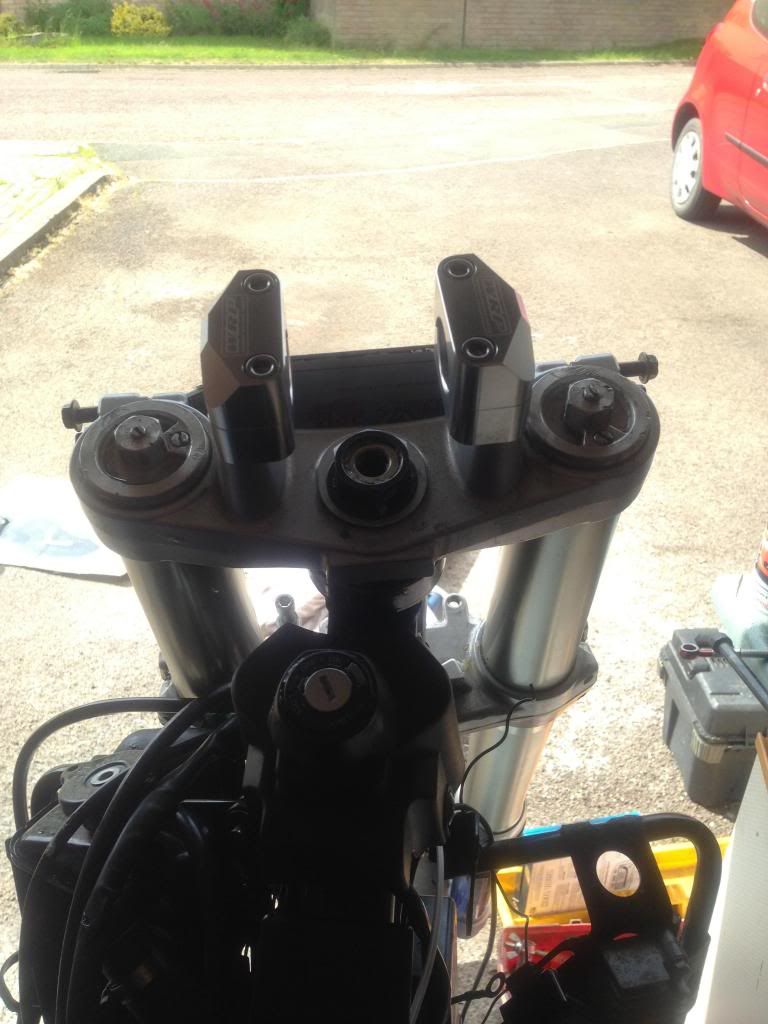
Got some nice Bar risers. Will look to get some Fatbars and Unbreakable levers. Then i'll be happy to say the front of the bike is complete!
For now...
Bought some
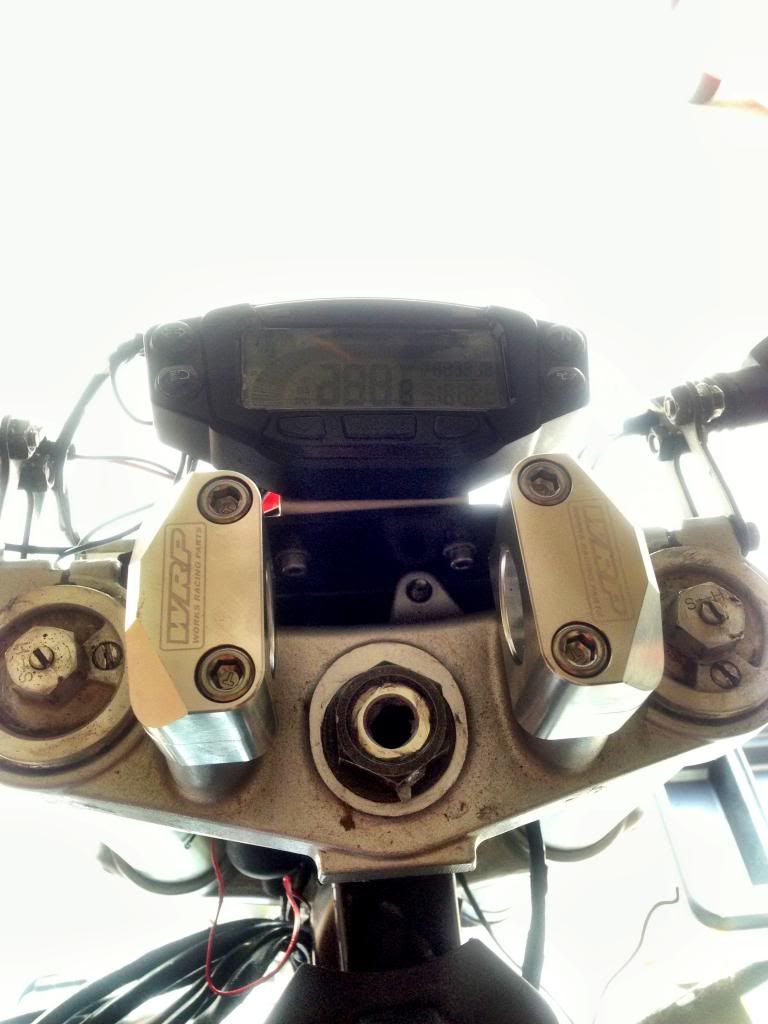
Pro Taper EvoBars. Should get them fitted soon. So the Bar risers have now been installed. Also fitted thevapor stealthto my new yokes.This was the existing headlight bracket but it didn't quite fit on the yokes. So have just split it down the middle and spread it open some more. If it starts to fail I can just weld it back up.
That didn't work above ^^^^ It made the width just not the height
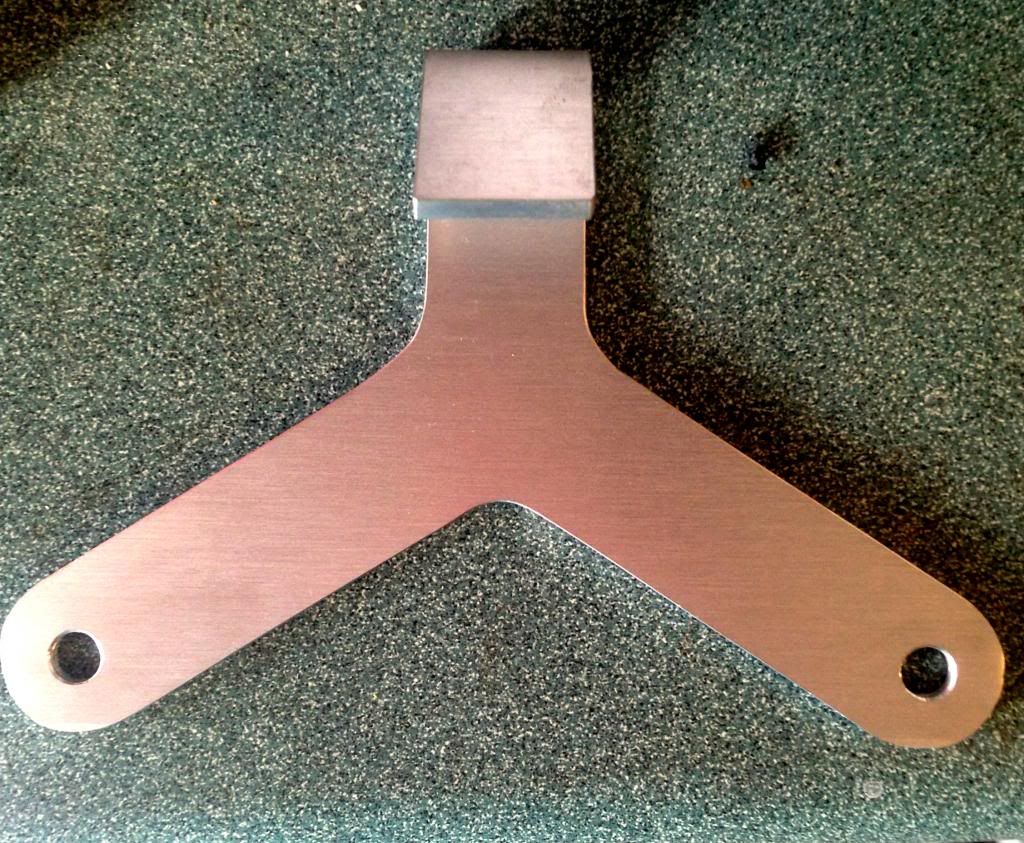
Got this made up in nice anodised aluminium.
Some nice stickers to the wheels. Since they're designed by OZ I thought I'd show that off.
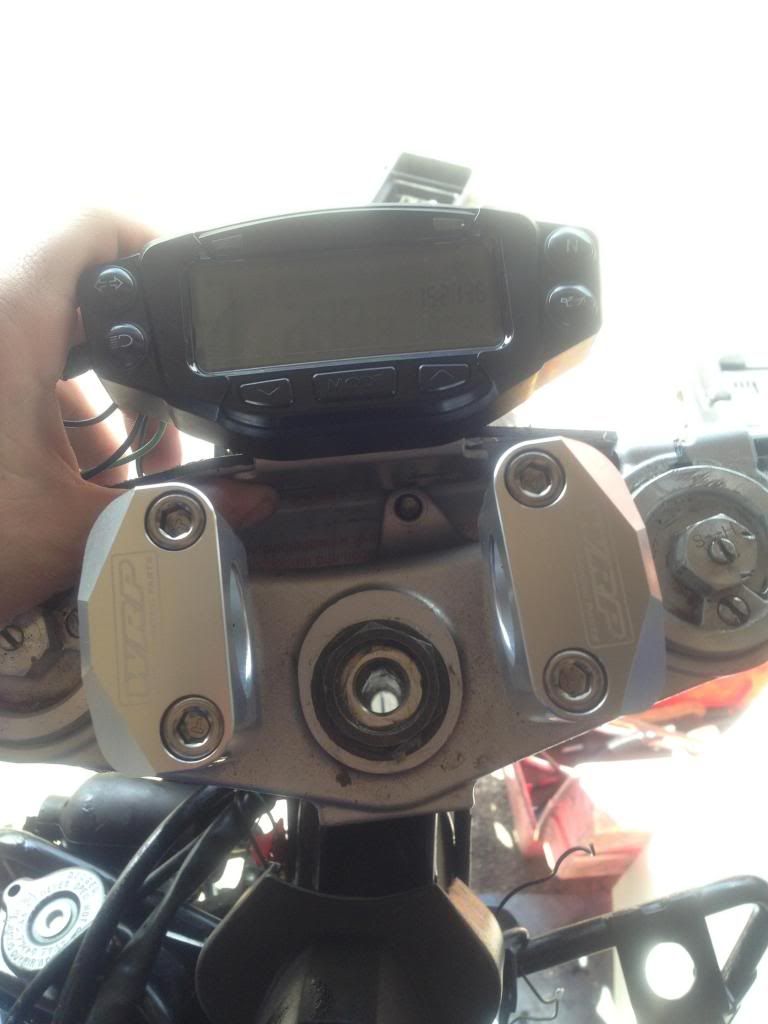
I didn't take enough photos last time of my vapor installtion. Haven't made that mistake this time lmao,
Hugs the forks nicely
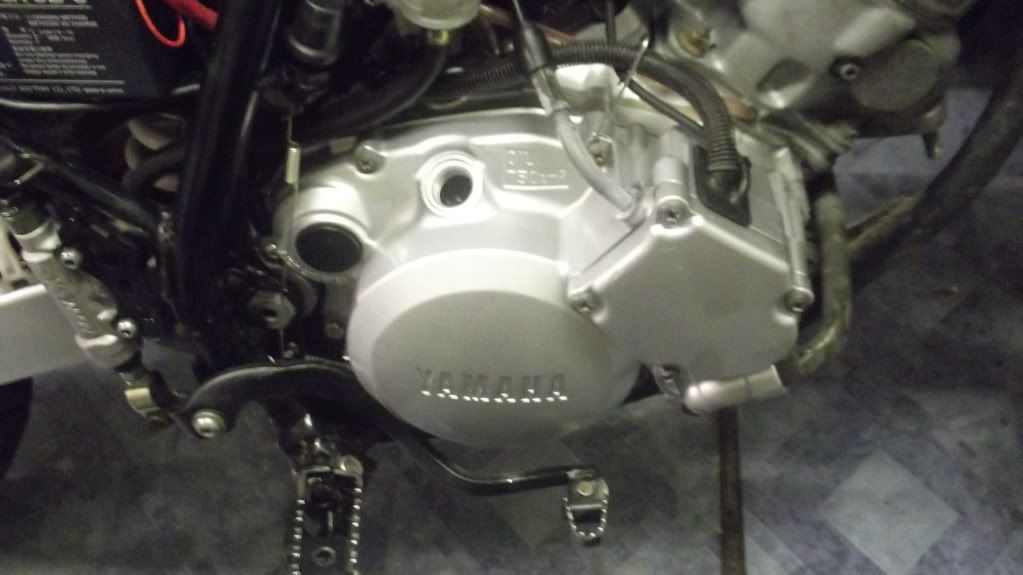
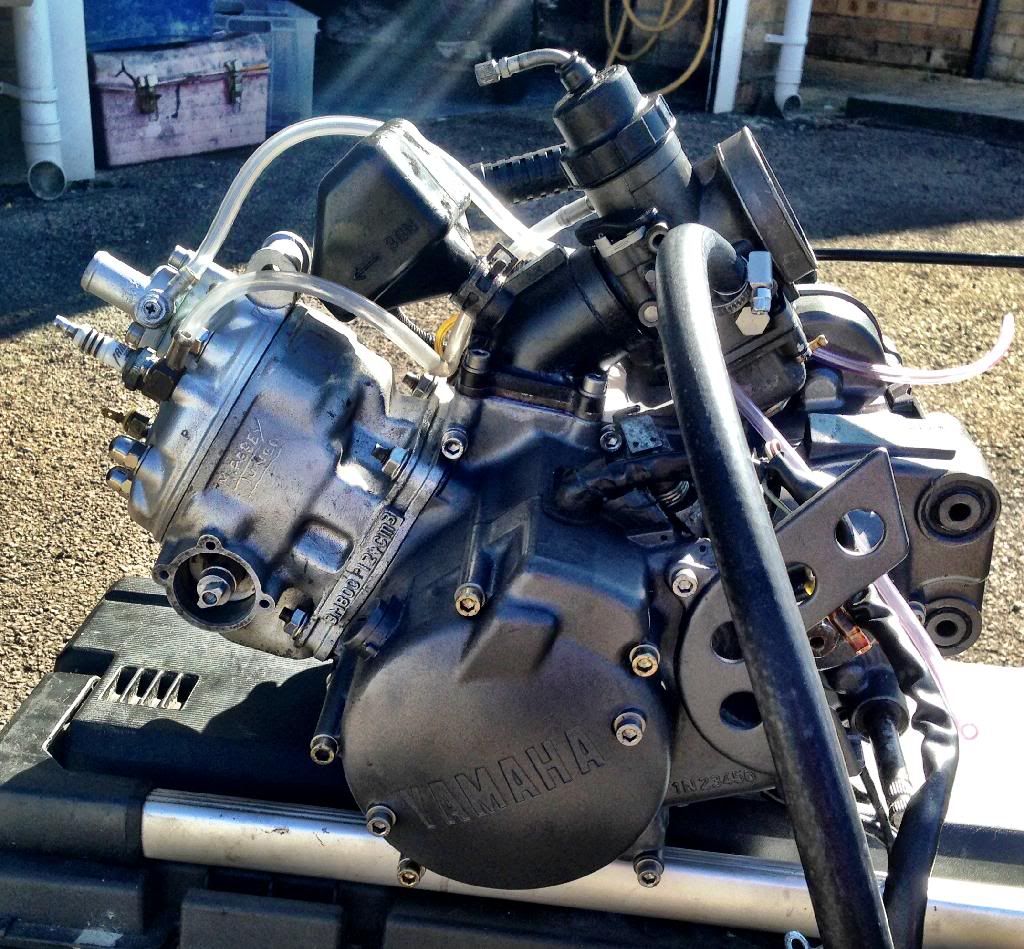
4DL Belgarda Lump
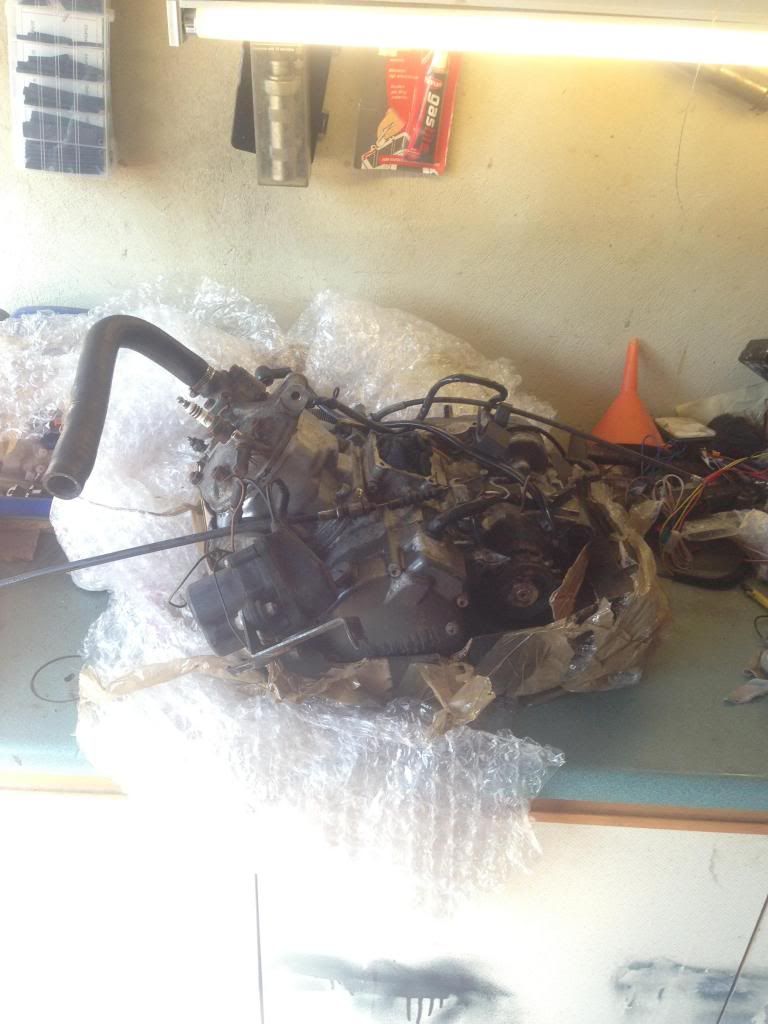
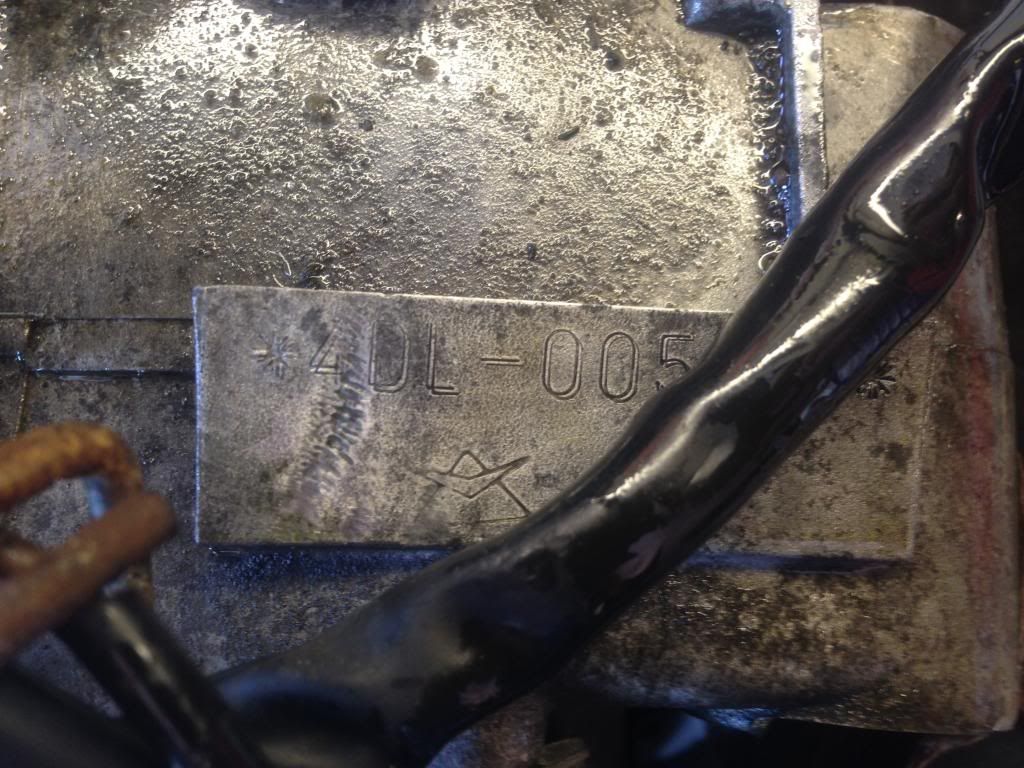
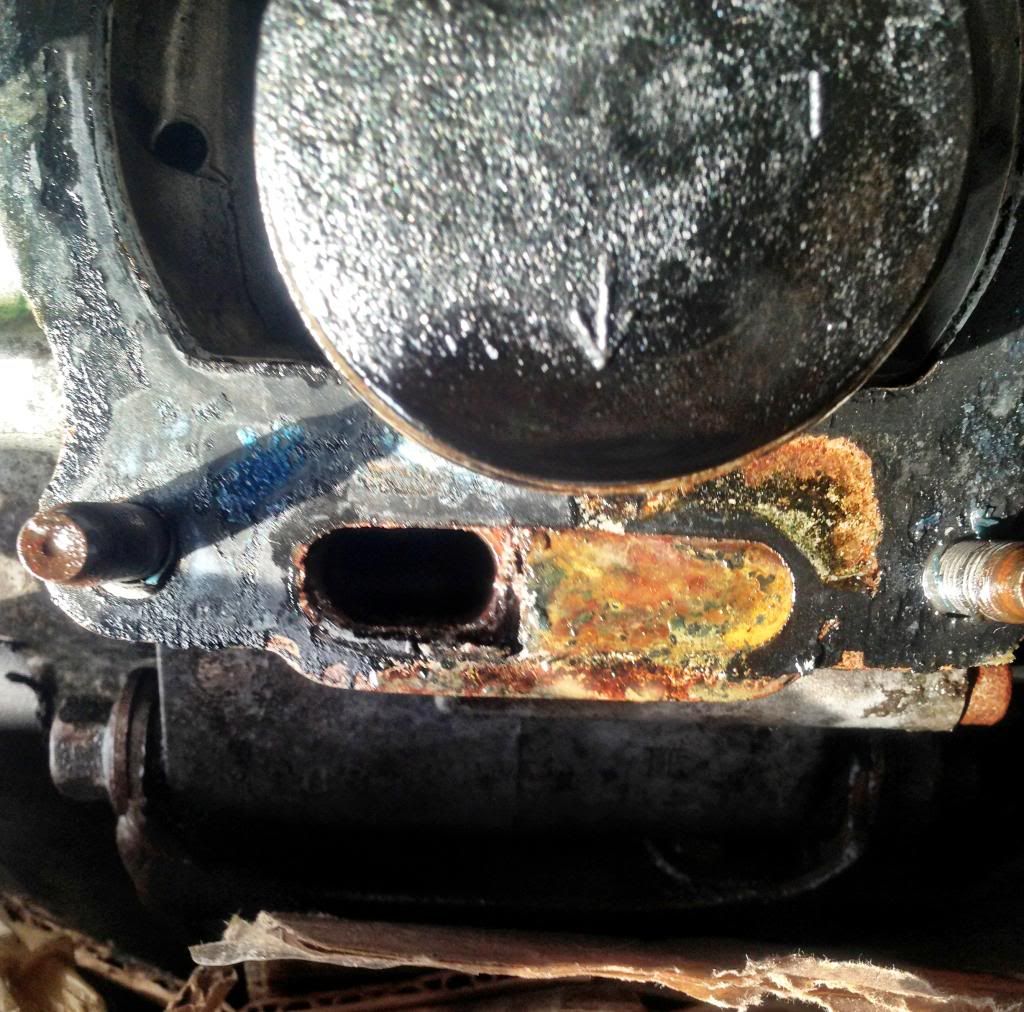
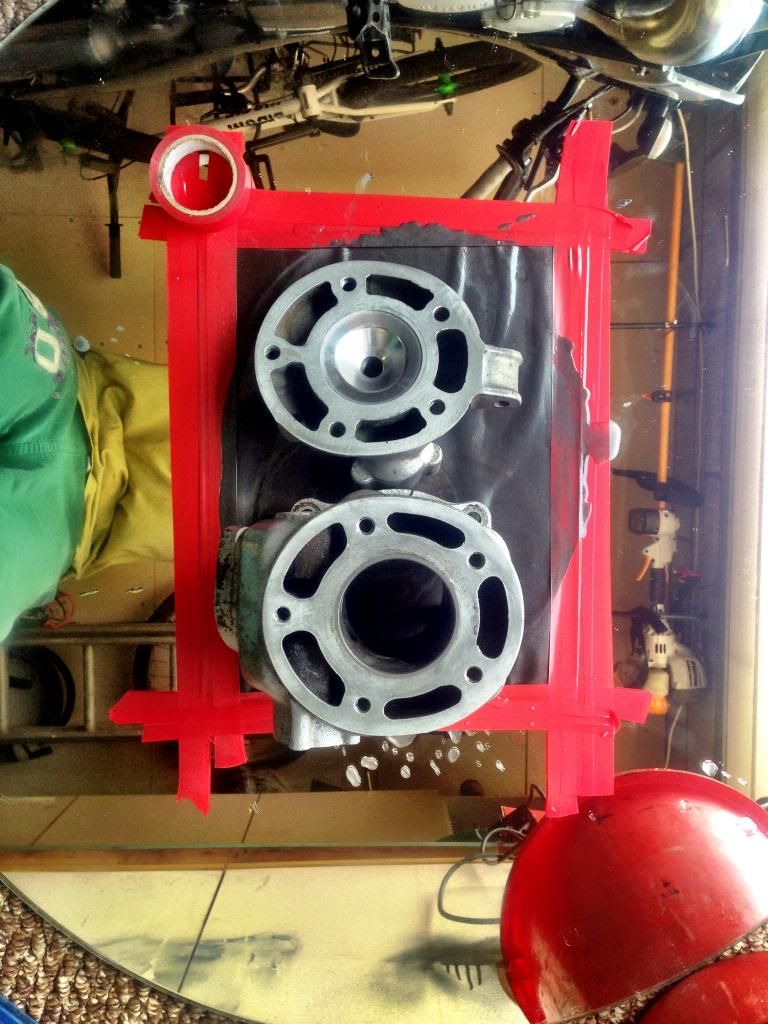
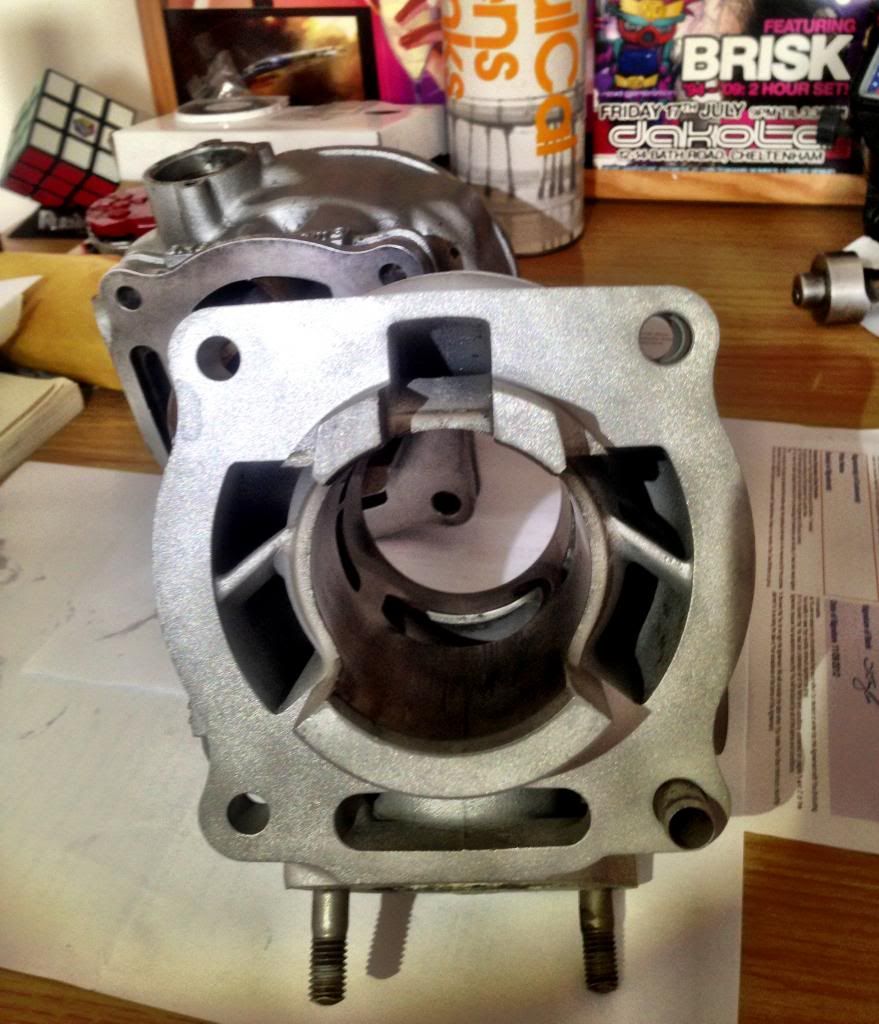
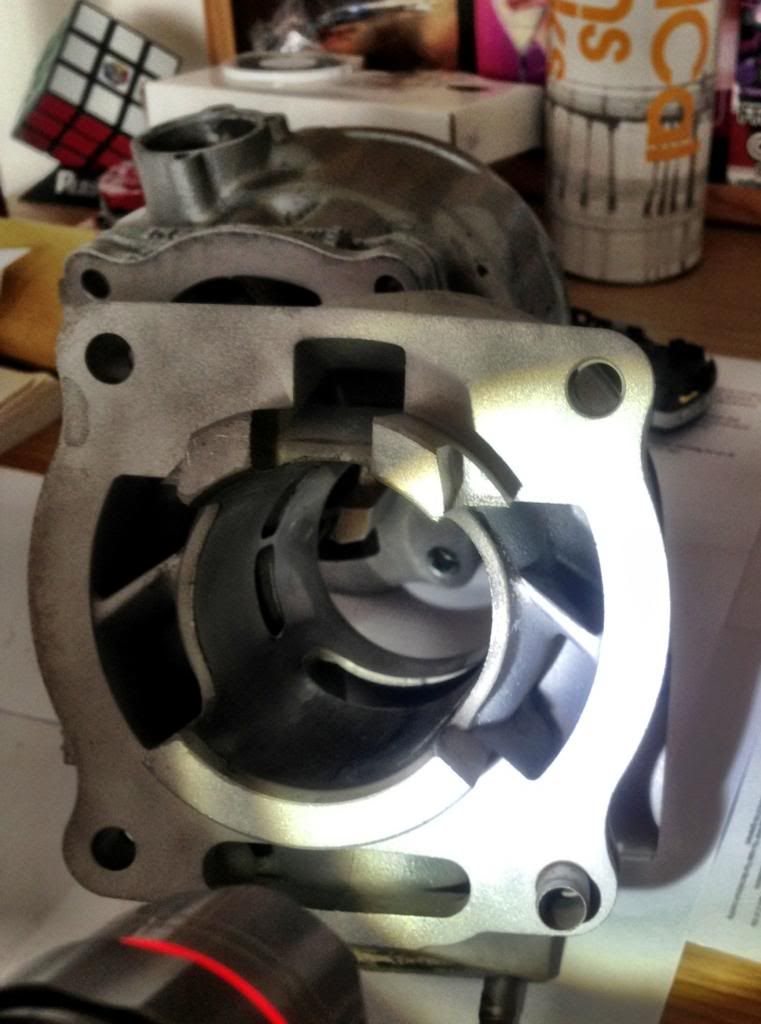
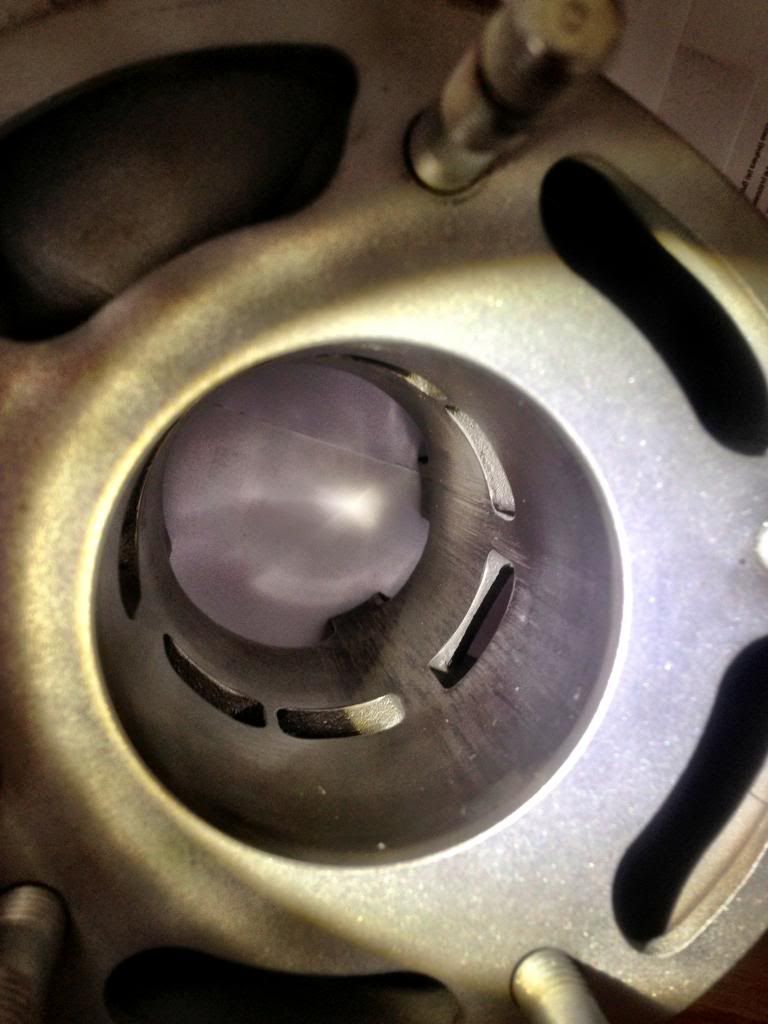
And this is what made me laugh once I lifted it!
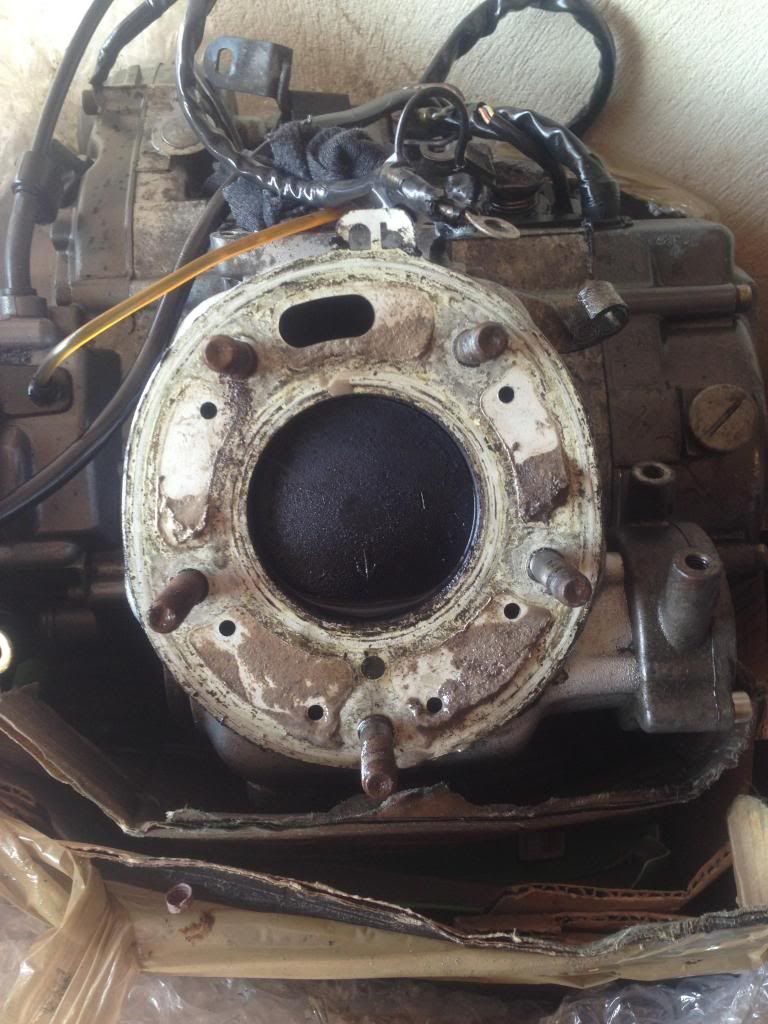
What are the three things you notice!
That doesn't read
upto me?
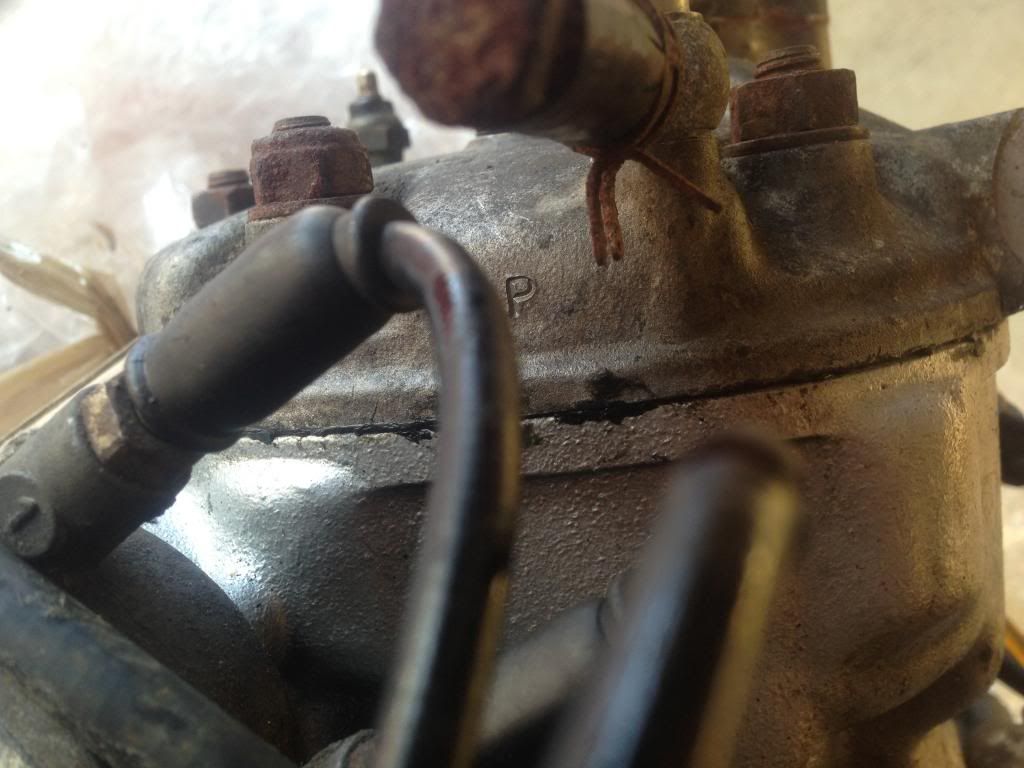
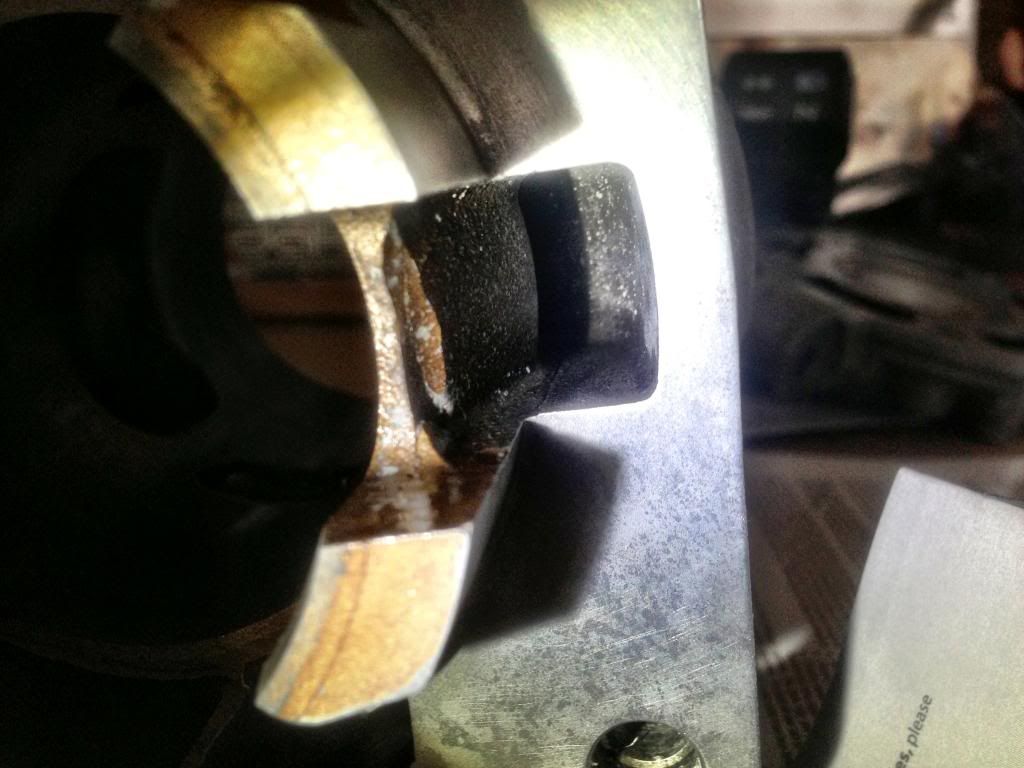
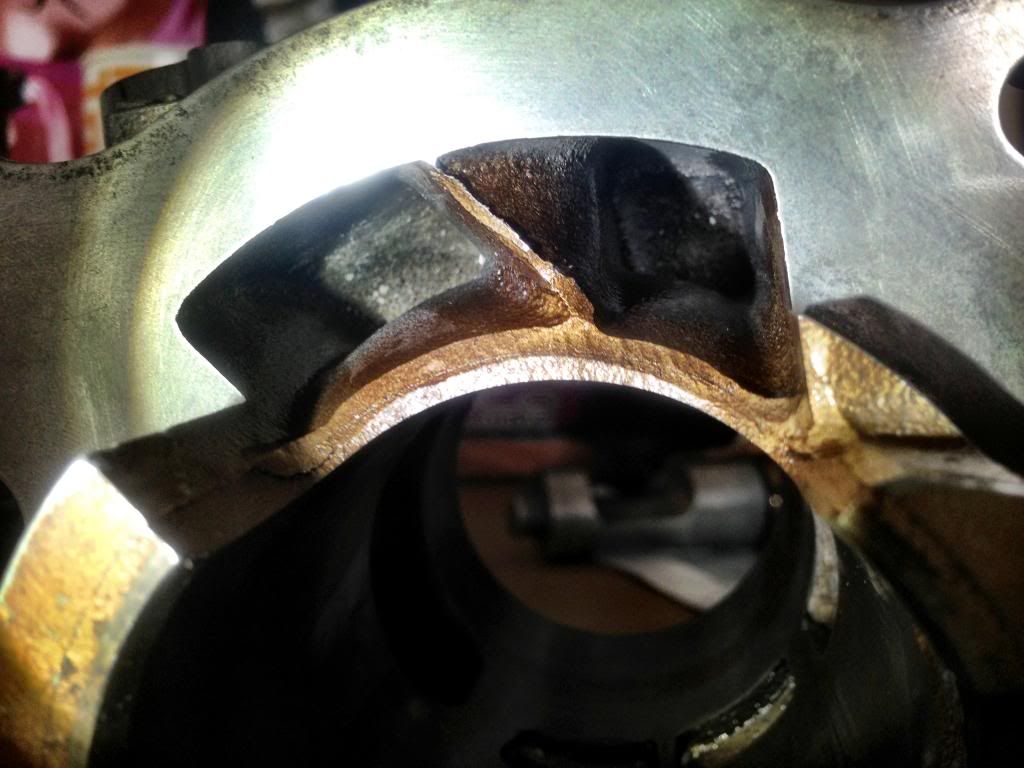
And look at the deposits on that gasket! That's not suppose to be like that!
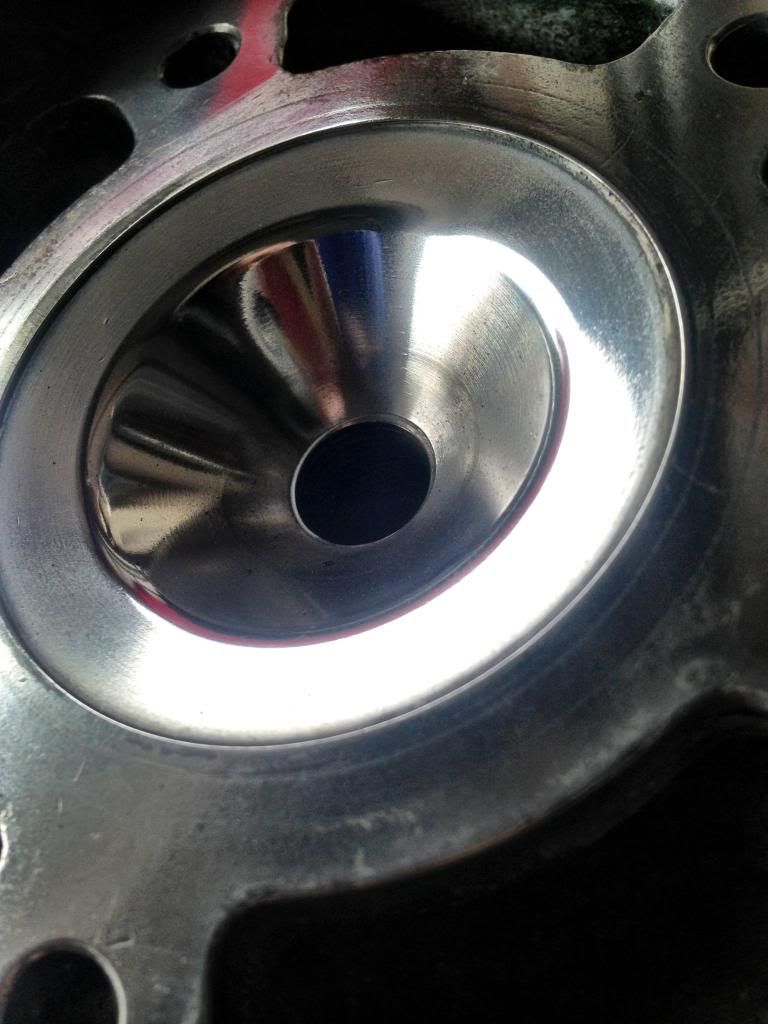
On the plus side no signs of detenation on the head. Just dirty. I'll clean it all up and upload pics another day
I'm not disapointed in the slightest. Just annoyed the ad blatenly lied. When I probably would have still paid asking price because I wanted to have it rebuilt anyway. So I have fired off a quick message.
And the saga continues.
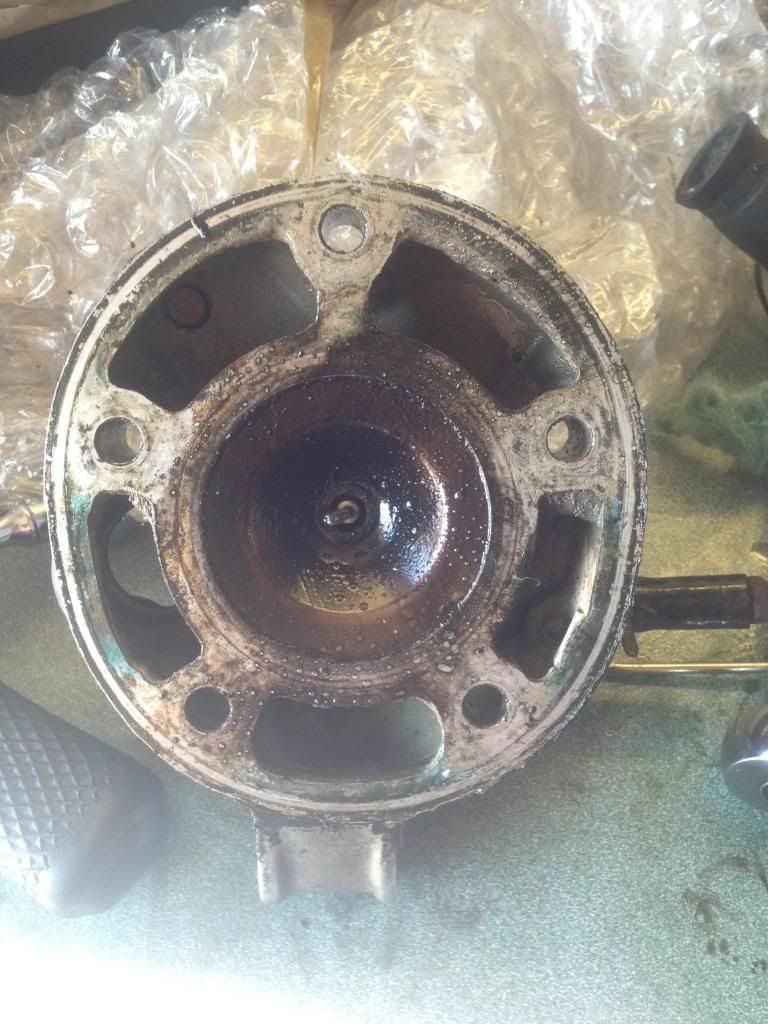
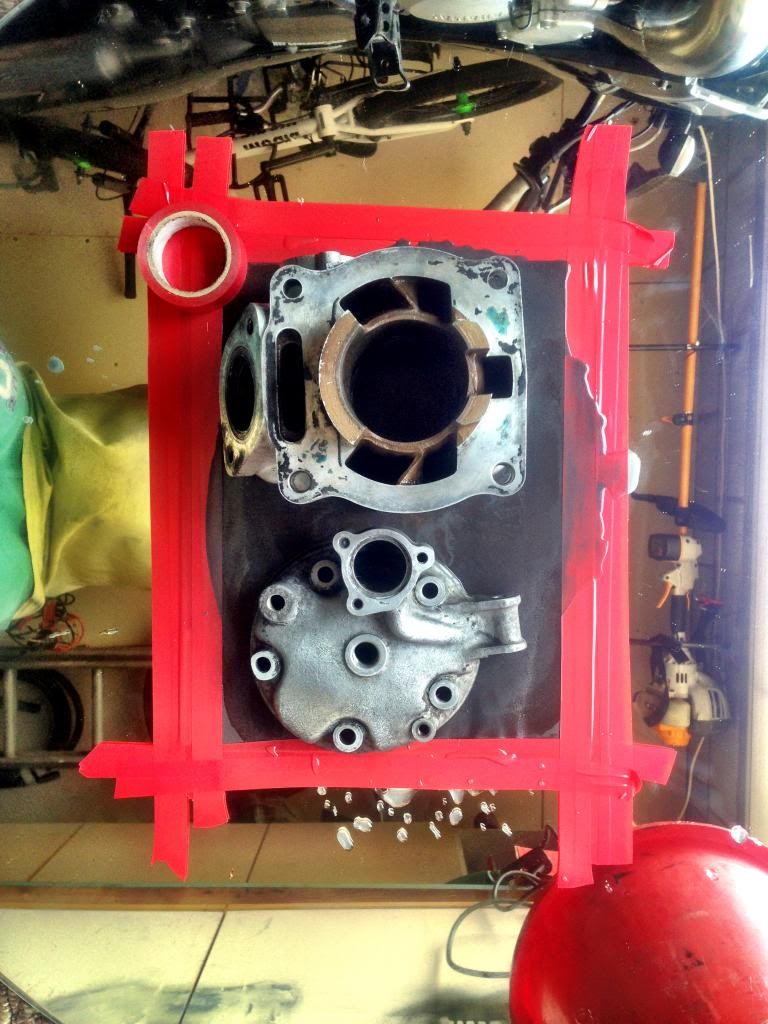
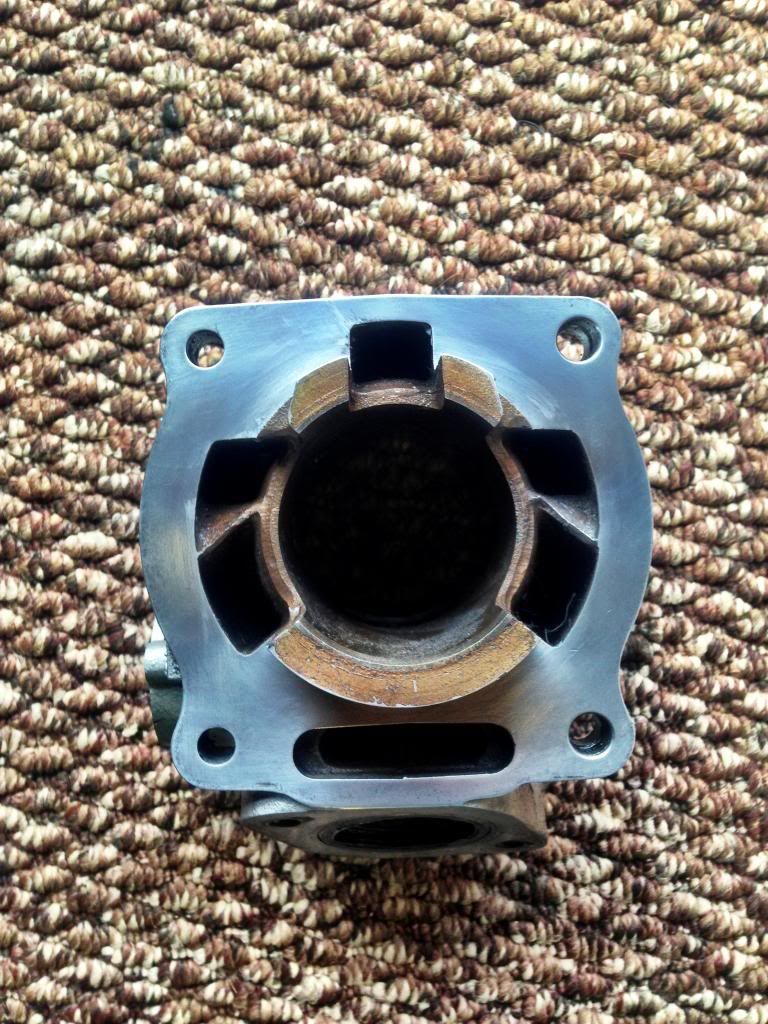
It's starting to look a bit better!

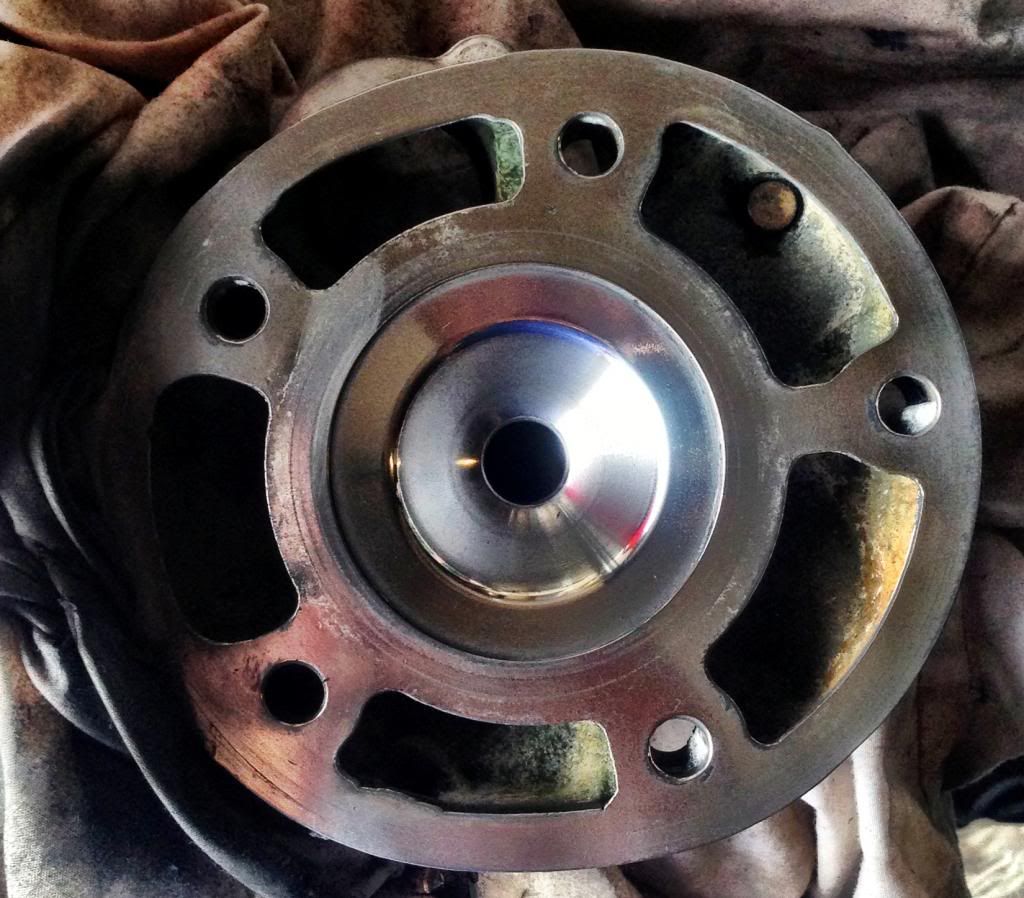
The head and cylinder skimmed
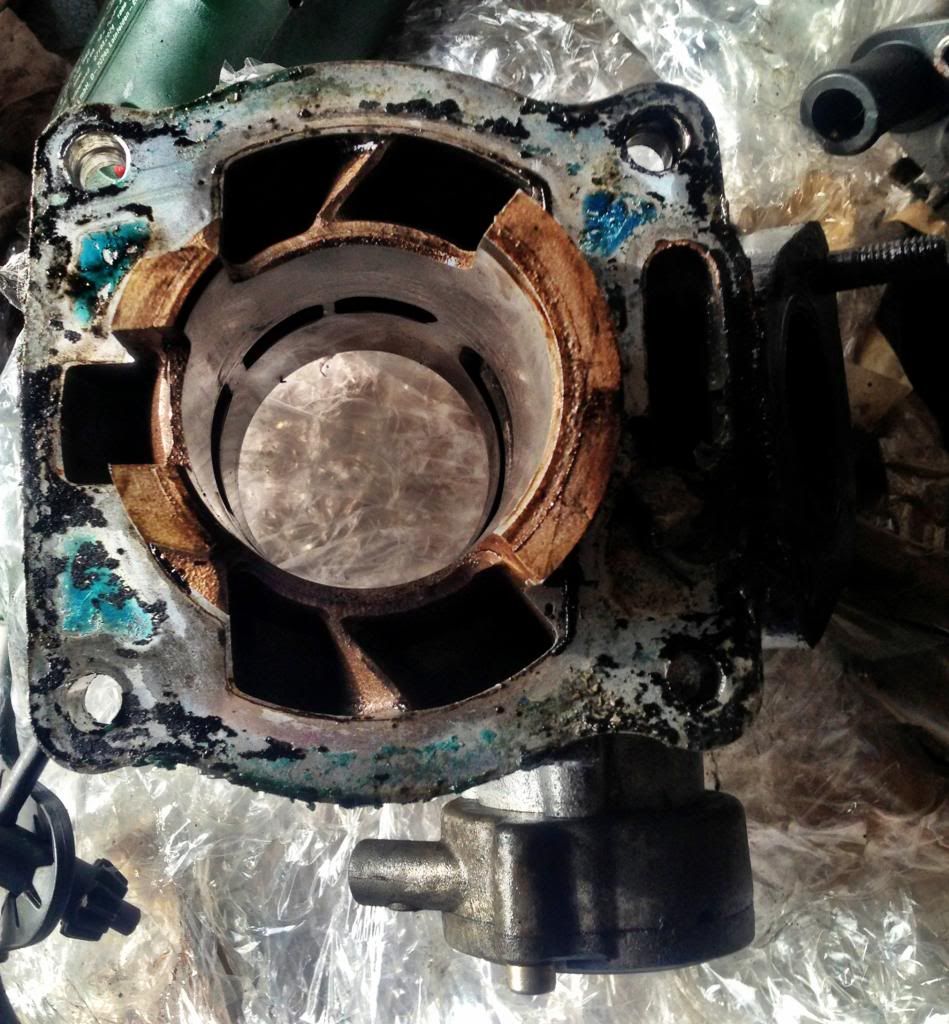
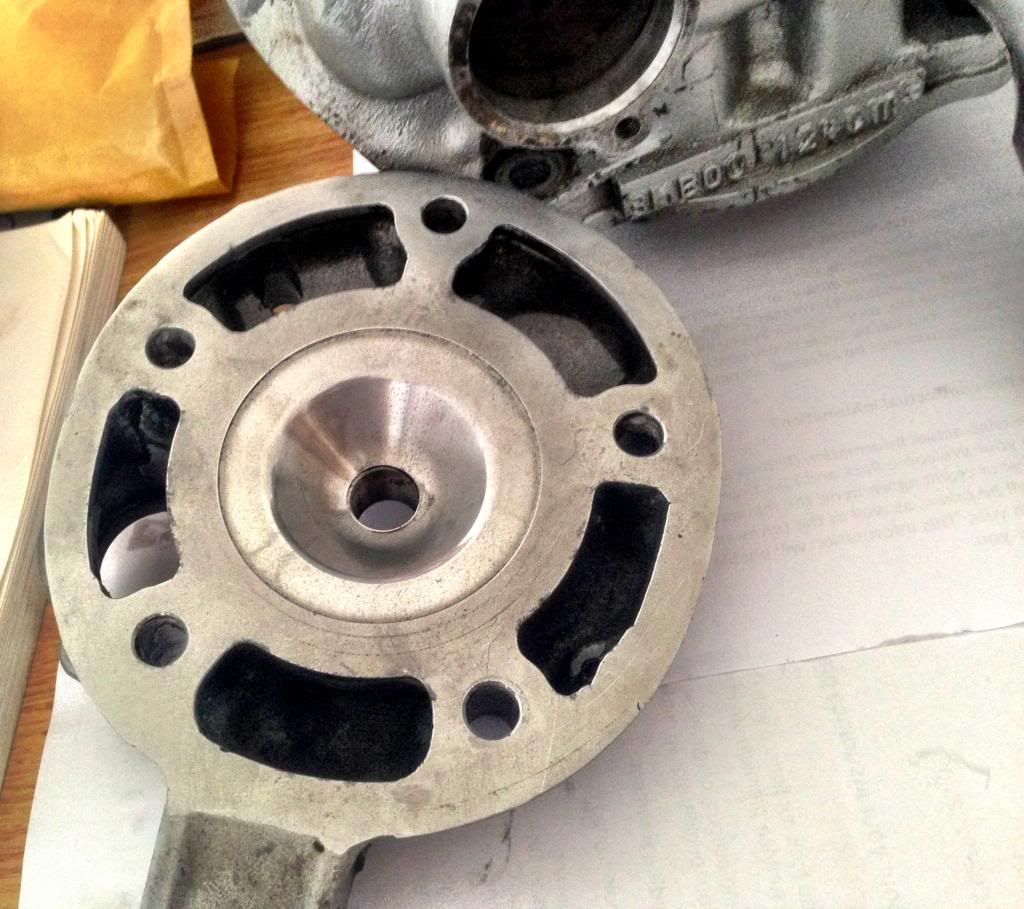
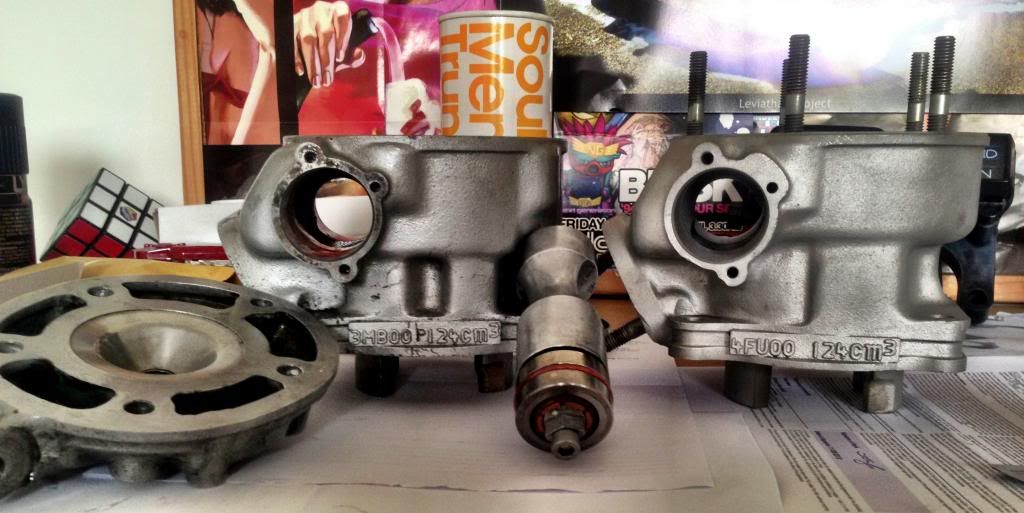
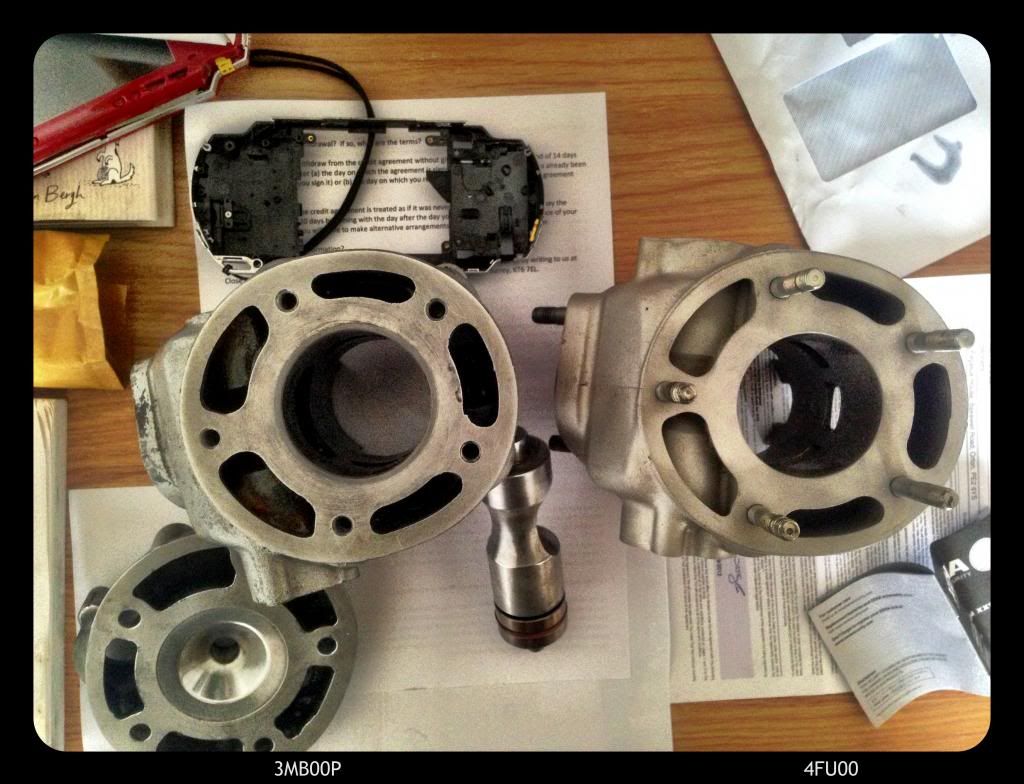
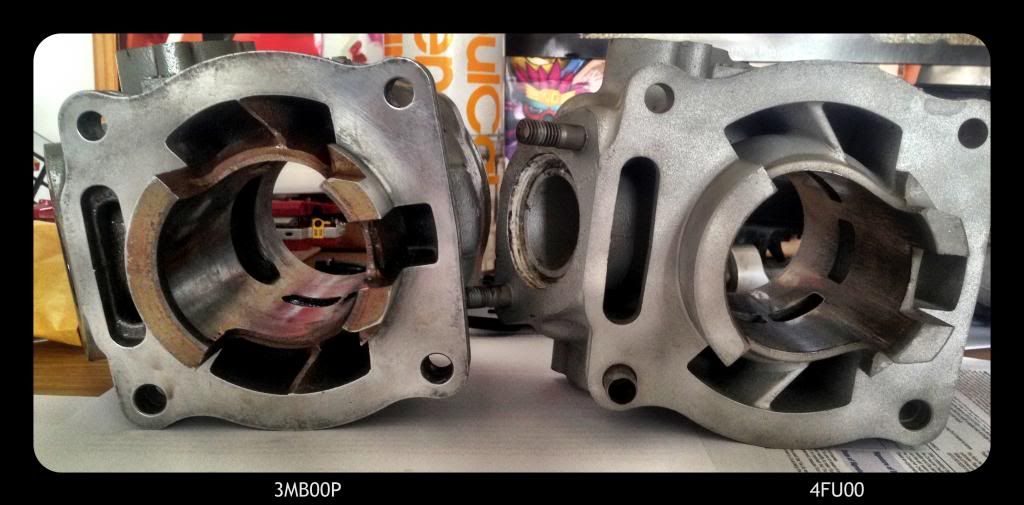
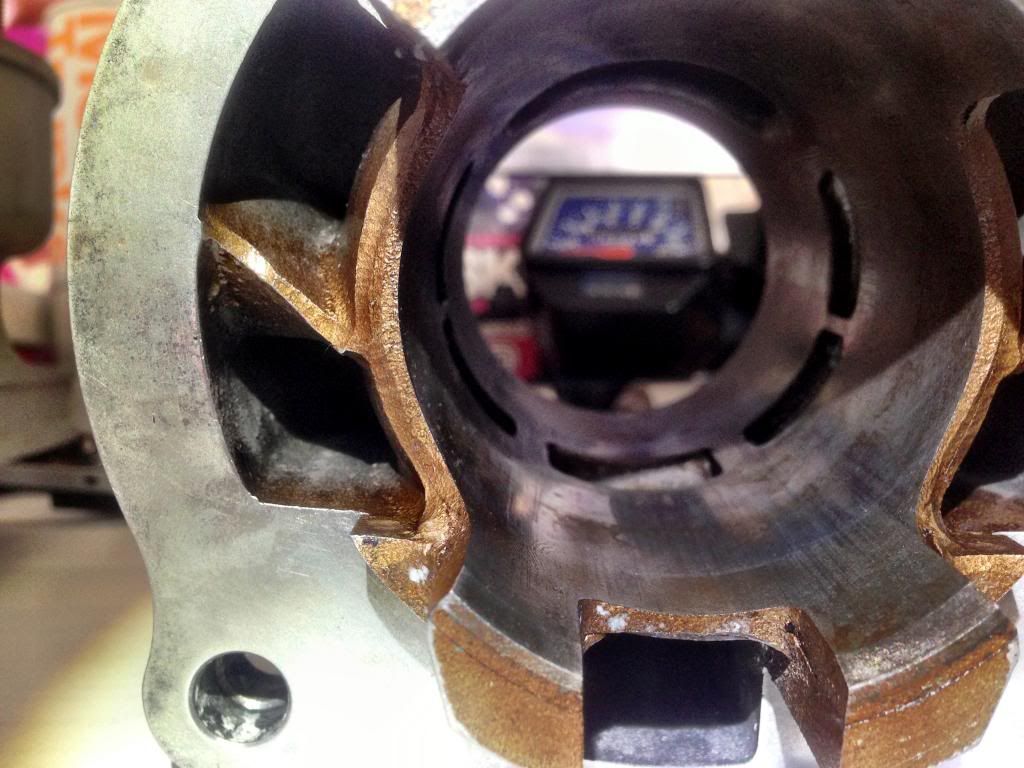
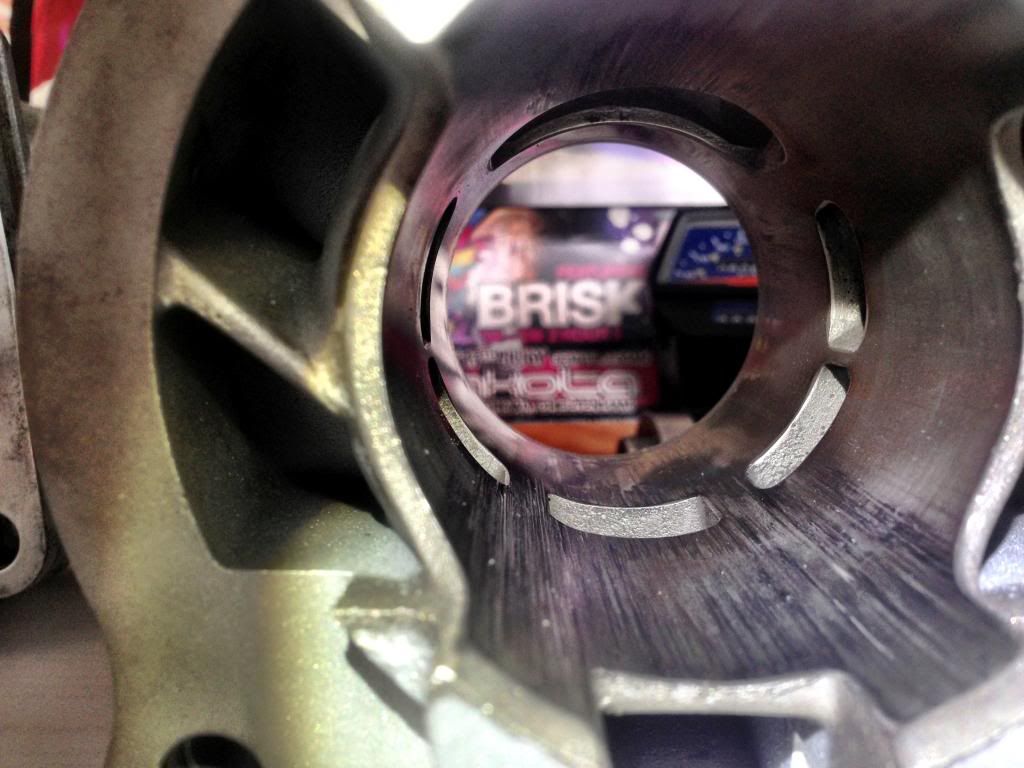
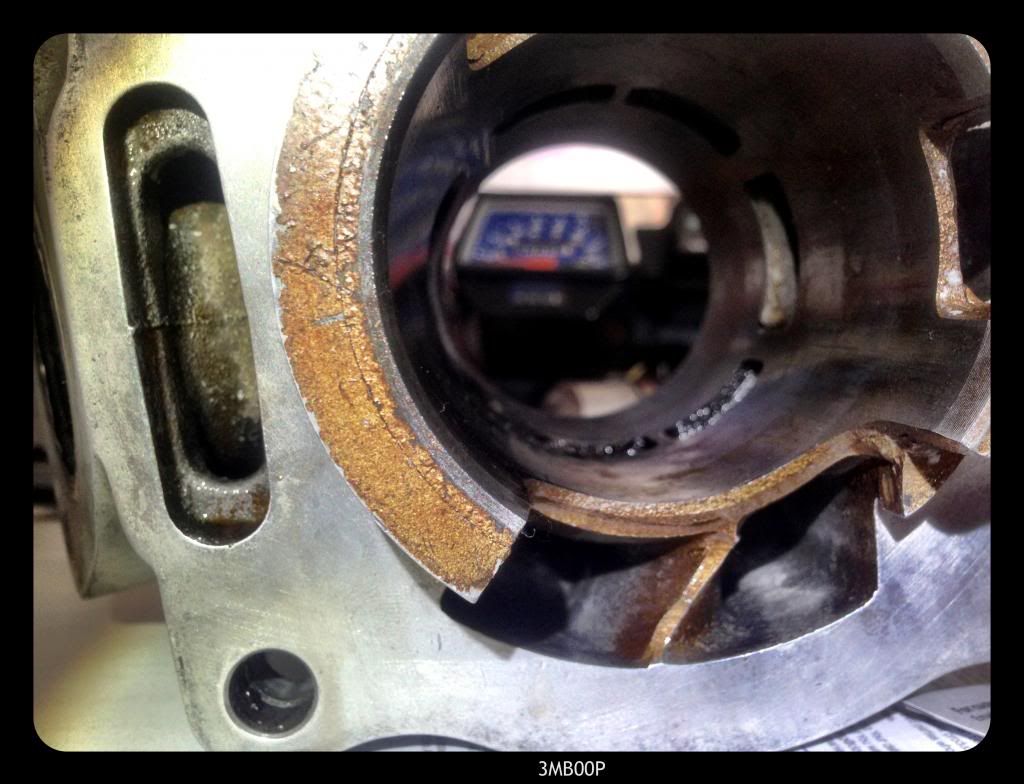
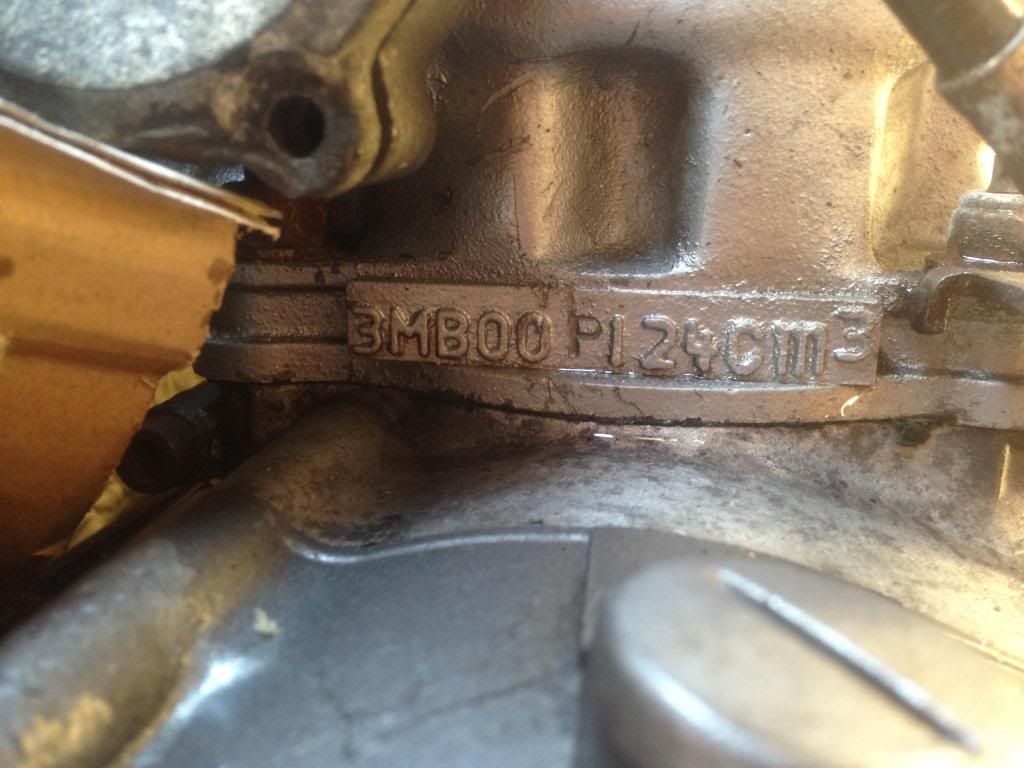
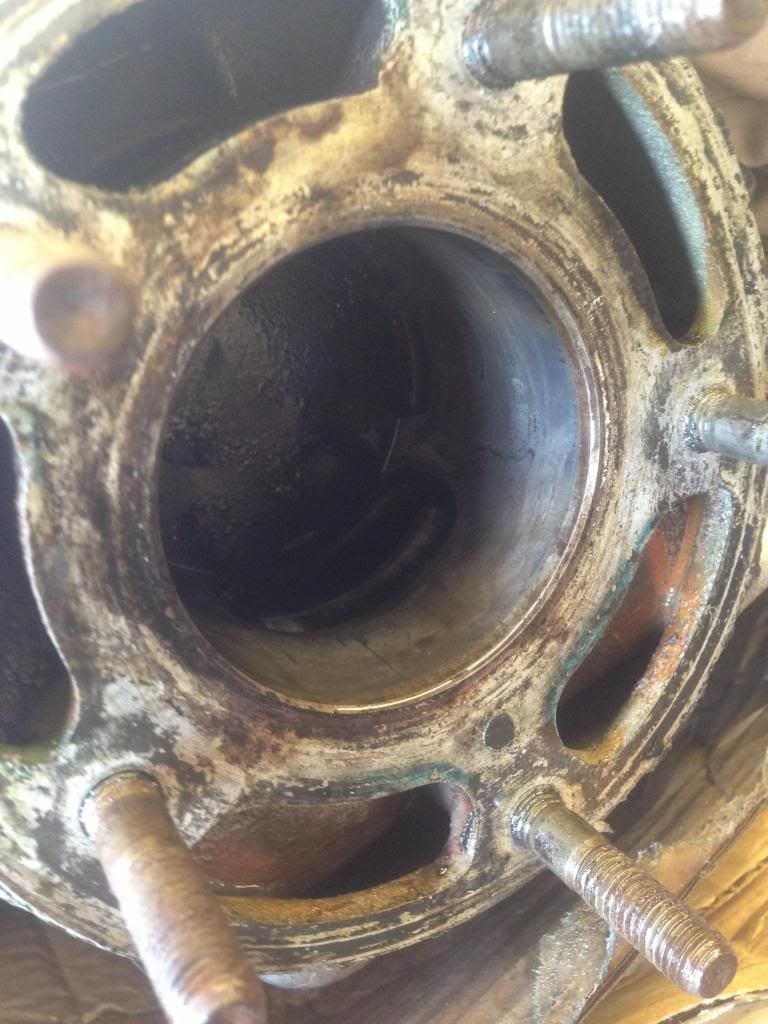
I don't know whether that's clear on the photos but those transef ports on the 3MB are DEFINITELY bigger. HOWEVER the 3MB doesn't look anything special. I.e. nothing that couldn't be done to the
4FU. Remember! the3MB00Pis not theTZR-RR SPbarrel. This is just a ported 3MB. So I reckon if you get the 4FU ported you could match this 3MBAnyway I'm really basic at this so i'd be interested in seeing what you guys think.
So very small update.
Paid and bought for a
VHSAFlat slide carburrettor 32mm. It's actually in very good shape for its year. Surface damage to the carb. Internals are semi good. The floats have a bit of corrosion on them. Nothing major. Will get round to replacing that. The slide chamber is good. Few signs of wear but nothing extreme. Definitely useable on the whole!
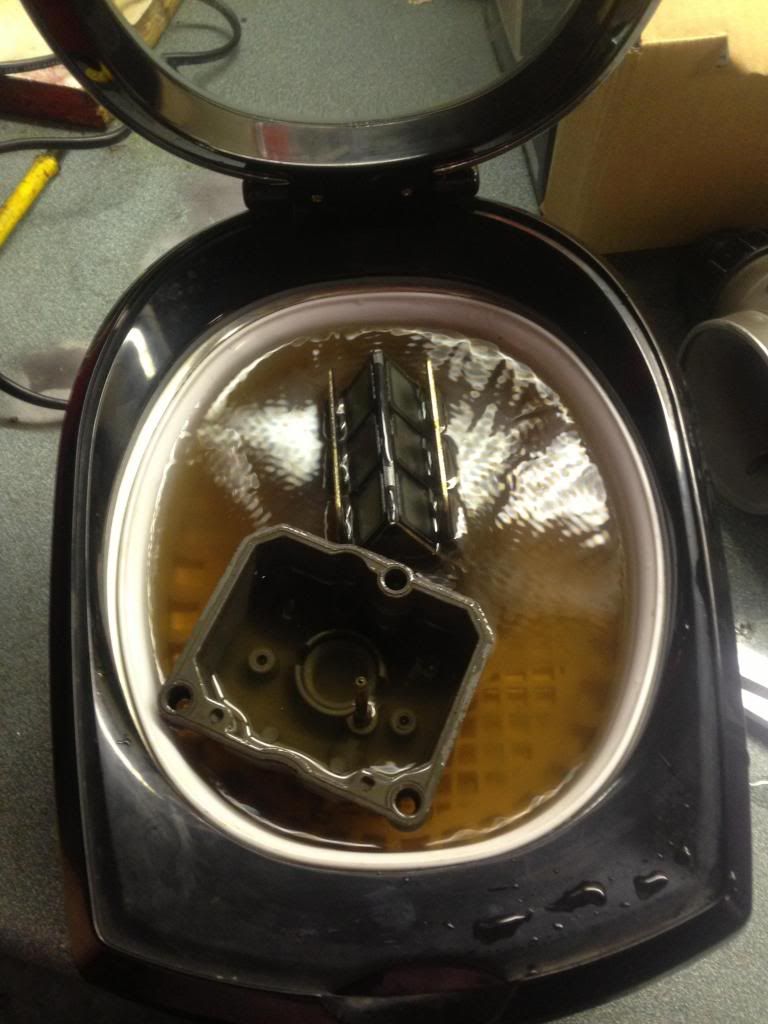
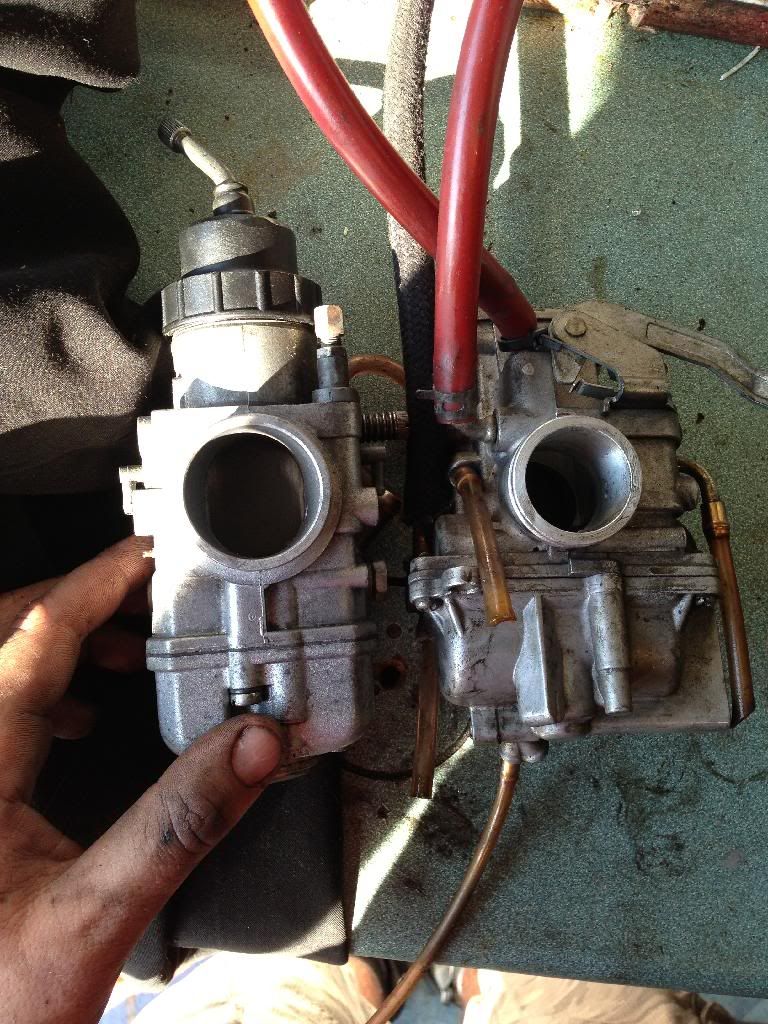
Use some `Professional Carb Cleaner'.
Actually did a nice job at removing grime. Then I found this in the cupboard lmao! I think I need a bigger one but I broke the carb down and cleaned it all up.
Looking good now.
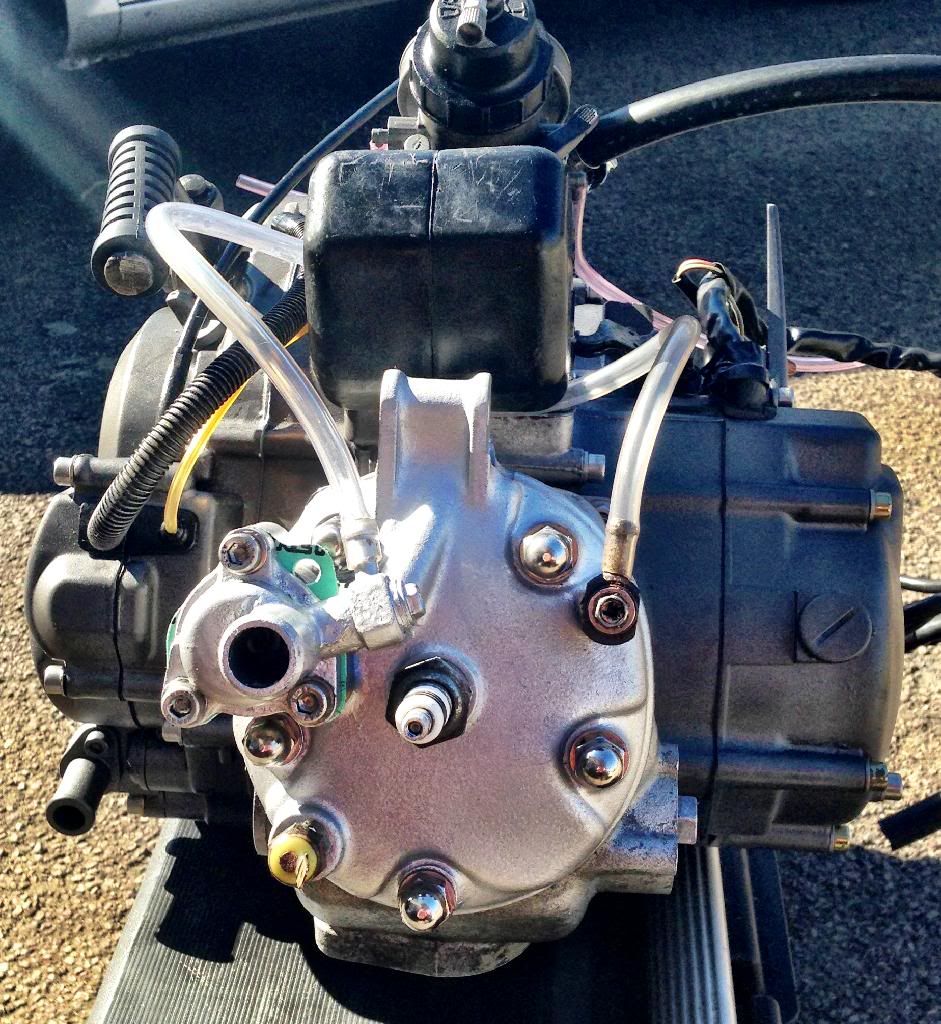
Also managed to get a 4DL inlet manifold which obviously can take the bigger carb. So pleased about that. Cost about £100 in total for the carb and the inlet and cage. Will strip the cage down and fit carbon reeds into it.
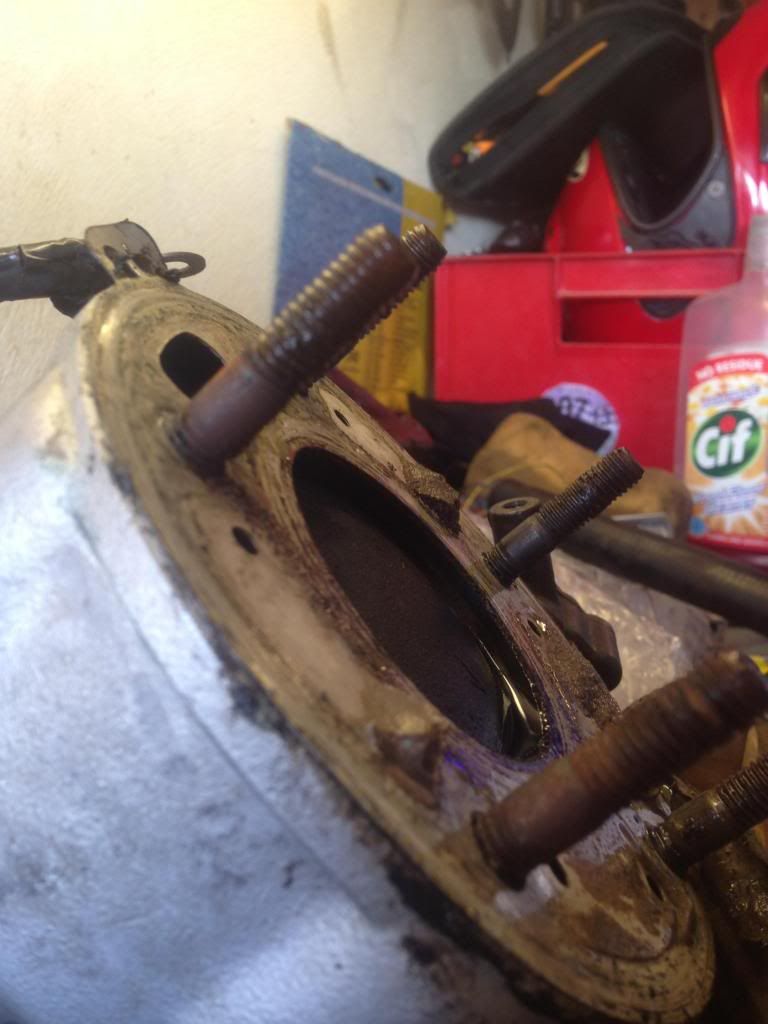
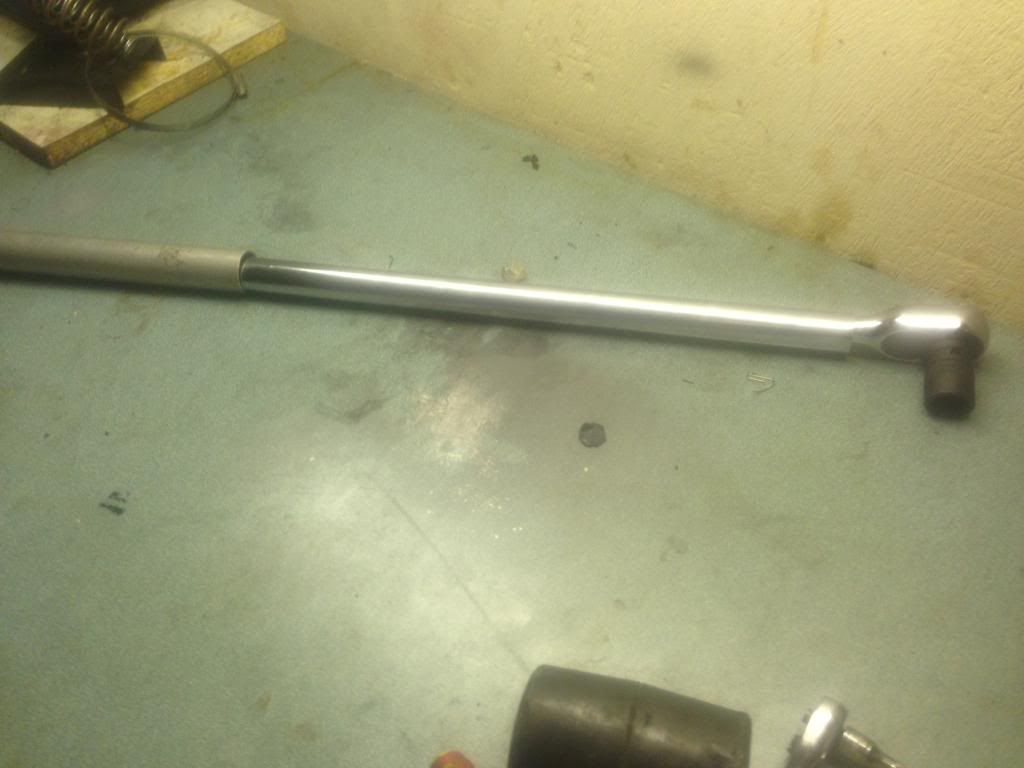
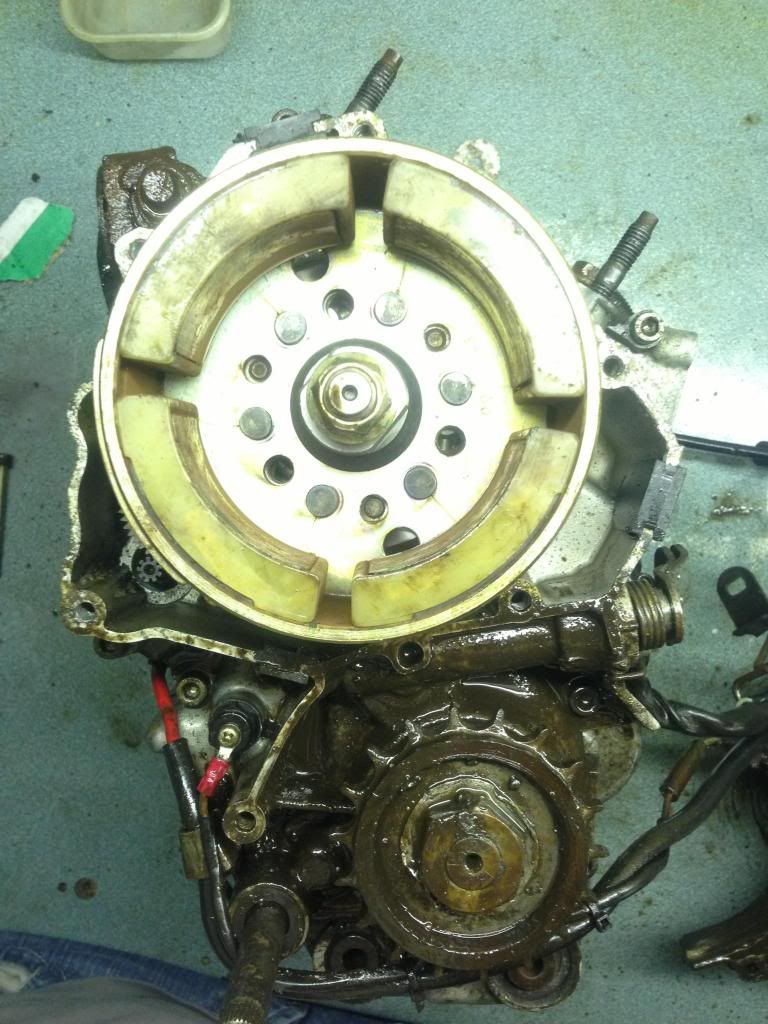
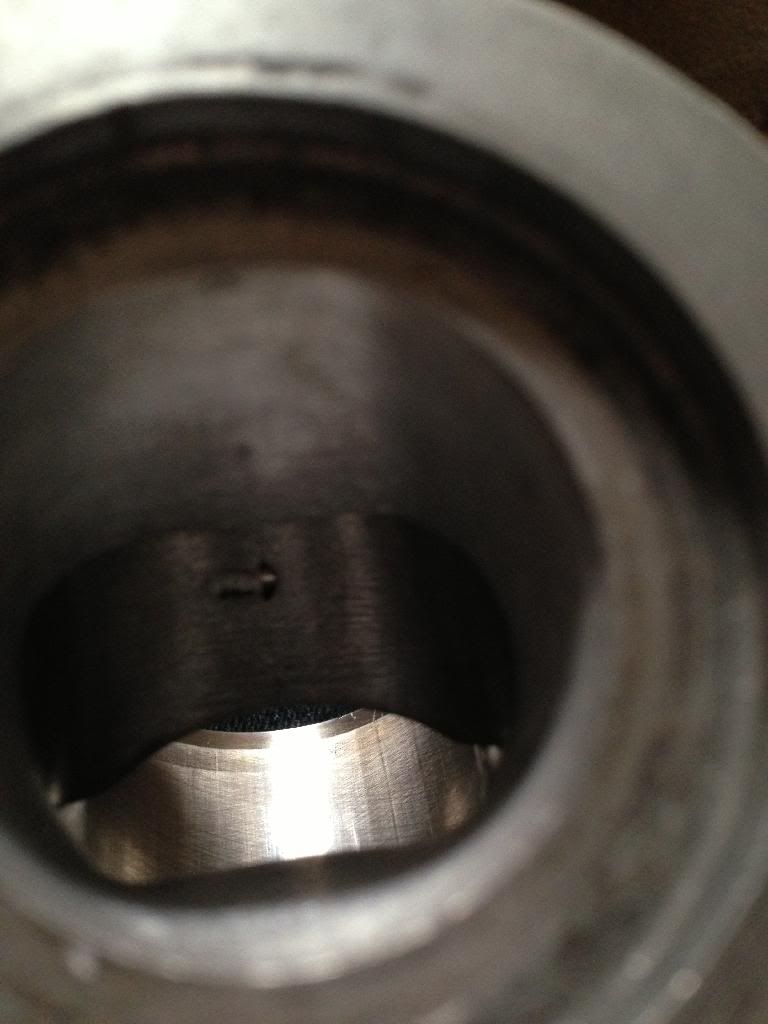
OMFG! How hard is that flywheel to remove! Look at the bar extension I needed to turn it!
Can someone tell me how that is suppose to go back on....? PLEASE!
Ok so haven't been able to do much really. A combination of scared, busy and breaking more than I'm fixing!
I'm not worried so much about dissassembling. I'm using a bit of brute force to dismantle it. This is NOT! Something I want to do once I've spent hard hours on it when it comes to reassembling it. So tips and advice much appreciated!.
What have I done so far.
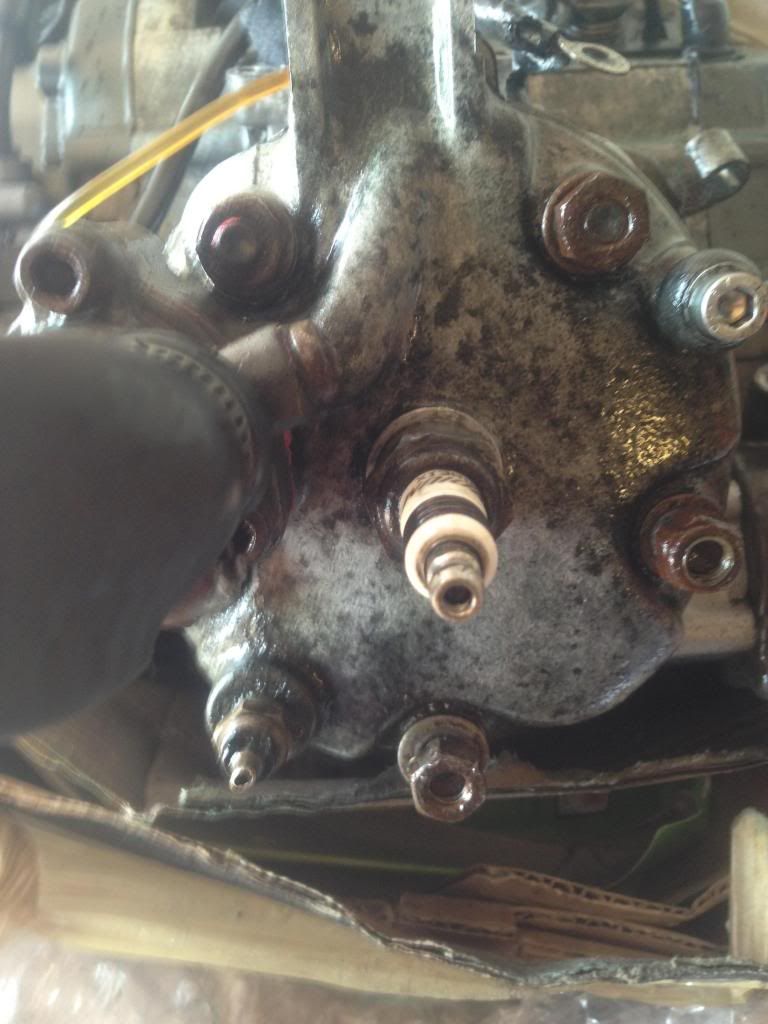
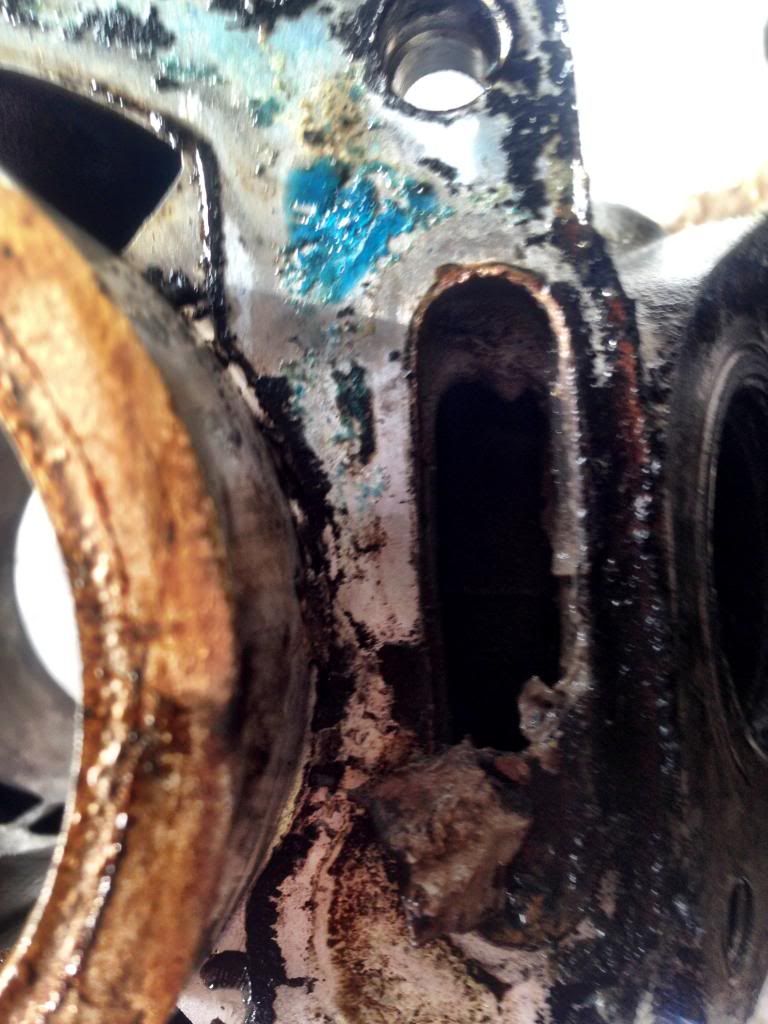
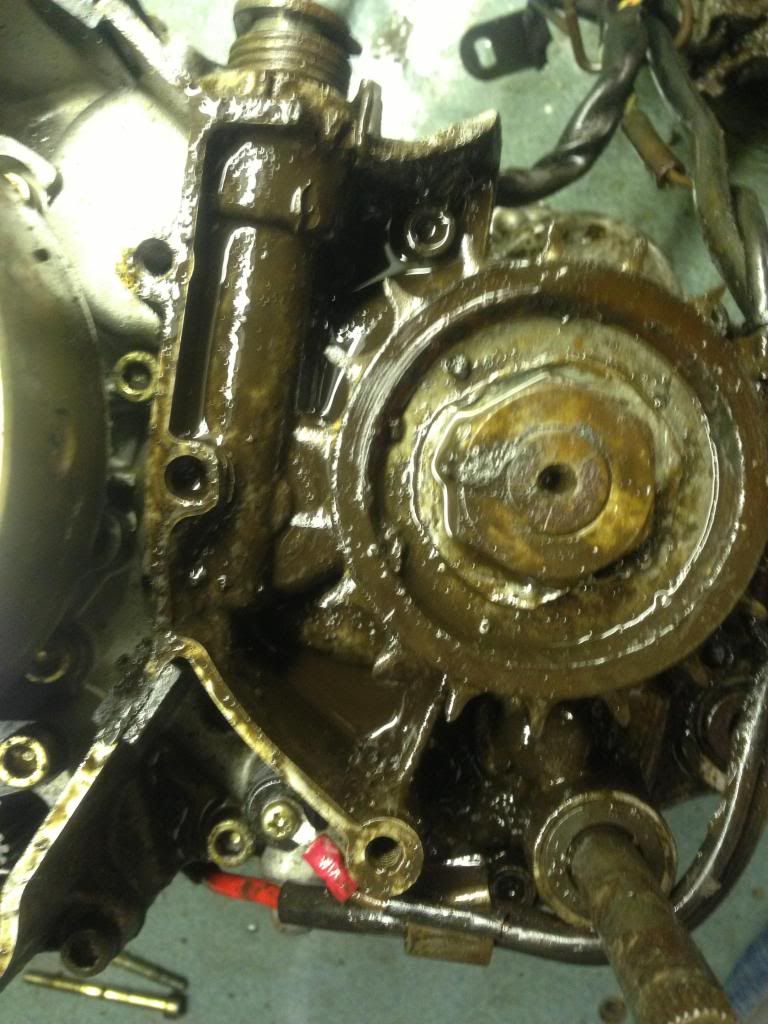
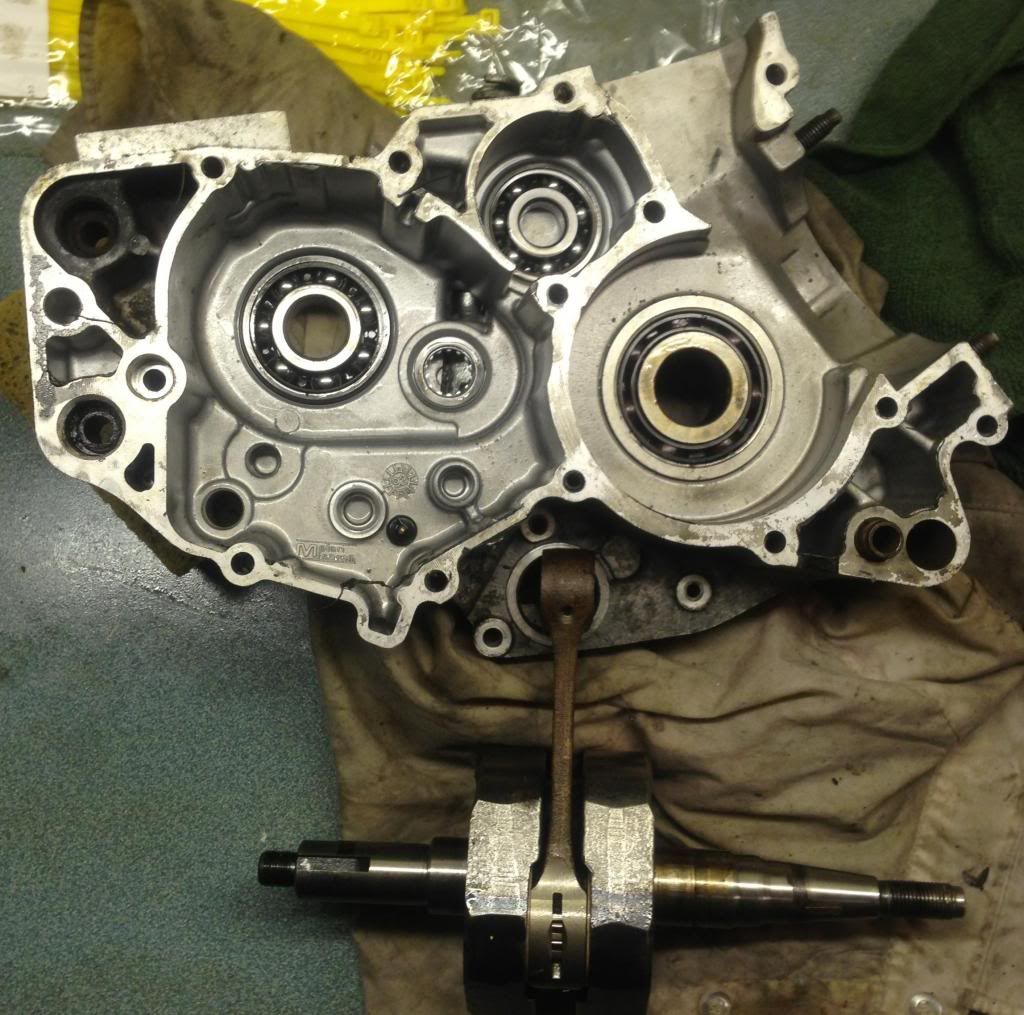
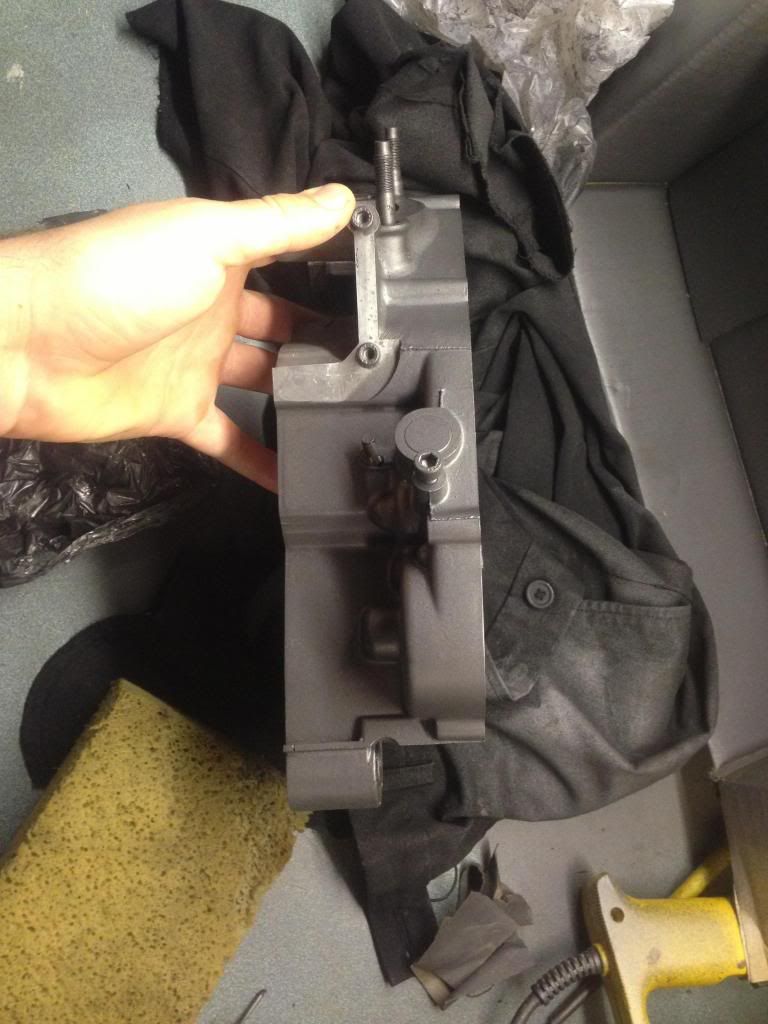
Well I've got LOTS of parts. Oil seals. Bearings. New con rod. Full gasket set. Lots of loctite. Lots of gasket tite. The engine has had a massive scrub down to remove all the surface oil. But it's absolutely engrained into the metal. Some emery paper and WD40 will sort that out. Got some heat resistant paint on the go for the cases. They were badly scratched and paint flaking. I'm pleased with the results. Fingers crossed it's durable.
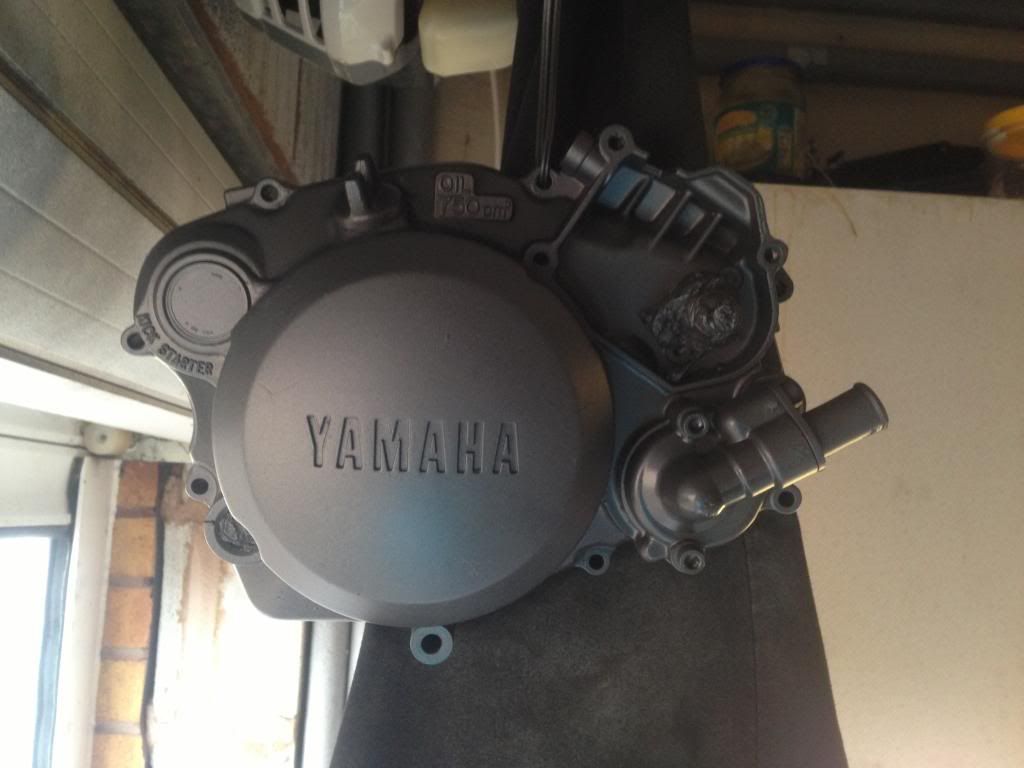
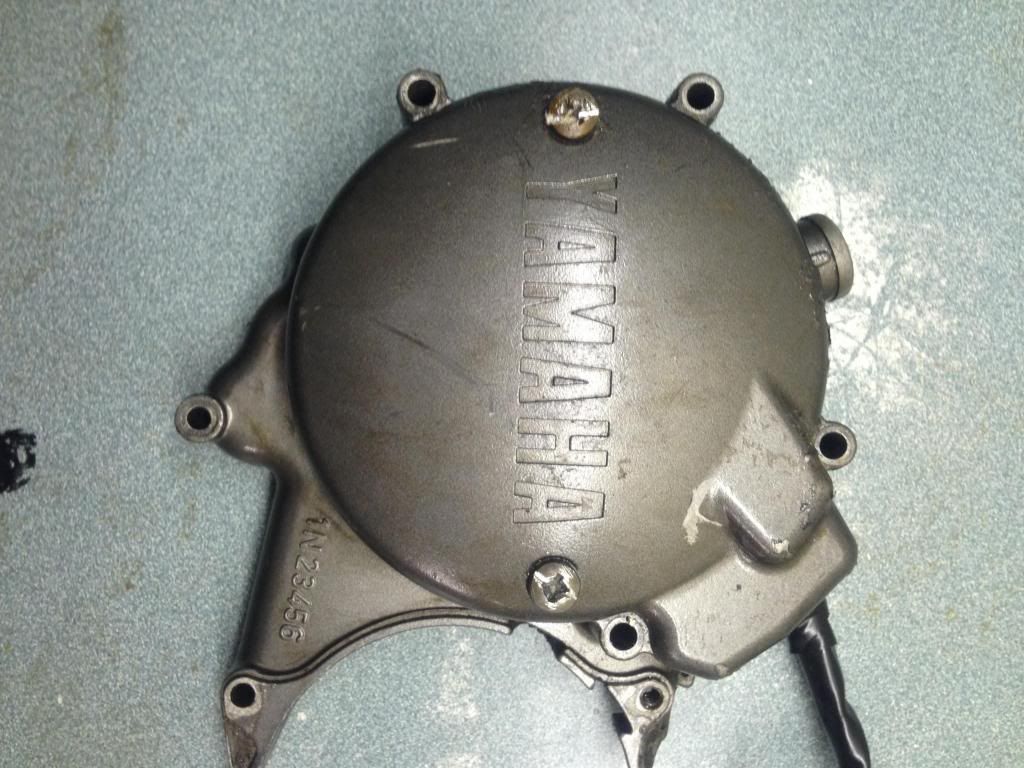
Sprayed the generator cover too. No photo but similar job. No runs so i'm pleased.
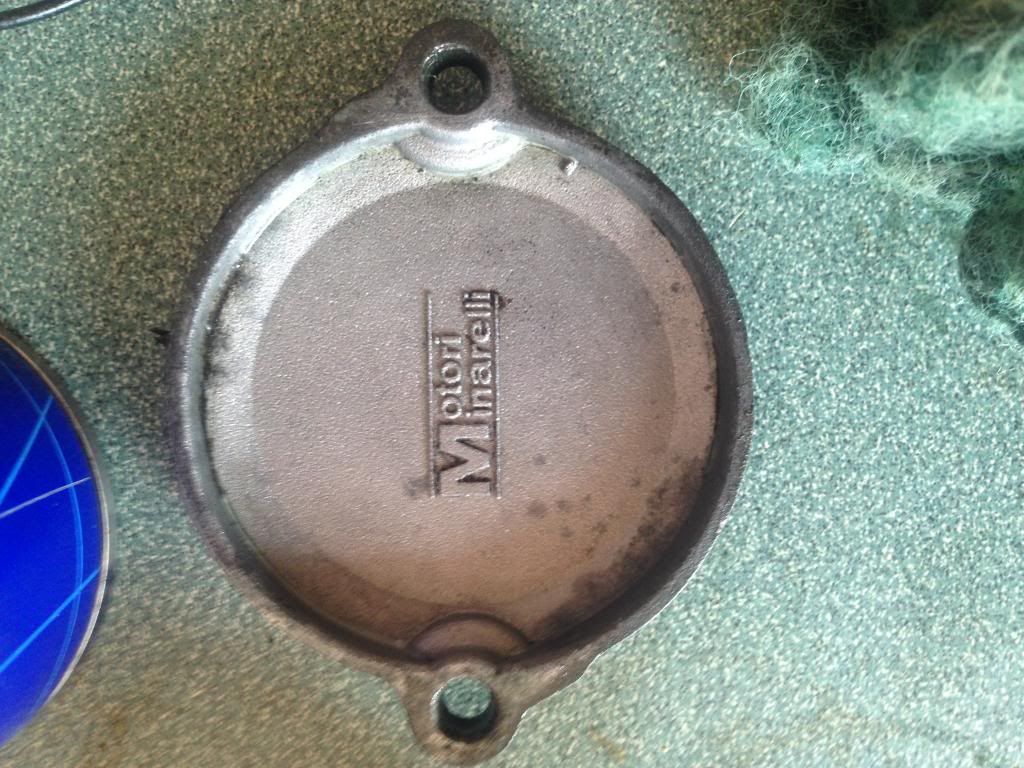
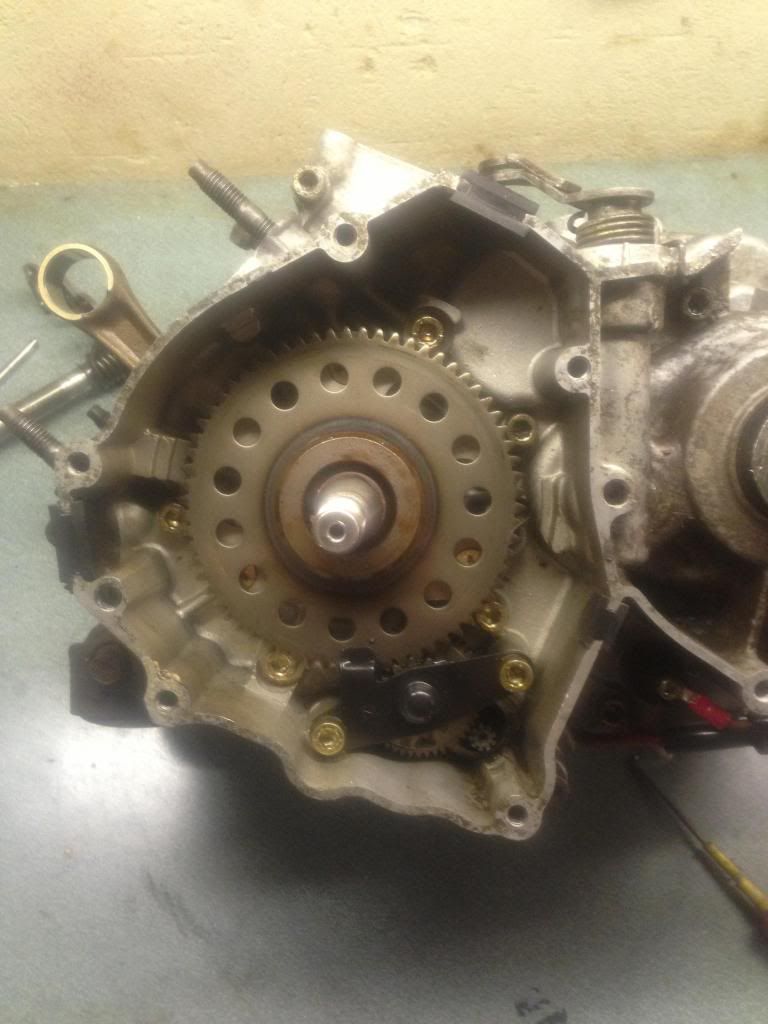
Clutch dissassembled. Note the
MinarelliStampsThat fly wheel was solid to remove! Literally thought I was going to break it!
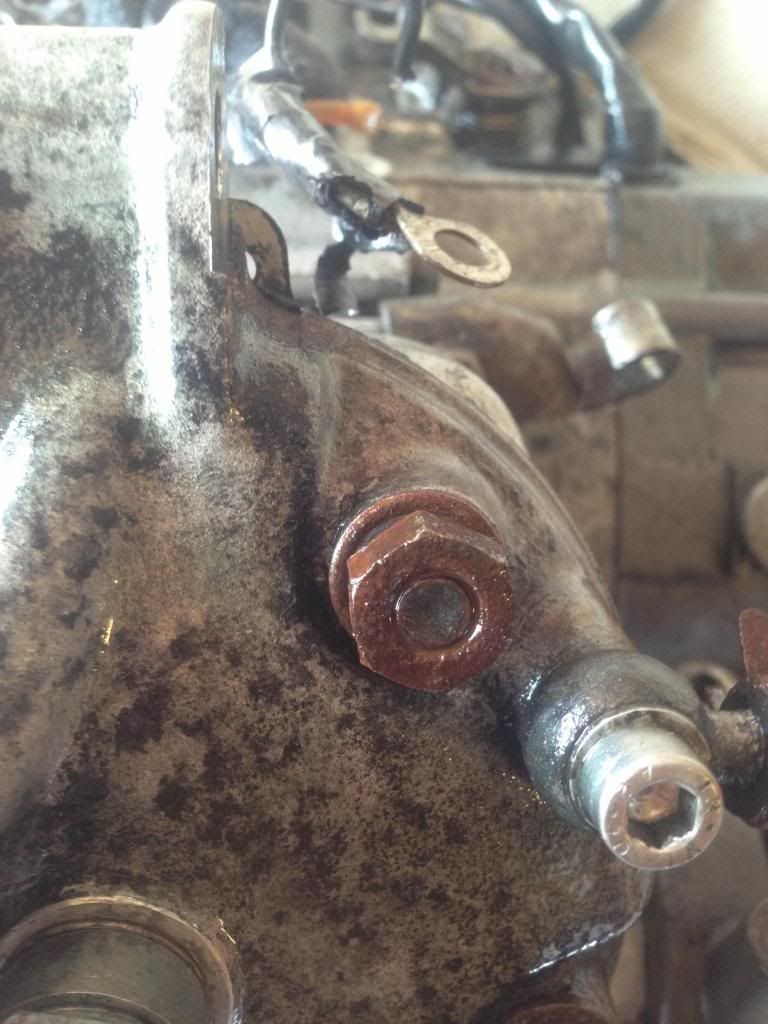
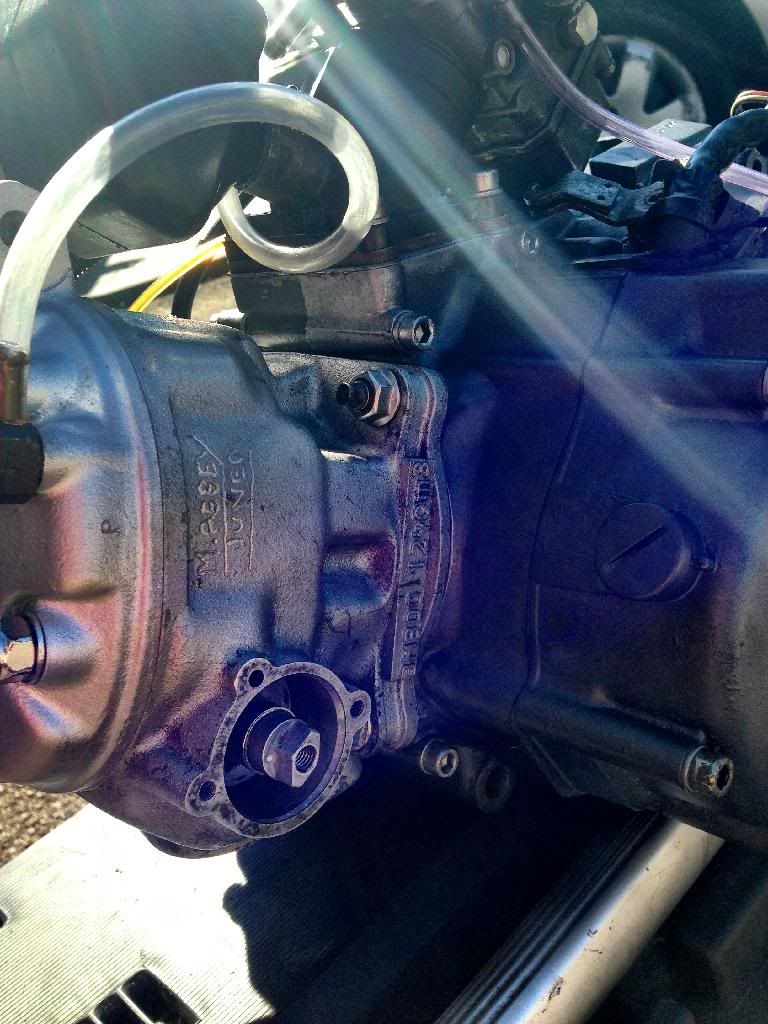
I get the impression this engine has been dissassembled before. Not many original bolts about. But I don't care what they've done. Full engine rebuild or whatever. They've done a SHOCKING job and I'm going to make sure a proper job is done on this. No time limit so who cares.
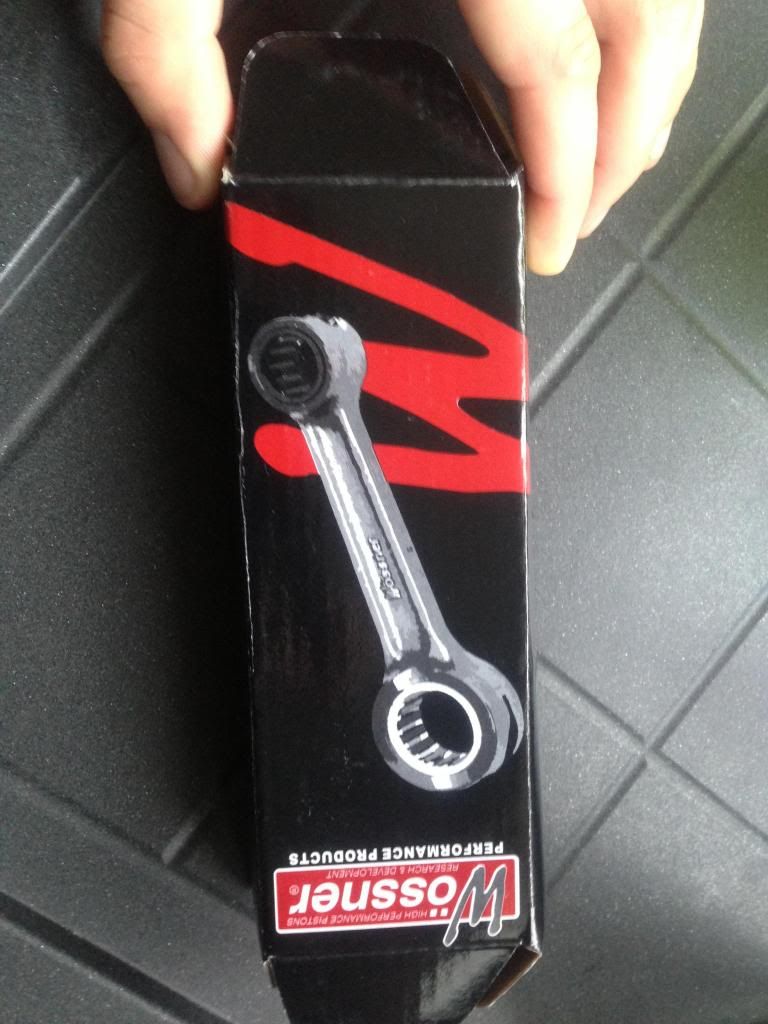
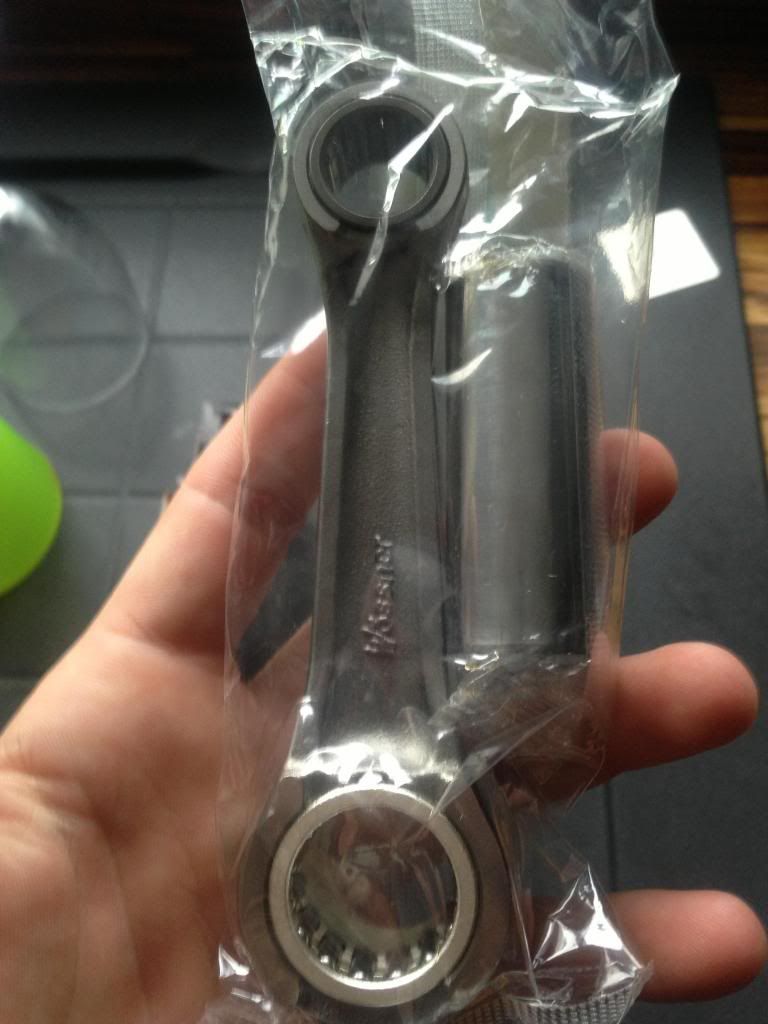
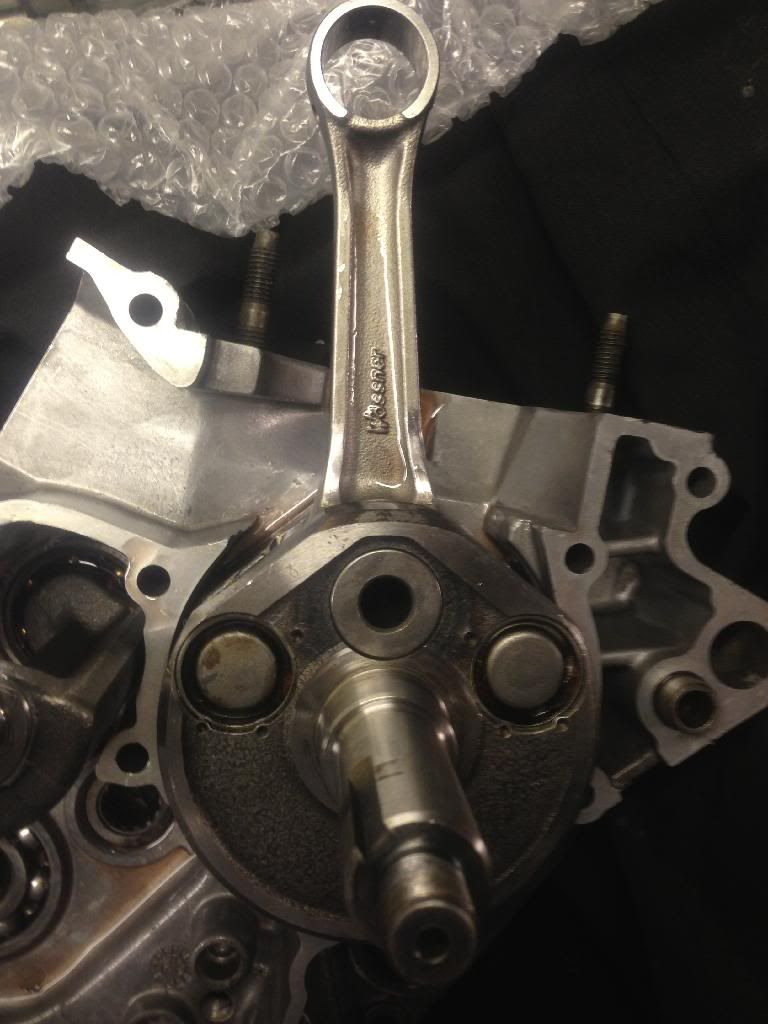
Sending the crank to
Yamahafor a Rebuild with theWossnerconnecting rod. Before you wise allects say it. I'm aware that the £30 one from PMJE would do exactly the same job. I'm aware that i'm paying over the odds for the name. It upsets me to pay so much for something that could be bought for £30. But on the same note this says High Performance on the box!!!! Lol. Sad I know.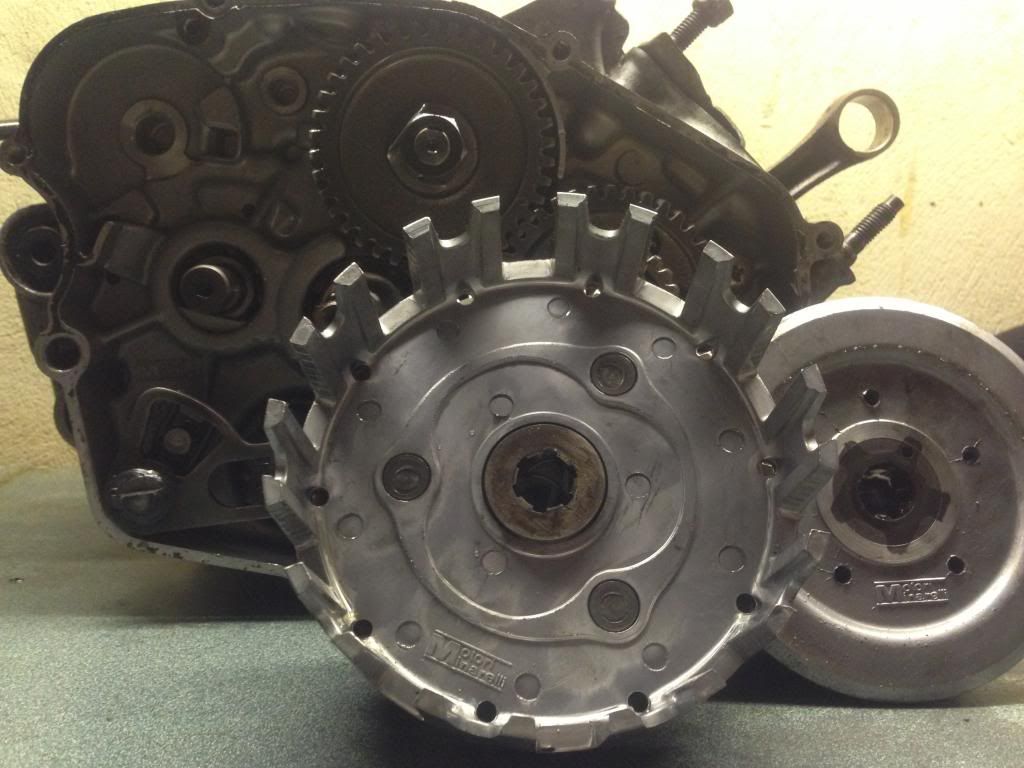
Well it's in pieces. Just need all those bearings ordered. Clean the shell like mad! Spray it. Rebuild it. Expect lots of updates in the next couple of months.
There are a million and one photos of engine rebuilds. But another one can't hurt. Purely for reference for myself and othres that want to rebuild a TZR 4DL motor!
So no more talking, here it is.
So picked it up to today. Extortionate prices from Yamaha it's unreal. A whole £20 to split the crank. File down the connecting rod and then to rebuild it. I mean what a joke!
Nah jokes I'm over the moon with the price, especially from a Yamaha dealer where the technician understands that it's a belgarda crank and is measuring tolerances to that specification is just really good.
Any who. More photos of the build.
BelgardaRod (Can't get a hold of those any more )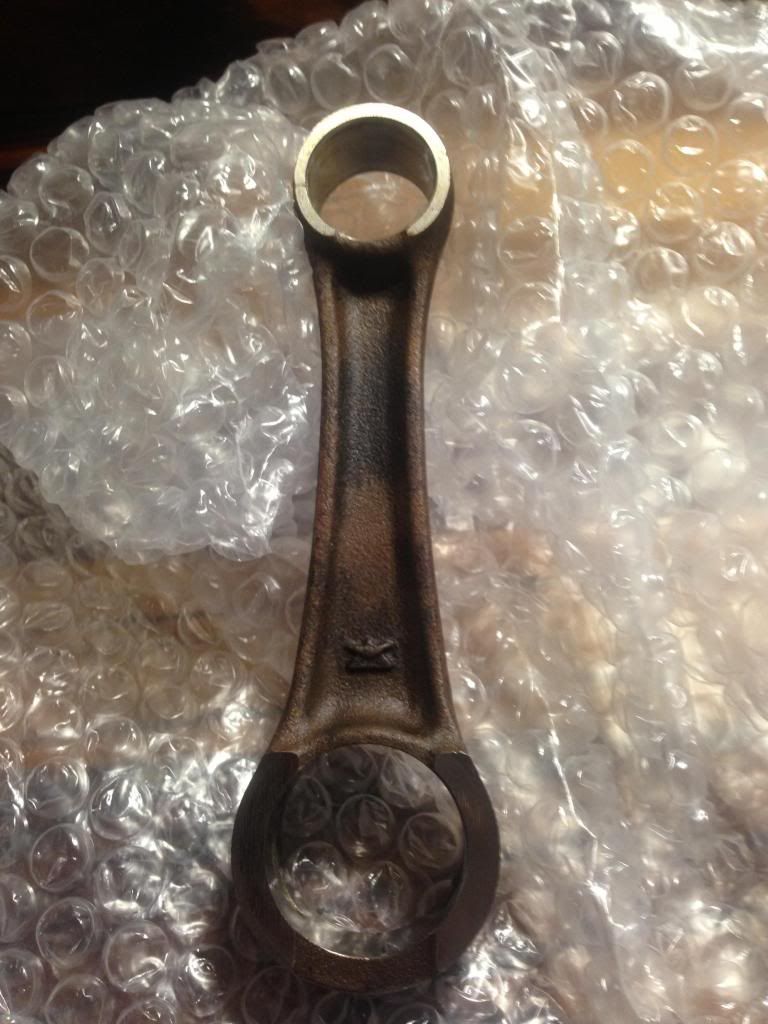
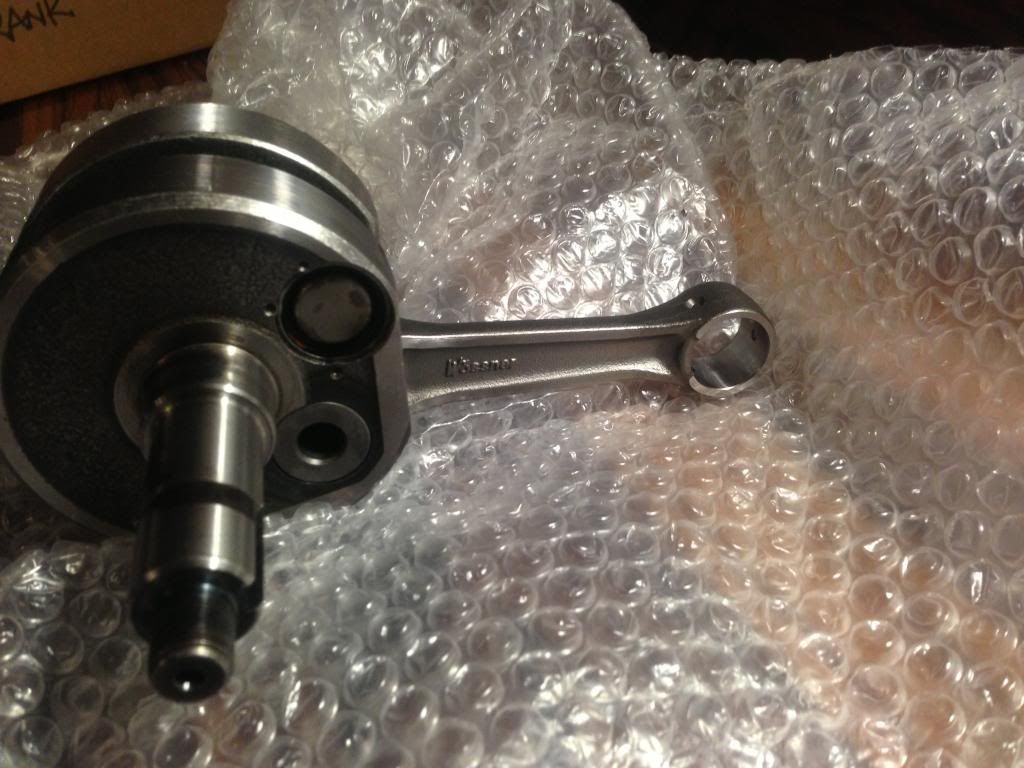
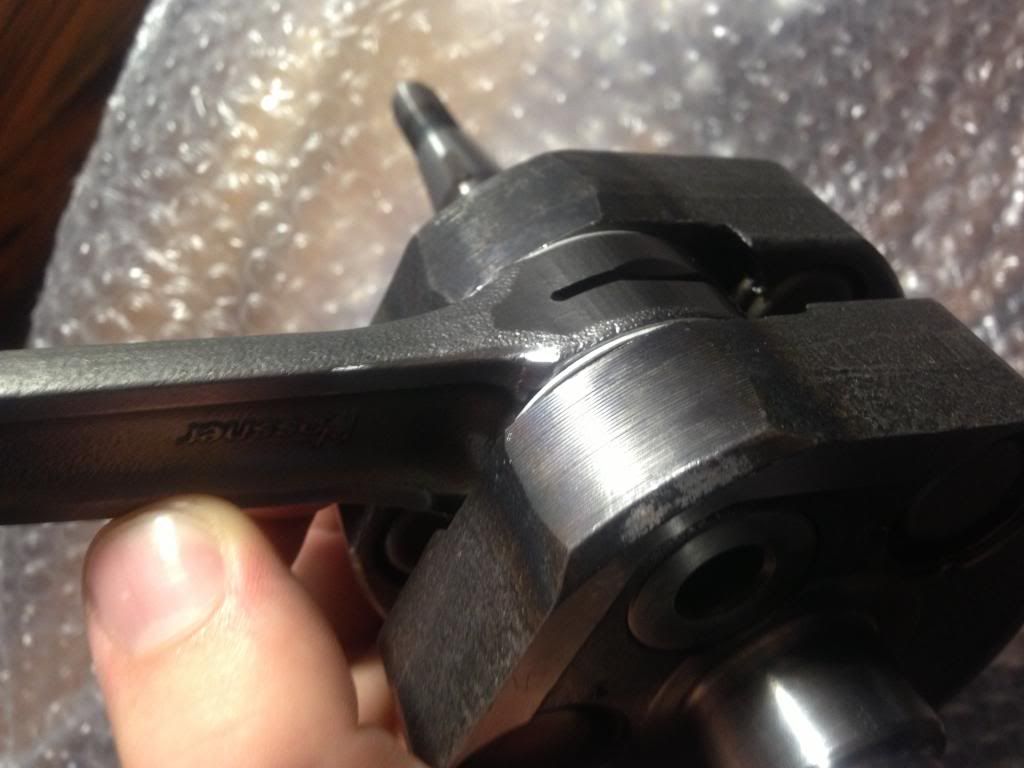
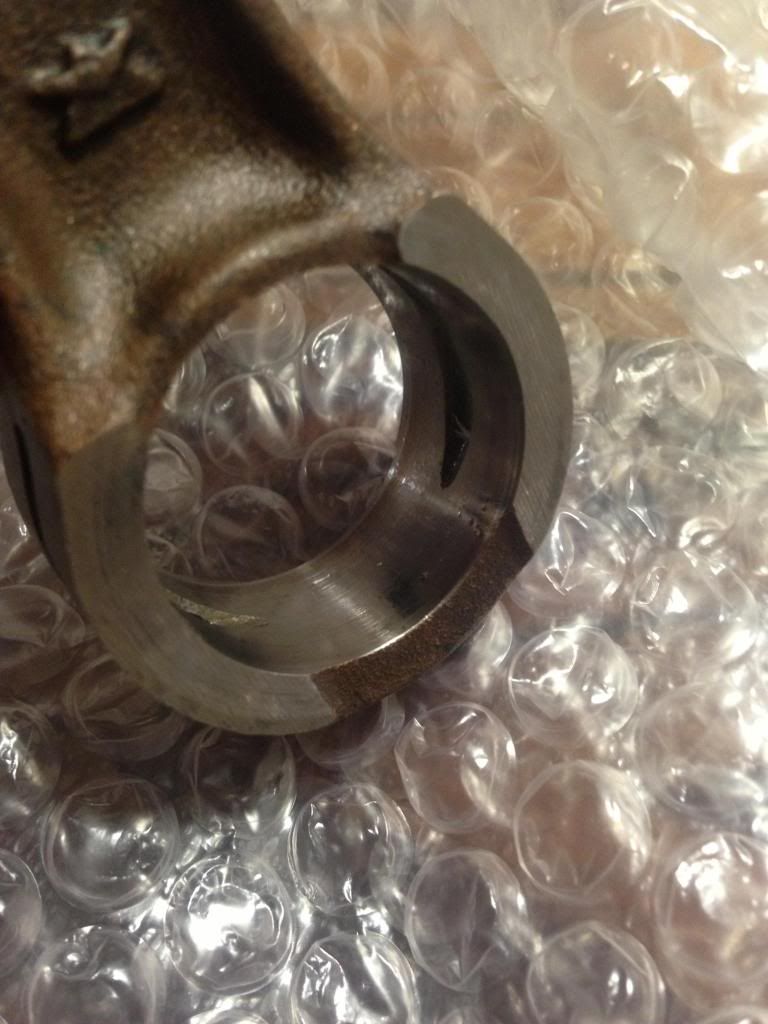
The technician said that it wouldn't have lasted for very long without a rebuild. It's hard to see from the photos but you can just about to start see scoring along the big end eye where the bearings had begun to spun. So I'm pleased I did do it. Cracking bloke in there loves his two strokes and I get a real satisfaction from talking to another two stroke enthusiast who has a wealth of tuning knowledge.
The crankcases just need hardening in the over for 30 mins. Bit scared about putting it to 160 degrees though

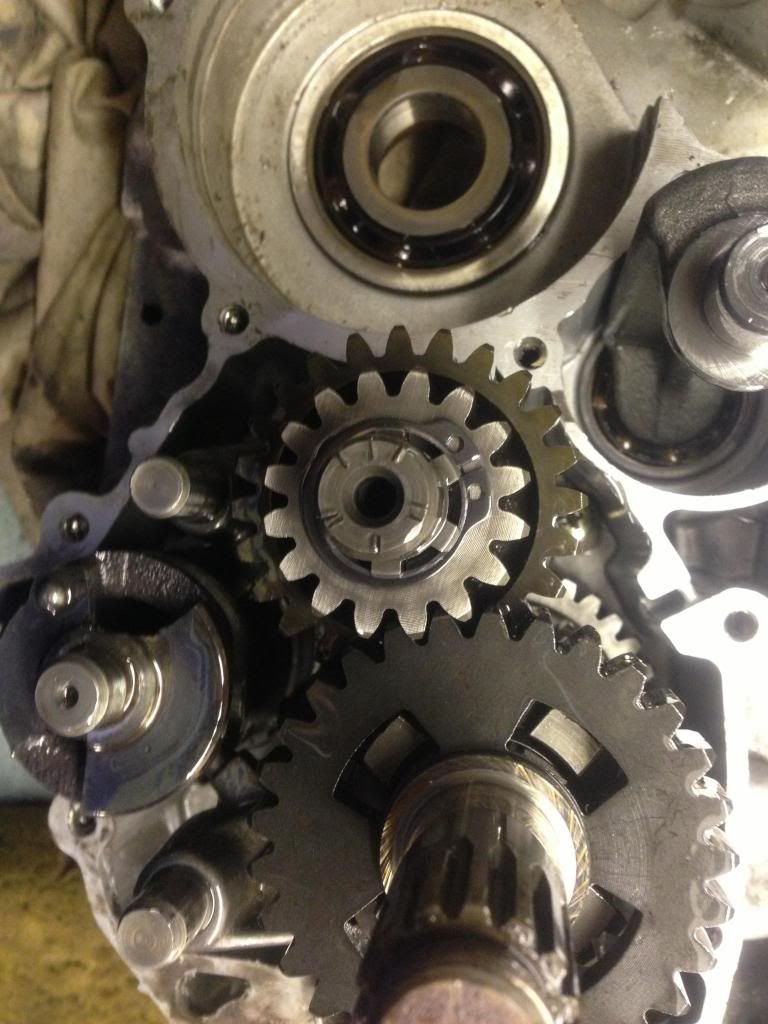
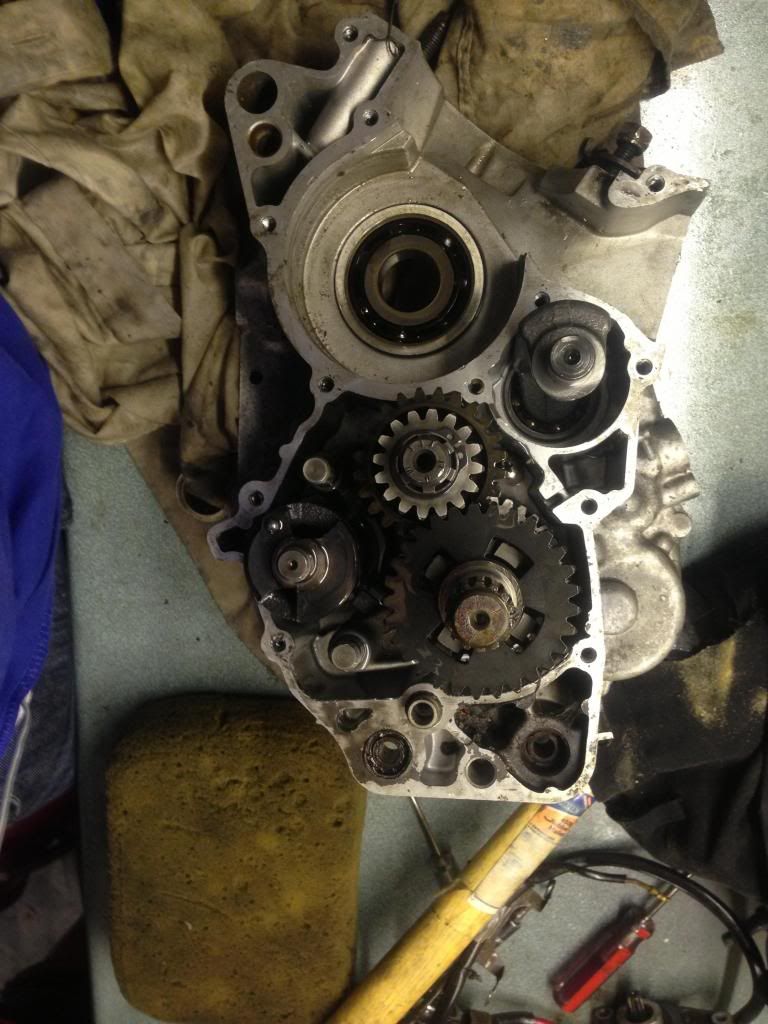
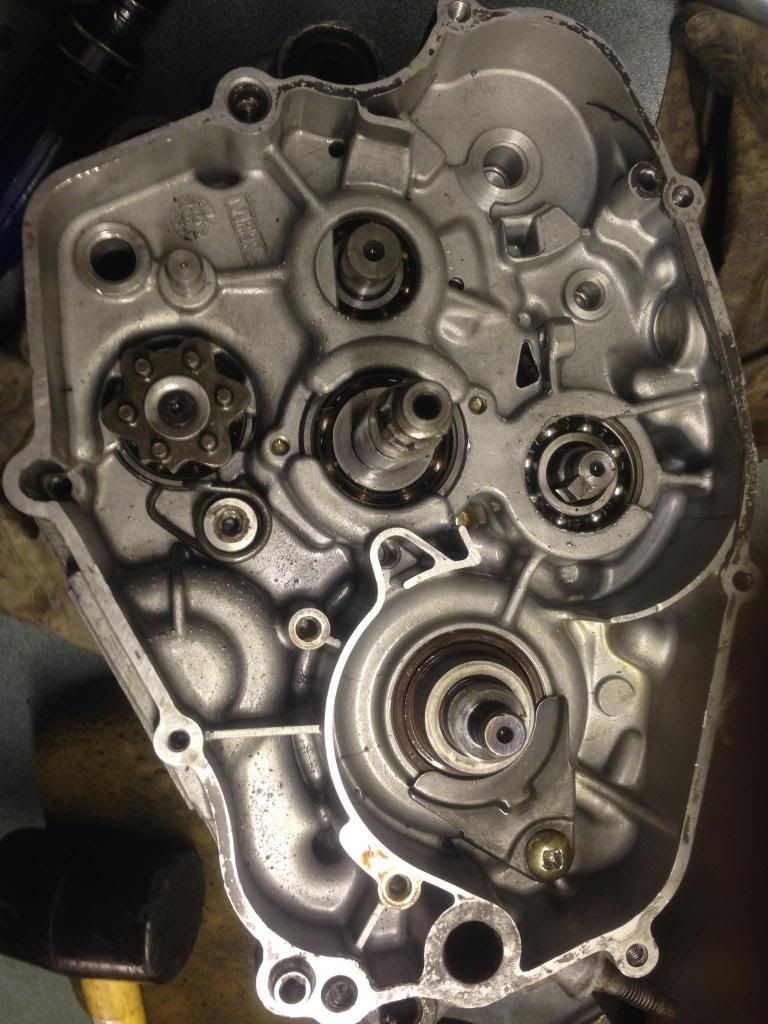
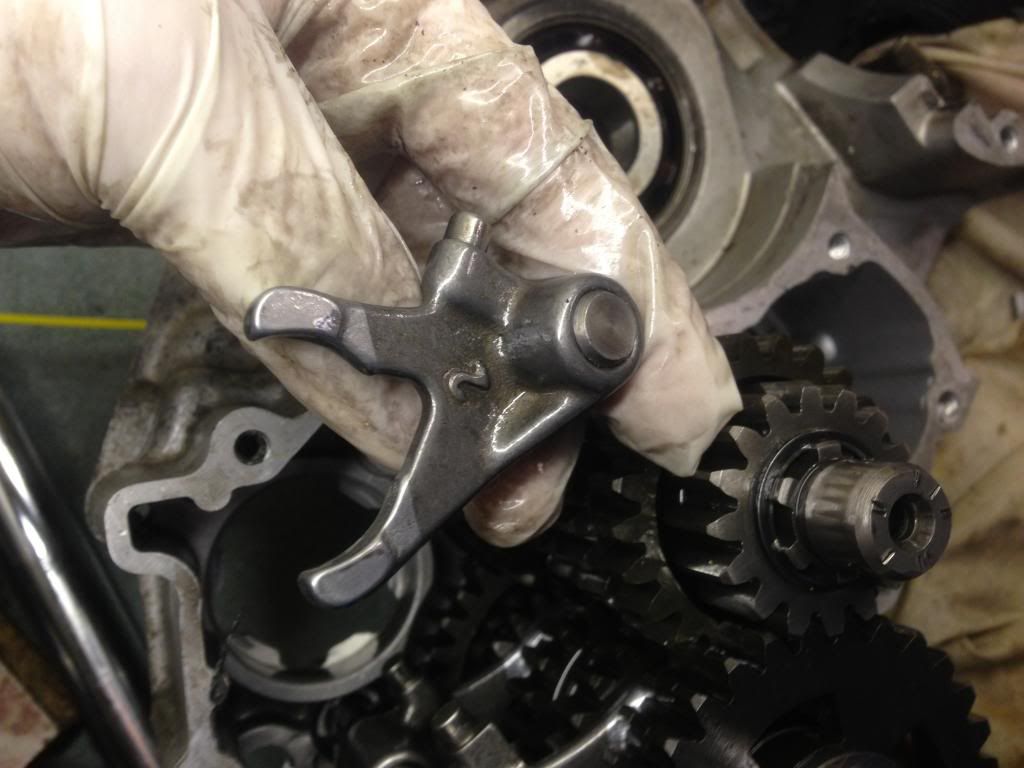
Okay. It's been a long ass while but finished work for the rest of the year now so have spare time to crack on. I've been worried about this part for a while not....not sure why?
It was surprisingly easy and satisfying. Can't say whether it works or not. It seems to select gears and the crank rotates. So that's some. I genuinely thought it would take longer to do this than it has. Just followed the Haynes manual and working through it slowly and carefully.
Seems legit. I only stopped because I actually have reached the point whereby I'm putting it back together but don't have all the new shiny bits for it yet. So that's new.
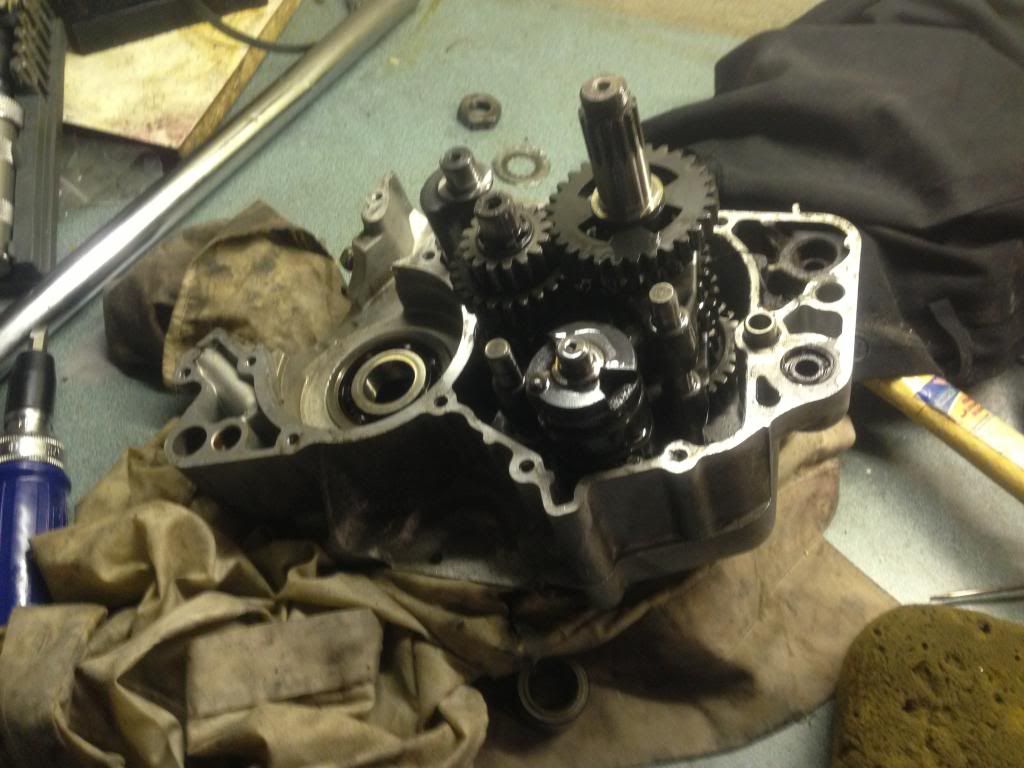
Nuff the talk here's some pictures.
Gently tapped the rebuilt crank in.
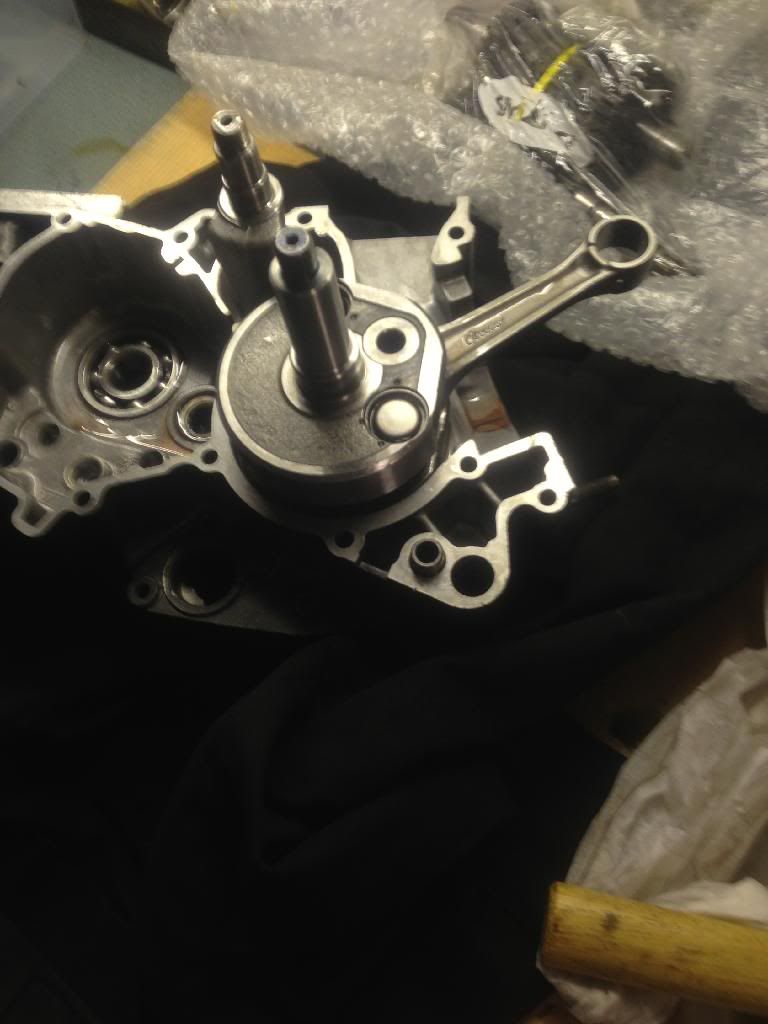
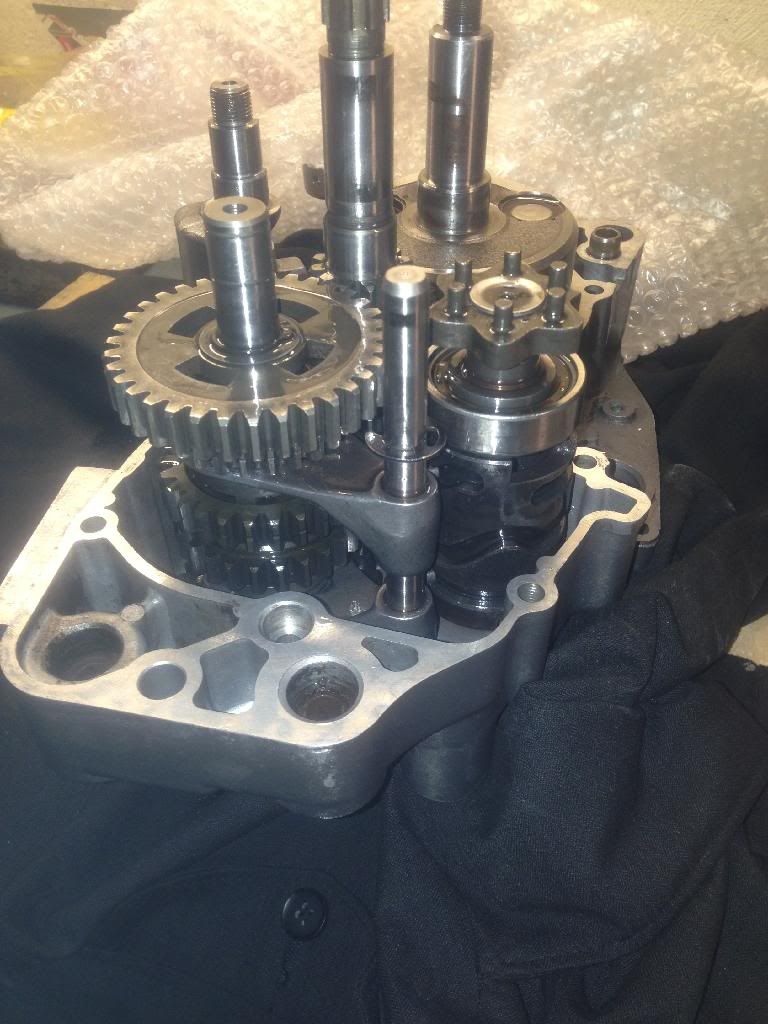
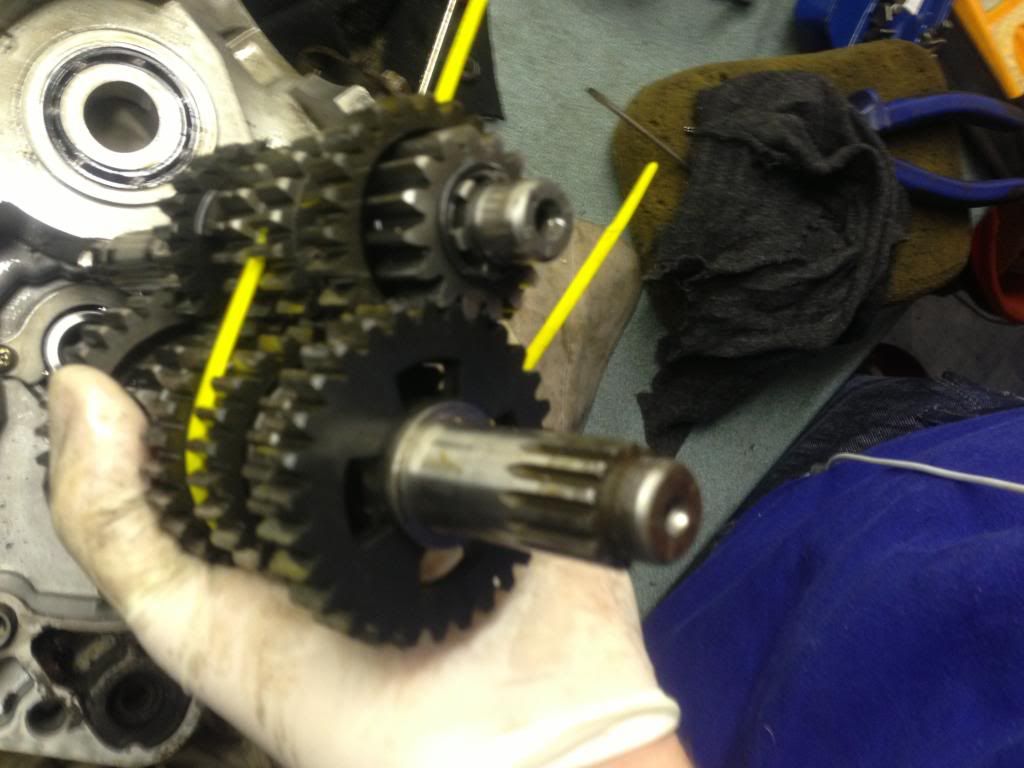
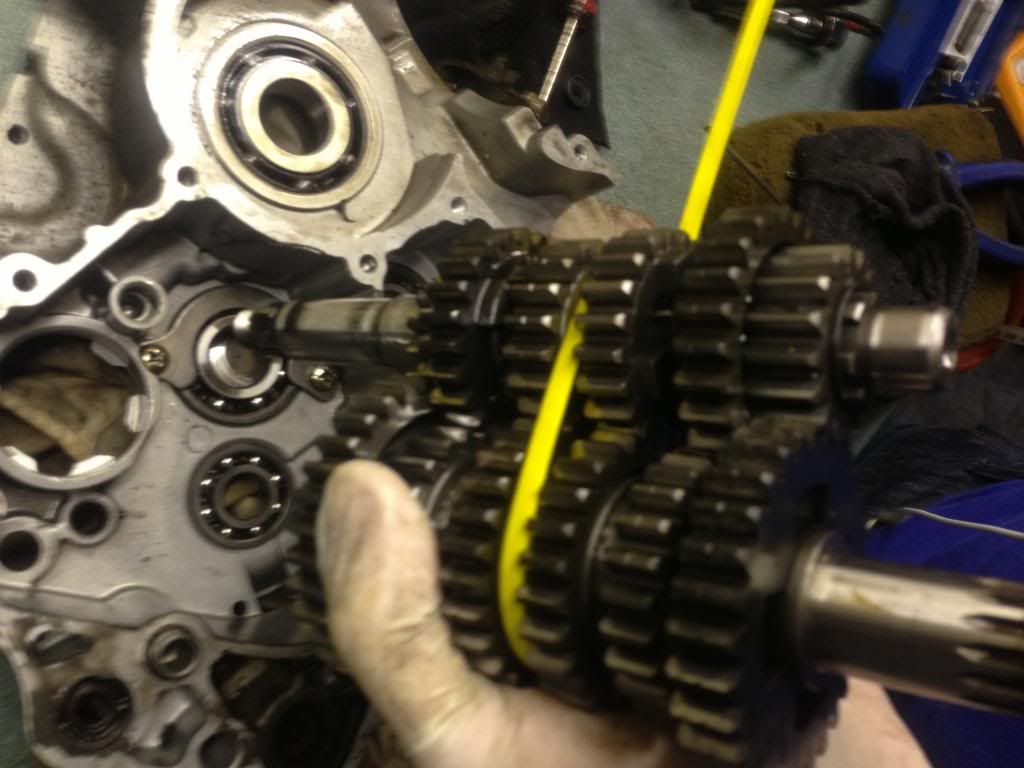
I have been so worried about this part ^^^^^^^^
Wondering how I'm every going to put that back together. Well I cable tied the gears together BEFORE I TOOK THEM OUT. Seemed to work a charm. They dropped straight in no problems.
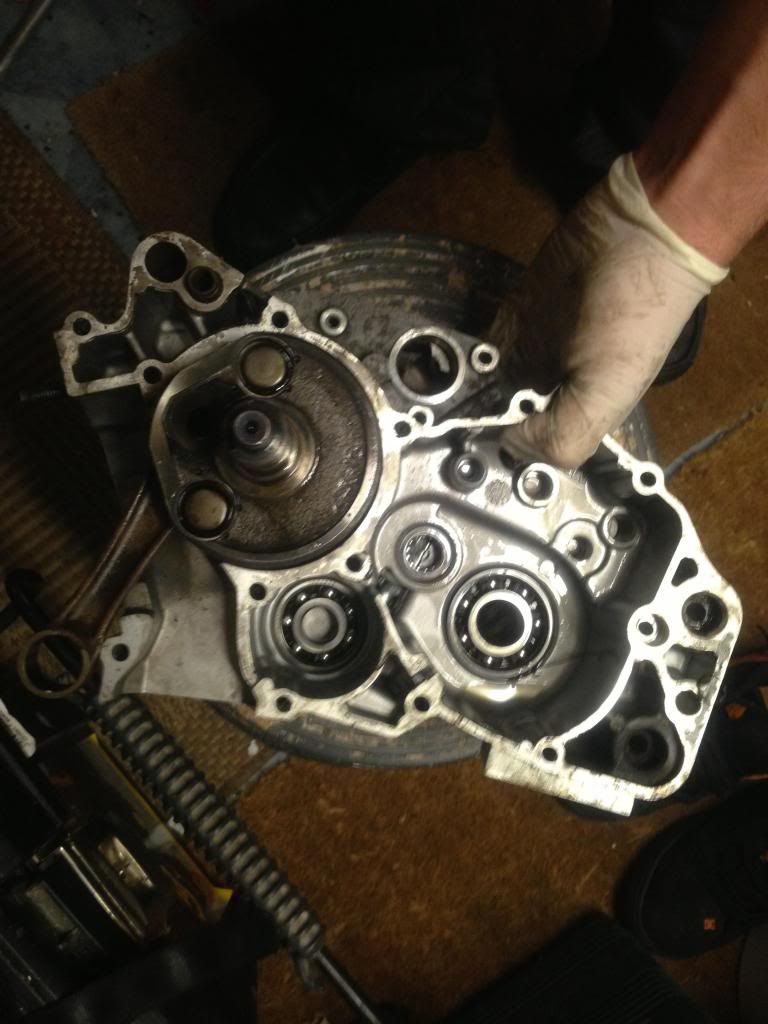
Then the forks... well that was a little tricky to get my head round cause I for got to take photos but Haynes explained it very well. THANK GOD!
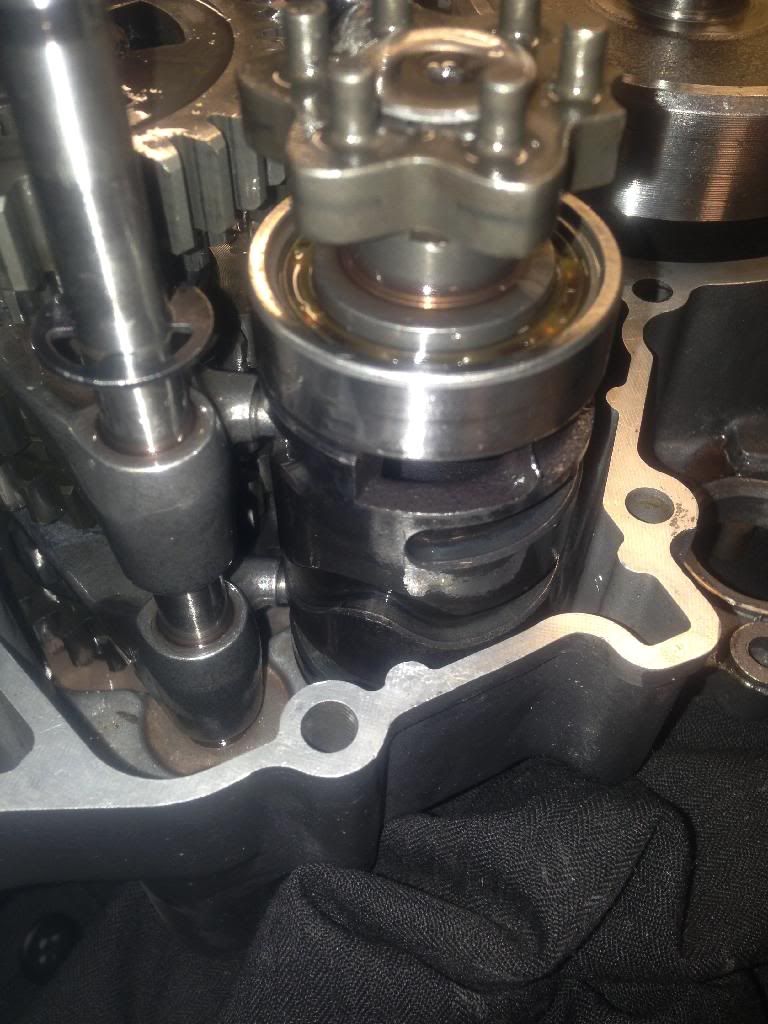
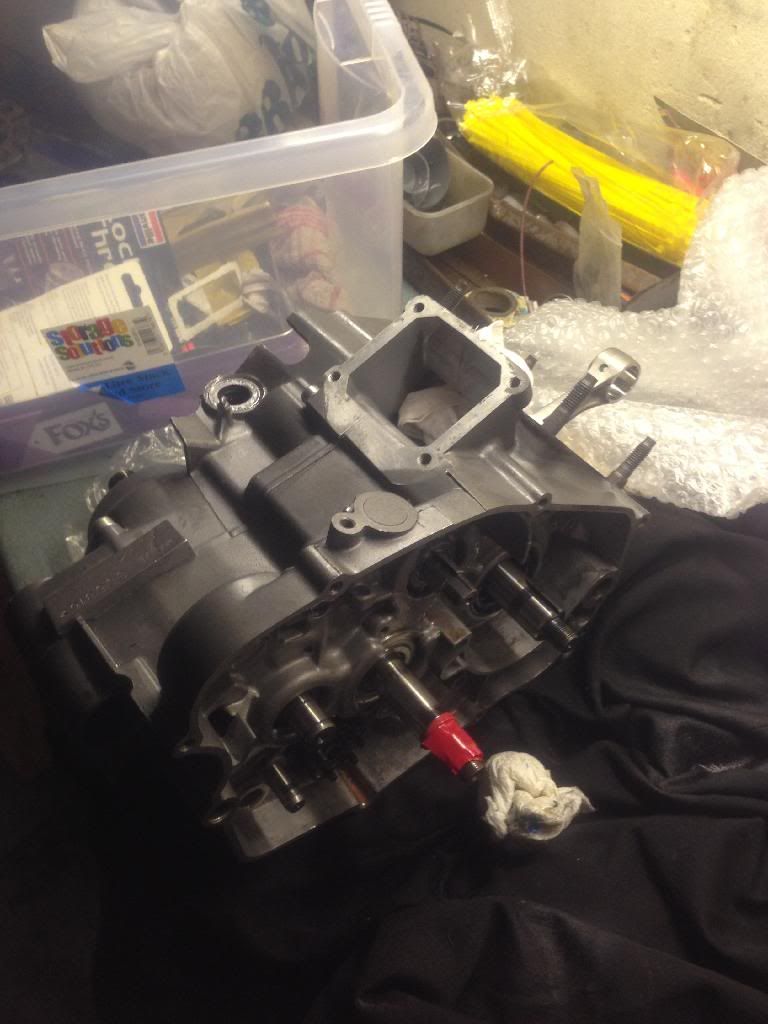
Getting these little bastards in took me a while to realise that you need to remove the support first then put it back in once you're happy with it.

Advice on how tight those crankcase bolts should be? My torque wrench doesn't go down that low. So I just did them fairly tight but not too tight? Bit worried about that actually.
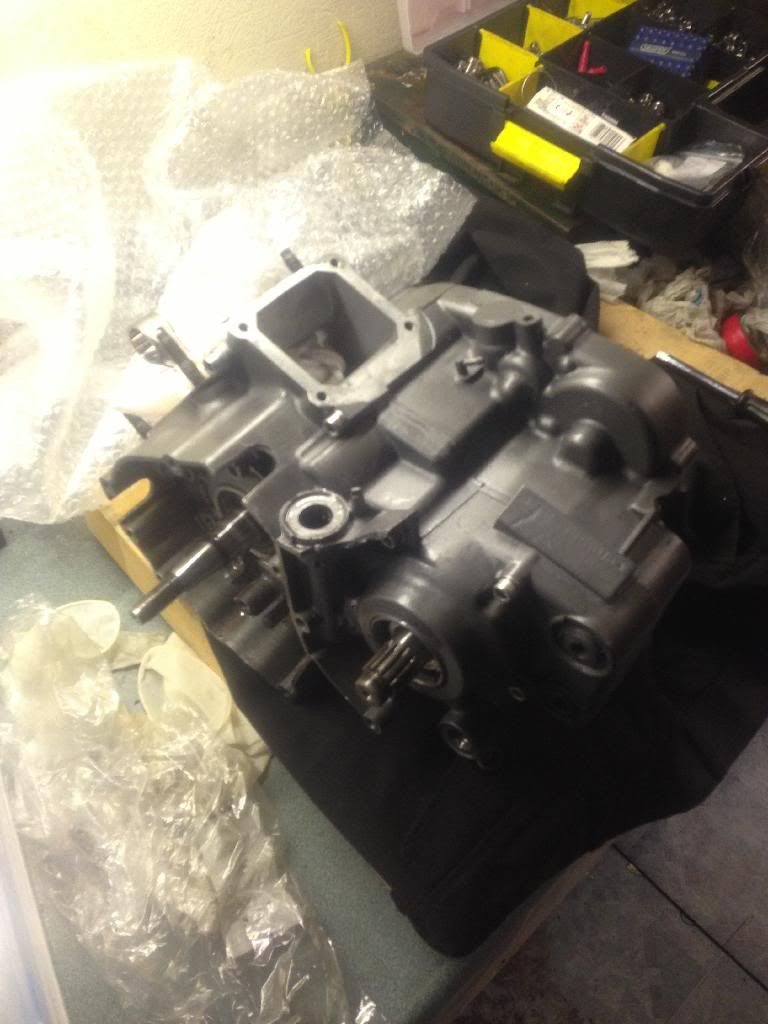
So here's where I'm at so far.
Want to put carbon reeds in there before I put the inlet back on. So will have to wait. Also want to put a new clutch in there as well. So need to order one of those.
Will try and finish the majority of this off this weekend.
Then it'll be the interesting stuff. Need to take the cylinder off my bike. Send it to a tuning specialist. get some sexy work done to it. Back it on this bottom end.
Sort the carb out. Got the VHSA 32mm Delorto (4DL Carb).
Sort out my
Zeeltronic.Run it in then Boom. Summer tears!
I'm thinking of running it in using the 4DL cdi first. Then switch to the Zeeltronic.
Okay, so I'm putting in the TZR this weekend. Nitch gut. Nev the collar that sits between the swingarm. how did you remove it from the engine? the collar is too small and will not take the DTR spindle. Can't progress until that is out. The carb, obviously, isn't going to fit without some form of modification. I need to sort something out. I've got the week off so don't need the bike. Am really tempted to leave it off the road for a few weeks.
Hand made
underslung pipe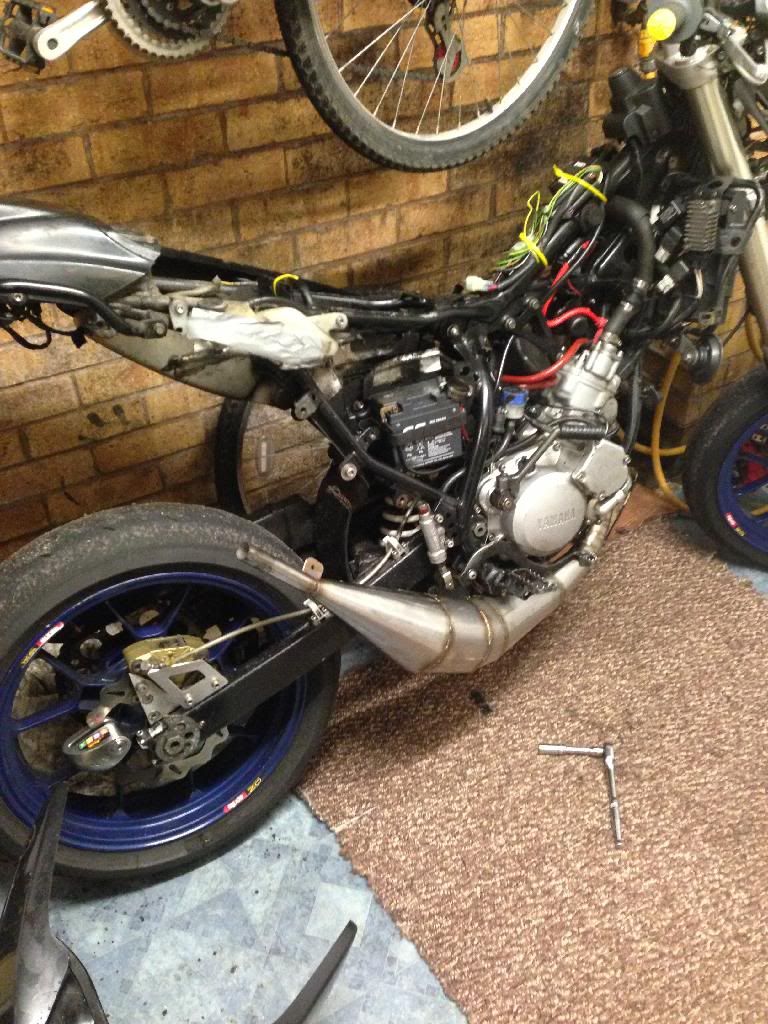
So received my parcel today. It's okay. I don't know maybe I was expecting more. I know I've seen more. Slightly disappointed. I know what sort of porting can be done. Maybe that's my flaW. But biggest issue here. Has the powervalve been grounded down too much! It's now been exposed which is rather frustrating.
Oh well have a look for yourselves...


Because I like wasting money, I bought ANOTHER VHSA carb because it said
"Blue Printed". I'm not so sure and am tempted to write a letter. it's slightly different but not massively. I'm no expert. So I have two VHSA carbs. I'll just use the best of both and sell the other.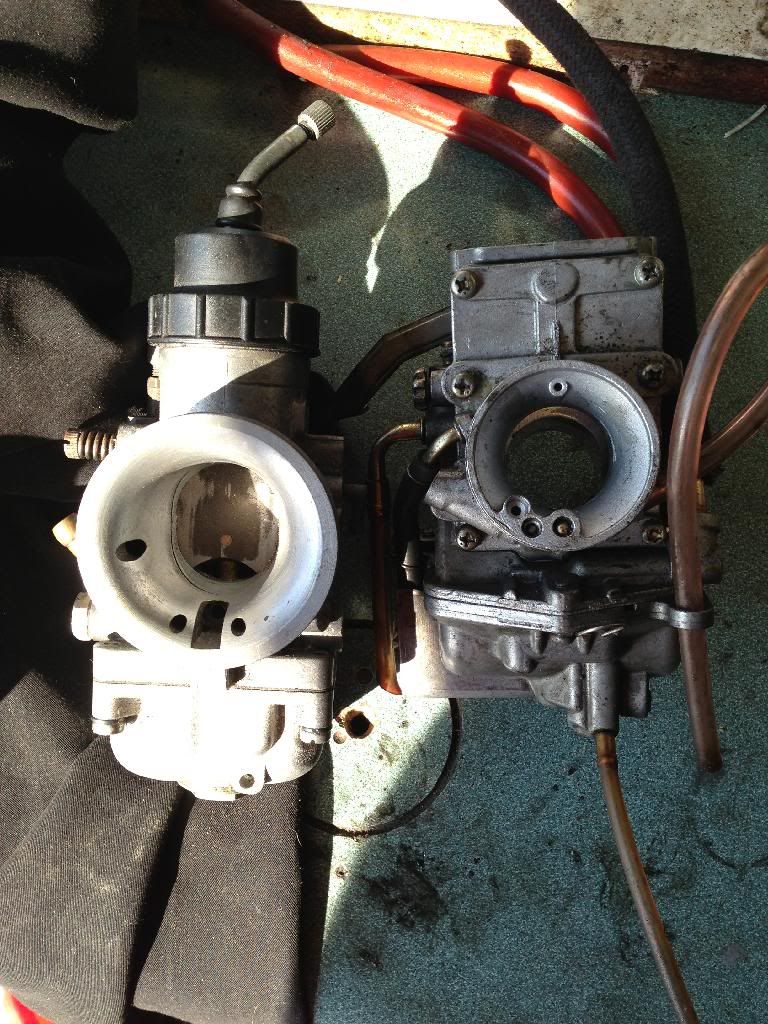
Today
Well the bike is three boxes at the moment. It's just waiting to have more dosh spent on it and I have no drive at the moment. I will get around to it. To tell you the truth, I'm missing it now
Updates will come. Hopefully this will be the final straw. Full nut and bolt and rebuild and then I will just enjoy it!
-
Finally got down to the coaters. I just dropped off some test pieces and I like the results.
Having the yokes painted black because they only get oily anyway
They were good enough to block all the threads up for me and mask off the appropriate areas. Oh and they didn't even charge me for this piece as I agreed to send all my parts to them.
-
Small Update:
Lots of parts have been sent to the powdercoaters.
http://i1152.photobucket.com/albums/p488/calum122/DT125/DSC_0041_zpsmmkpa1yc.jpg
http://i1152.photobucket.com/albums/p488/calum122/DT125/DSC_0057_zpssto0mo41.jpg
http://i1152.photobucket.com/albums/p488/calum122/DT125/DSC_0054_zpsd00kqkhm.jpg
http://i1152.photobucket.com/albums/p488/calum122/DT125/DSC_0038_zpsmwhfpvfs.jpg
I have had some parts made up.
Have ditched the idea for the YZ swingarm after examining it I quickly realised my Aprilia wheels simply won't fit between the gap lol. So back to the drawing board on that one.
-
Nothing I am afraid. Just a respray and out back together. Then back to working on the car. I have been looking at the 3XP0 barrels and 4ET Lanza engines and 144 big bores and all sorts but I think I have come to a point with this bike where I have had enough. As we know they are quality motors and not really power mad. So will keep it as the ol faithful and and look for another smoker.
-
Small Update
I am so slow on the progress with this bike.More stuff gone to the powdercoaters. Pretty sure they've lost a component so will need to ring them up Monday.
Switching between working on the car and the bike.
Got the shock spring resprayed.
Wanted to go black, but at the last minute decided to keep it red. Everything else is going black.
Swingarm is black with red snail trails and the little brake guard.
Want the calipers Black.
-
Going to be a minter, this thread takes so long to load though
-
Going to be a minter, this thread takes so long to load though
@Louis-James Yeah it's an absolutely nightmare lmao.
So with this version of NodeBB you can
Sortby last post.I may split the build thread up so that the 1st post is just a title, and the images are in post 2. That way if you sort by last post it won't load the images.
-
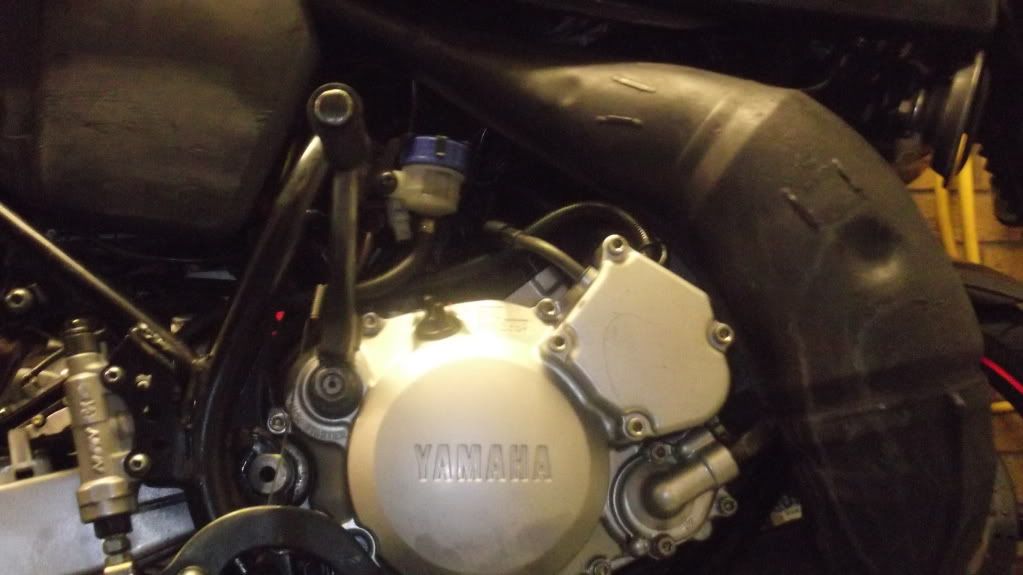
Everything looks so clean! It makes me happy, and sad that i didn't repaint or atleast clean up my engine
@ConnorDTR Bah, will last about five minutes. Once spin round the block and it'll be filthy.
I don't plan on keeping it mint. I plan on using it, battering it. Abusing it till the next rebuild. It'll never be a show machine.
-
Two months since my last post! Wow that's literally flown by.
What have I been up to?
Wheels have been dismantled and powdercoated. New bearings have arrived I just need to press them all back in.
The petrol tank has been coated as well. Lots of sand still inside thst I need to flush out. Joys. Hopefully next month it'll be on its own two wheels after a whopping 18 months!
http://i1152.photobucket.com/albums/p488/calum122/DT125/DT125 Project Thread/DSC_0006_zpshmut8nl5.jpg
I still need a front disc which won't be cheap. -
@MIGHTYMAN Yeah you and me both. Just a matter of time now though. Just need to get the tyres put on and inflatted. Bearings pressed in. Alarm wired up. A few other bits and bobs as final touches.
Marmite will be the final touch to this bike. You'll either appreciate it or you won't! I'm keeping this one hush for now but all will be revealed once the bike is back on the road.
It's an athestics thing but I really think it will just solidify the end of the road for this project.
I am itching to start on the car now but I must finish this one first.
I shall see what I can get done this month. Fingers crossed wheels on te ground panels back on, of which I have replaced every single panel and graphics to match colour scheme. I have had the graphics for over 2 years waiting for the time to fit them haha!
I still need an inlet to accommodate the bigger carb. But all in good time.
Watch this space
-
Only got the wheels back yesterday
Have test fitted them and they look great. They need to come off again but for now the bike is standing on its own two wheels
Need to finish polishing this carb too.