Yamaha DT125R '01 - Running Project
-
@CYBER-NINJA I ended up getting some made in various lengths for testing, but Have not put them on yet. I've got FZR 150mm tie bars and they are too long, but thanks for the offer, those Lusty's are nice quality tbf.
-
@CYBER-NINJA I ended up getting some made in various lengths for testing, but Have not put them on yet. I've got FZR 150mm tie bars and they are too long, but thanks for the offer, those Lusty's are nice quality tbf.
-
@Darty What size rims and tyres are you running there dude please? And are they laced to stock hubs too???
-
Finally put on my new drop links.. Tie bars.. dog bones.. whatever you like..
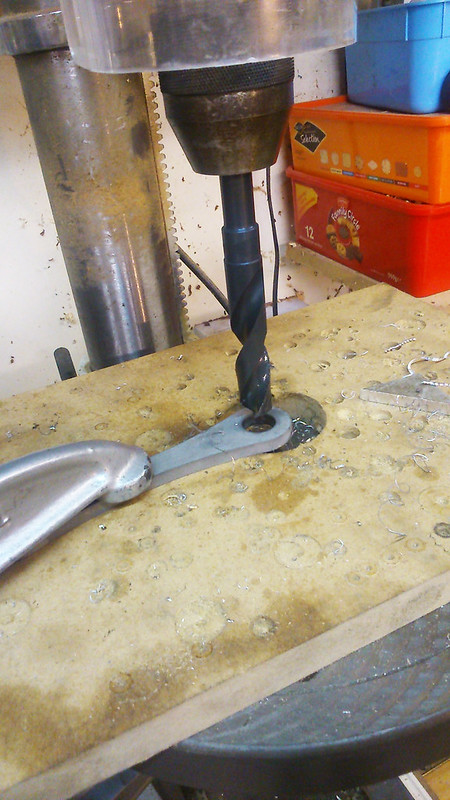
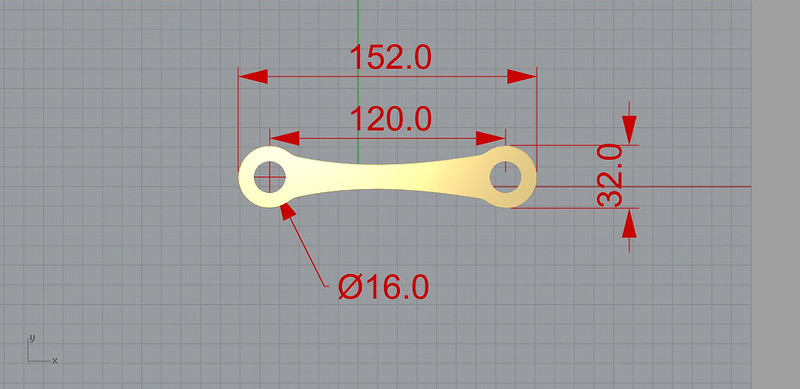
Water cut 7mm Stainless steel, I drew the pivots at 15.5mm to compensate for the distortion water cutting creates cutting through, essentially the water jet blasts through creating a slight taper on exit, it's like firing a cone shape rather than a straight beam.
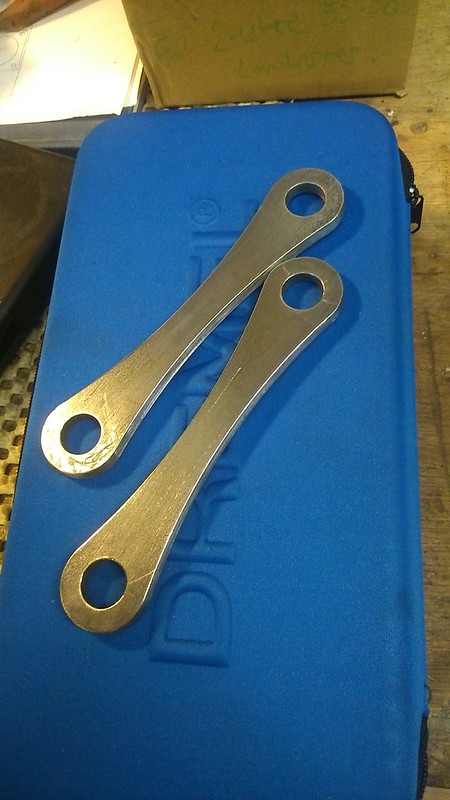
Got a very sharp 16mm drill bit which gives the exact fit you need. Then a sand and polish.
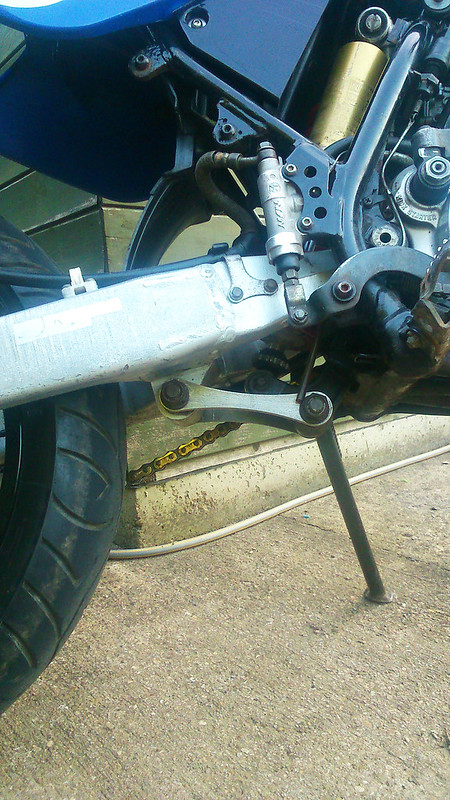
Changed the design a little and went for a continuous sweep, got to love CAD ay.
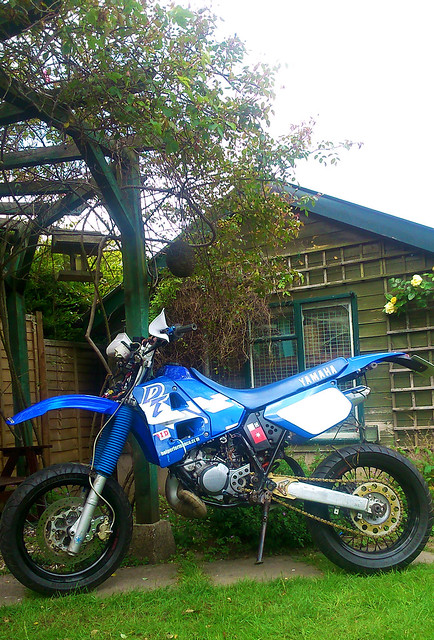
I went for 130mm versions instead and it now sits perfectly, she's niiiice and sharp now and handles pretty bloody well for a DT.
The rear does look ridiculous.. hot rod stance not to my liking. Those portugal rear mudguards are a wacky fit on the tabs, need something else YZ to chop up.
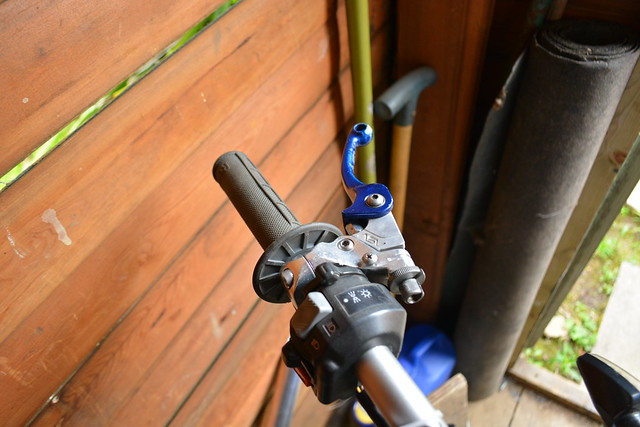
ASV clutch lever was a score, and it's lush to use..after a thorough grit removal rebuild. far superior than my 'eBay special' perch on before. But I had to move the switch gear over for clearance, and just cannot stop fumbling because it's out of reach to my thumb. I'm always having to look at it first.. lol seriously this does get at me, but clutch is more important in this case.
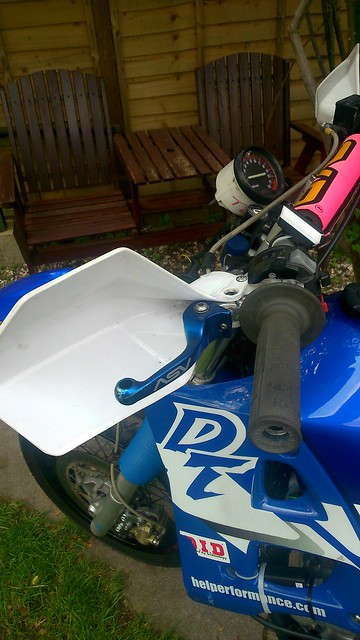
The best thing is that I can still fit my DT handguards on, Thank you ASV, much obliged. Those guard threads are a god send.
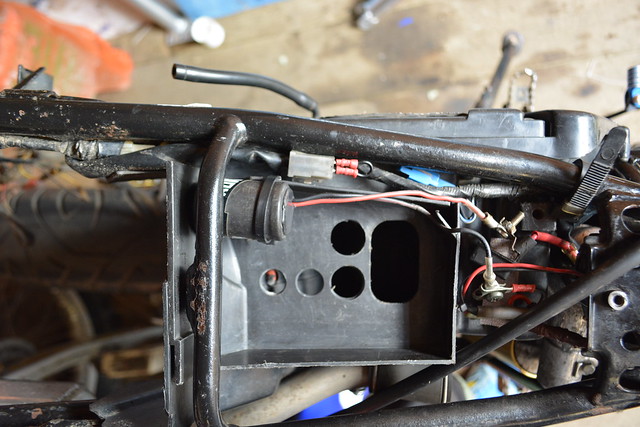
Because Race bike. But no seriously don't mess with the Airbox on a DT. It's perfect as standard. I've opened up the side and top to a 'maximum' I reckon. Remember you need to control the flow of air for good induction,
I've just been messing around and after many shitty test rides and a million jets and needle adjustments it's running sweet. And it sounds like it should, all in vain for increased throttle response and overrev, not such a daily driver anymore though.
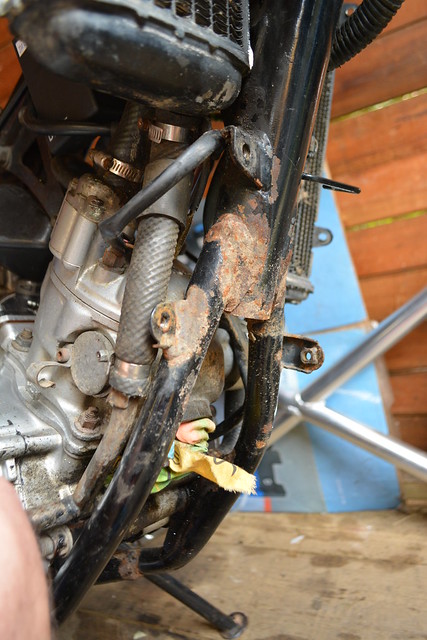
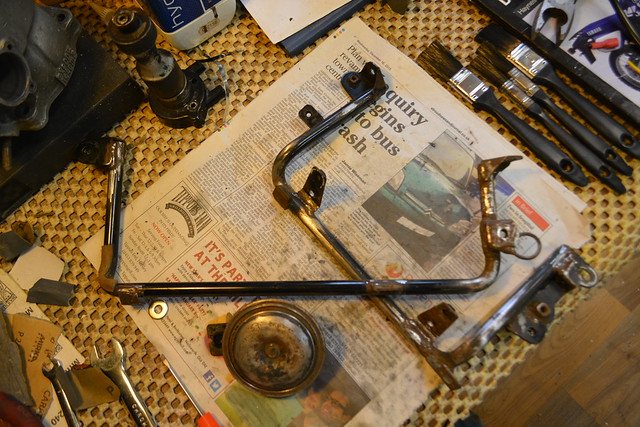
The rest is an embarrassment, rust is taking over, a bit of Hydrate 80 rust prevention and a bit of black spray just to stop it disintegrating away. Always a great play bike if it's already battered.
Bring on the summer,
-
Finally put on my new drop links.. Tie bars.. dog bones.. whatever you like..

Water cut 7mm Stainless steel, I drew the pivots at 15.5mm to compensate for the distortion water cutting creates cutting through, essentially the water jet blasts through creating a slight taper on exit, it's like firing a cone shape rather than a straight beam.


Got a very sharp 16mm drill bit which gives the exact fit you need. Then a sand and polish.

Changed the design a little and went for a continuous sweep, got to love CAD ay.

I went for 130mm versions instead and it now sits perfectly, she's niiiice and sharp now and handles pretty bloody well for a DT.
The rear does look ridiculous.. hot rod stance not to my liking. Those portugal rear mudguards are a wacky fit on the tabs, need something else YZ to chop up.

ASV clutch lever was a score, and it's lush to use..after a thorough grit removal rebuild. far superior than my 'eBay special' perch on before. But I had to move the switch gear over for clearance, and just cannot stop fumbling because it's out of reach to my thumb. I'm always having to look at it first.. lol seriously this does get at me, but clutch is more important in this case.

The best thing is that I can still fit my DT handguards on, Thank you ASV, much obliged. Those guard threads are a god send.

Because Race bike. But no seriously don't mess with the Airbox on a DT. It's perfect as standard. I've opened up the side and top to a 'maximum' I reckon. Remember you need to control the flow of air for good induction,
I've just been messing around and after many shitty test rides and a million jets and needle adjustments it's running sweet. And it sounds like it should, all in vain for increased throttle response and overrev, not such a daily driver anymore though.


The rest is an embarrassment, rust is taking over, a bit of Hydrate 80 rust prevention and a bit of black spray just to stop it disintegrating away. Always a great play bike if it's already battered.
Bring on the summer,
-
@Darty those dog bones are awesome mate!! You've made such a good job of them the bike looks fantastic the way it's sitting 👍🏻
@Biker_123 ahh safe, I can put up the DXF files if you want some? Got 2pairs cut for £10 down my end.
-
@Biker_123 ahh safe, I can put up the DXF files if you want some? Got 2pairs cut for £10 down my end.
-
@Biker_123 DXF files were drawn using Solid Works, I'm not sure what programs you might have to open these, but send these to any good company and they should know what's going on.
https://www.dropbox.com/s/6aropyq2sjczw0z/Tie Bar 130mm x 6mm 1.dxf?dl=0
https://www.dropbox.com/s/0bj1uprutg8im74/TIE BAR 120mm x 6 Reform1.DXF?dl=0
Enjoy!
Next up is a custom intake, really needed I reckon 32-36mm intake,
Will put up a plan after I get it made
-
What an awesome build man im loving this! top job m8y
-
@Biker_123 DXF files were drawn using Solid Works, I'm not sure what programs you might have to open these, but send these to any good company and they should know what's going on.
https://www.dropbox.com/s/6aropyq2sjczw0z/Tie Bar 130mm x 6mm 1.dxf?dl=0
https://www.dropbox.com/s/0bj1uprutg8im74/TIE BAR 120mm x 6 Reform1.DXF?dl=0
Enjoy!
Next up is a custom intake, really needed I reckon 32-36mm intake,
Will put up a plan after I get it made
-
How did you make the bracket for the front brake
-
How did you make the bracket for the front brake
@vtrn_raptor Hand sawed. filed, and machine sanded, you will need a Pillar drill!
I've only got a sketch you can follow, dimensions are rough and only for a YZF125 caliper that was modified. should be 68.5mm of the fork. I use 15mm spacers now of the hanger.
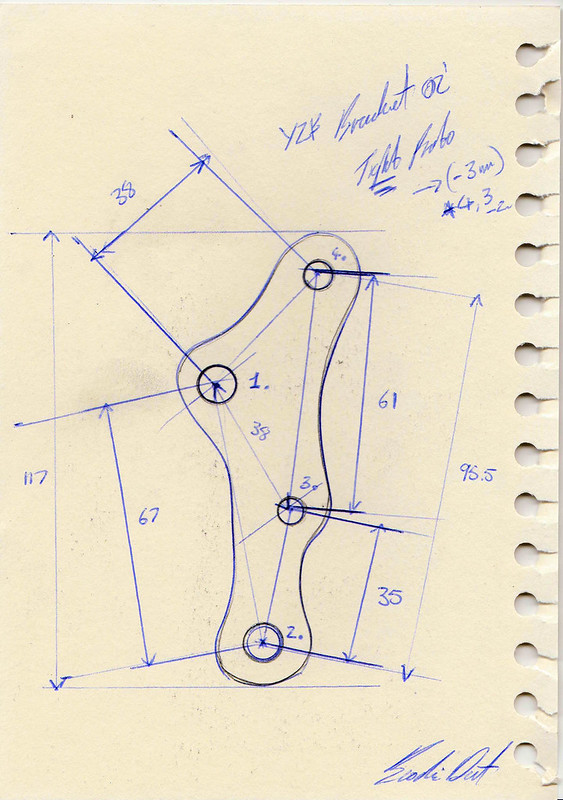
I started with NEV's example for a DTX caliper, and modified the fitments. If you have a DTX caliper then NEV's dimensions should be on point for you.
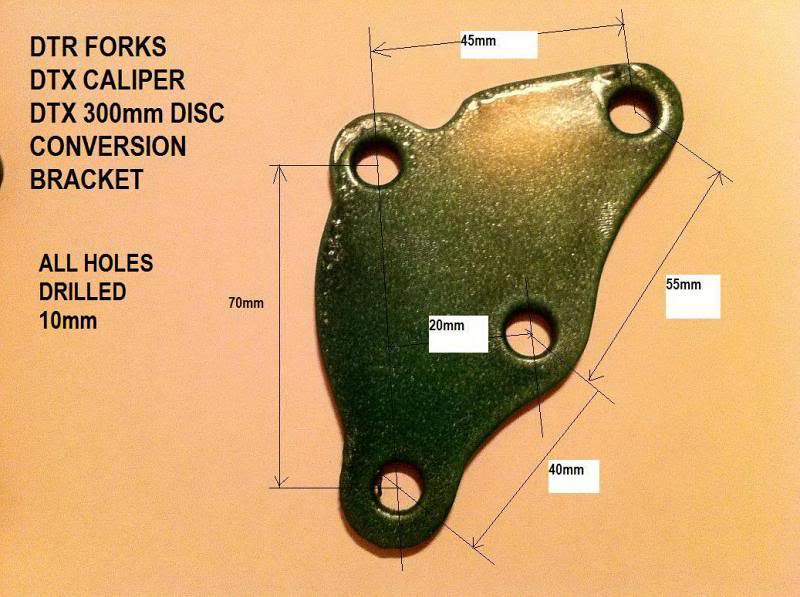
Create mock-ups and check your offset position thoroughly, CNC Steel alloy is a better option than ally.
-
I really need to find someone who can make me one for the standard dt brake caliper as I don't have to tool to do it myself:(
-
Hi, Thank you.
Yeah.. a Zeely would be nice to be honest.
I have followed your project for a while and it is very impressive, I have had my DT for a couple of years now. And yeah completely stock (De-restricted) of course, has been the best performance so far. And to answer the question of the Pre -94' CDI vs Later years 99' on bikes. Well. It's pretty close between them haha. Good times.
A little note, the older 3 wire DT's have a much more raw engine noise on tick over. Yamaha redesigned the stator motor with much else after 99'. Older models really have the right engine noise. Exhaust noise very much the same for all models on a DEP though, no missing out.
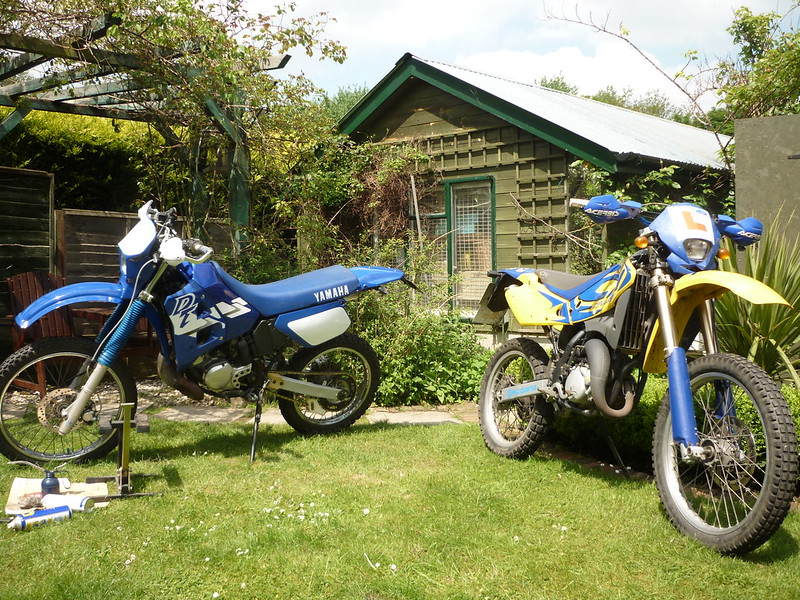

Jeez. You should see the state of it now 7,000 miles later. I rode it hard. It is need of a full restoration. Mechanically supreme however. The fit and finish is the last thing I can be bothered with.
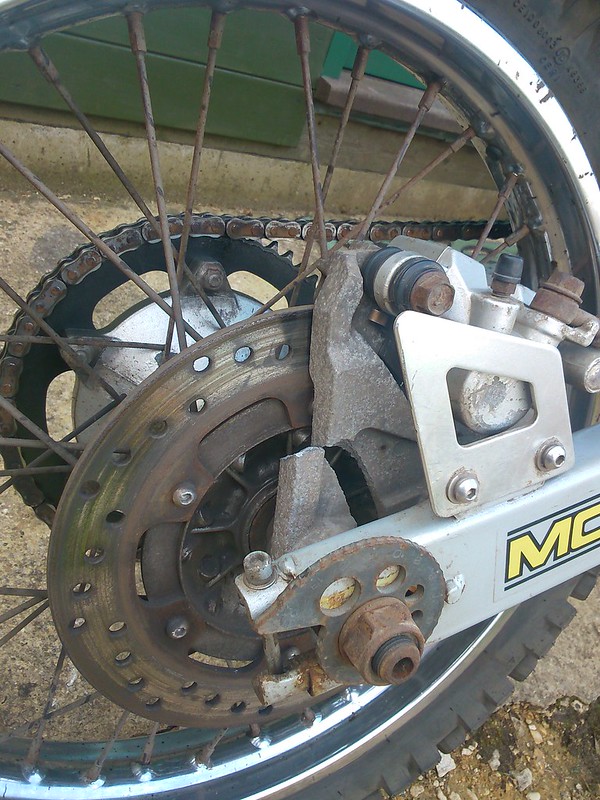
Hard hit.
Yes. The Lanza. I've seen only ever seen about 3 or 4 on eVil bay. They were never really imported here much by anyone it looks like. I know Yamaha never sold em in the UK- like the DT200R(3ET). I could never find any parts. I am considering a DT200R Alloy swinger - from Australia.. That is the easiest weight saving option out there I think. But not sure. I want the wheel base to be a bit longer on it really, so an extra 2" of YZ alloy or WR and fettling time seems a more pleasing upgrade, but where do you stop. I cant make my mind up.
Yeah still got my eyes on any TDR - TZRR stuff at the moment. It is getting the bigger inlet that would be a score for me.
Anyway, I'll keep from talking about it and get some updates up here. I'll see if there is anything useful I know.
Quickly as well, do you rate Mick Abbey tuning? Your barrel looked good but I don't want to rework anything.
Thanks for the links.
-
@Darty hello
would you say IGNITECH was a good upgrade and where do you buy itgot a dtre x 2005
@aidan1996 I recommend it, try and learn a bit about Ignition Timing and Powervalve setup before you buy to make the most of it.
Ignitech systems are made to order, so just send them an Email and state your desired Model and/or loom type.
-
@aidan1996 I recommend it, try and learn a bit about Ignition Timing and Powervalve setup before you buy to make the most of it.
Ignitech systems are made to order, so just send them an Email and state your desired Model and/or loom type.
-
Some little bits.
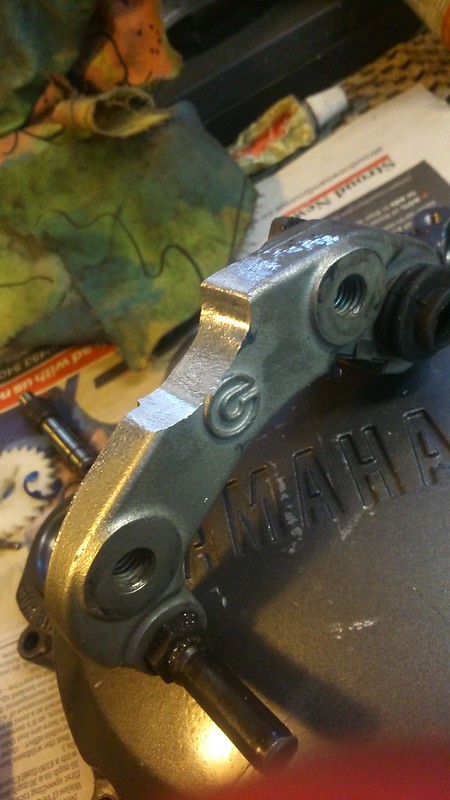
Removing material to clear the flanged nut I'm using off the fork leg for the correct position. Renewed this bit a while ago, the YZF carrier is not the best idea.
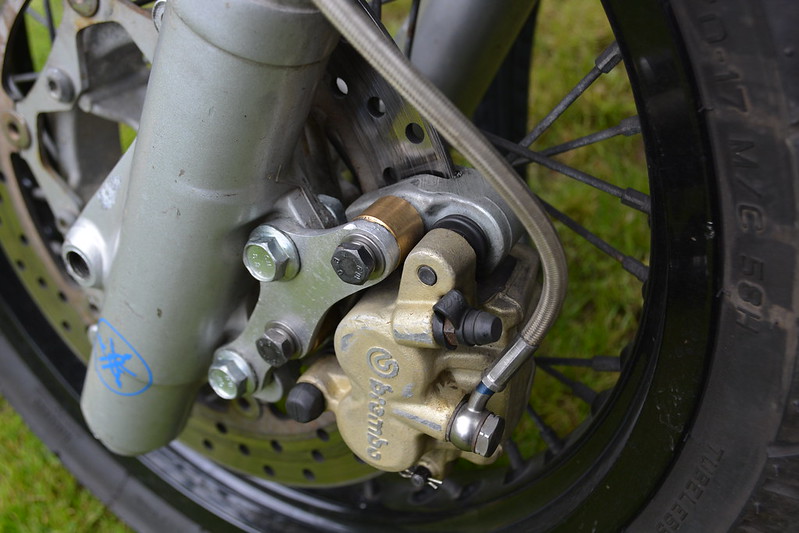
Finished setup for now, Lathed up 16mm Brass spacers and fitted together with 10.4 HT bolts.
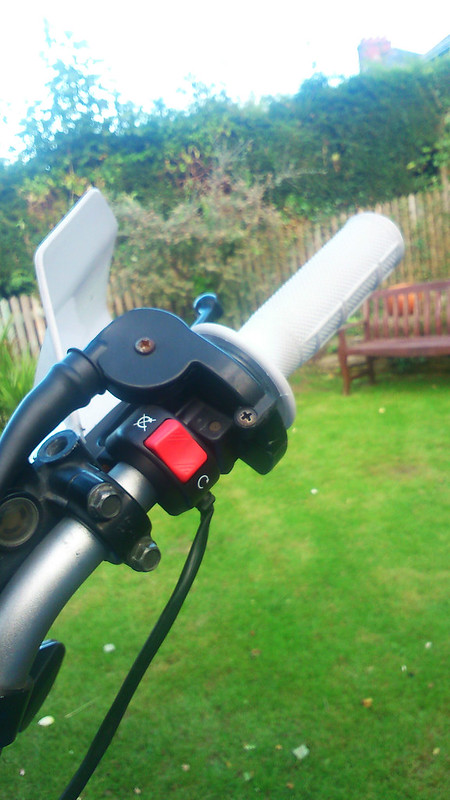
98' YZ 250 1/4 throttle with billet alloy throttle tube, is plush like em snappy
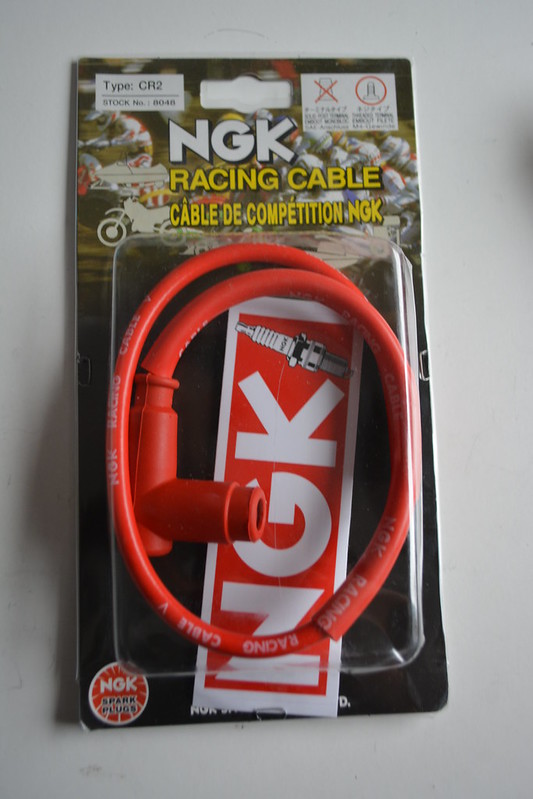
New ceramic resistor.
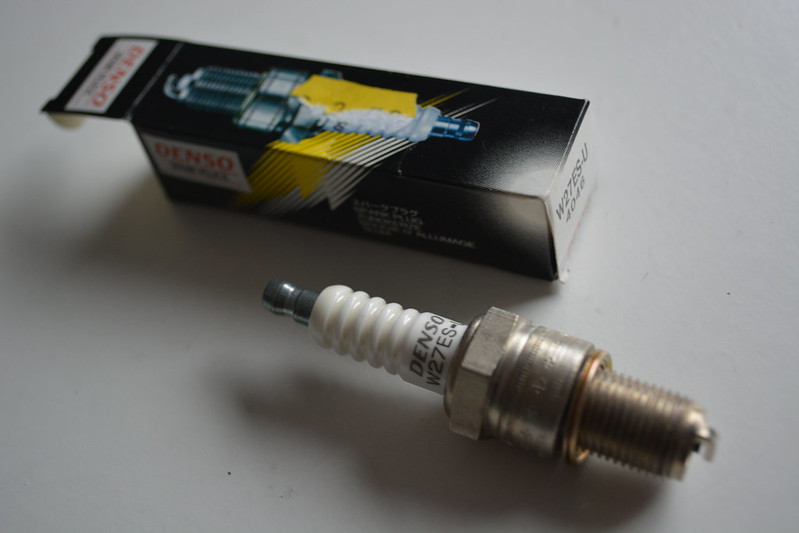
Trying to keep Jap with a Denso W27ES-U plug. £1.70!
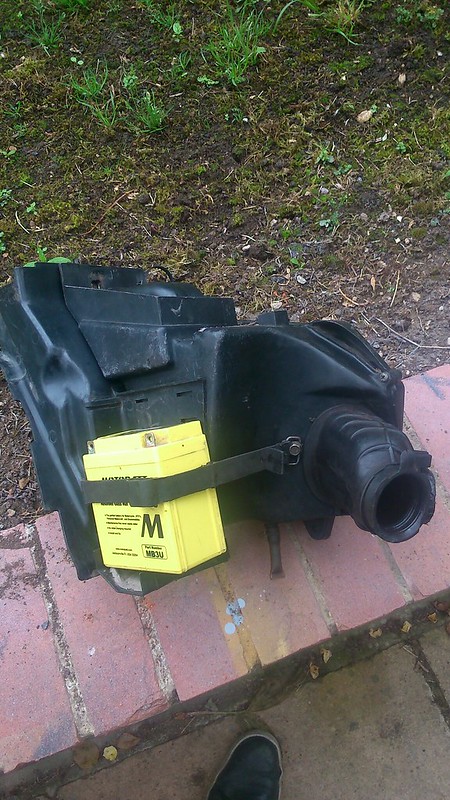
Call me the 'Artful bodger' Ran into some issues just using a capacitor to run the Ignitech. So strapped in ol' faithful in what's left of the only space available on the bike.
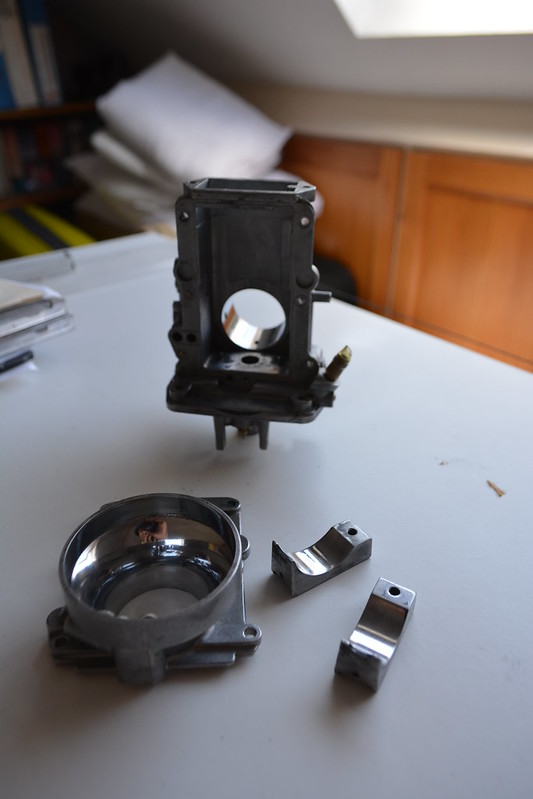
Slowly rebuilding my TM32. Sanded, wet sanded and polished internals.
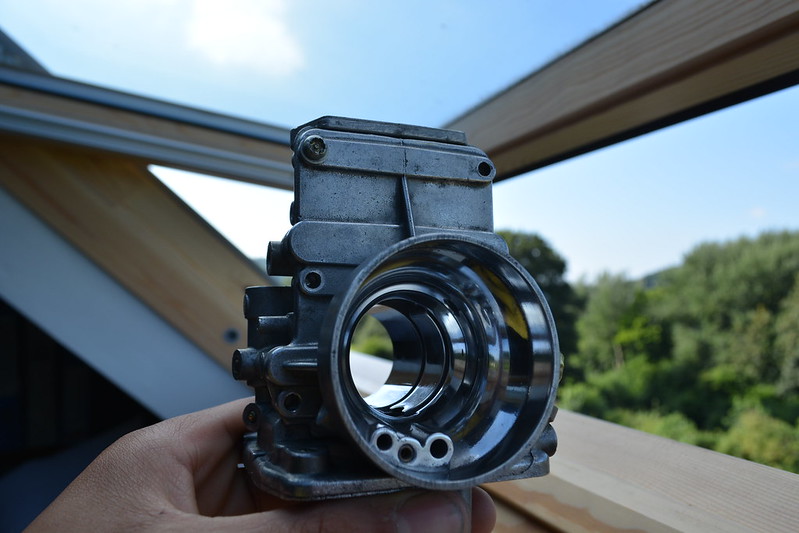
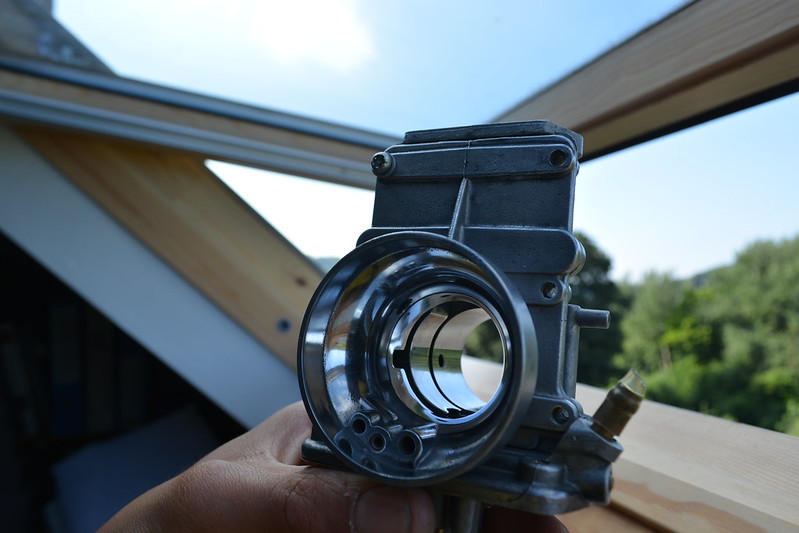
Satisfied like glass. Giving a helping hand to the inevitable ingress of dirt to be combusted.
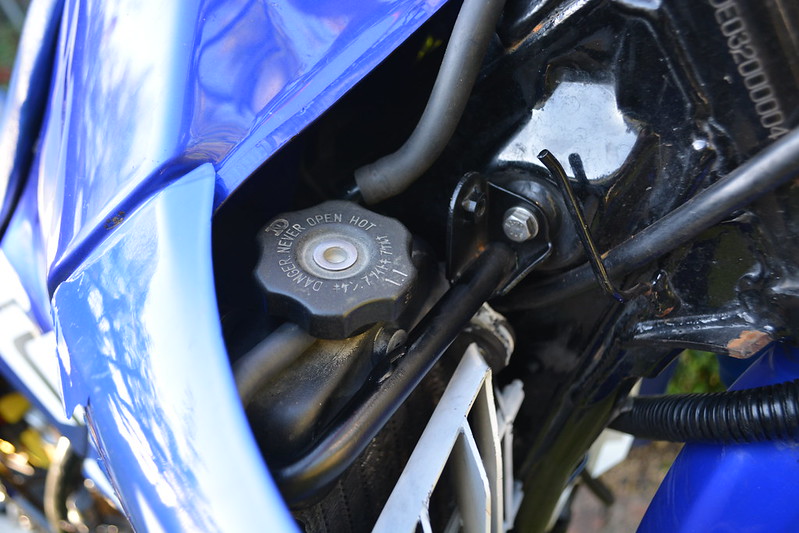
Remounting the WR rad, cutting the thermostat housing down, deleting the oil tank cap fixture from the support and shortening the rear radiator outlet futher to clear the tank. Then moving the whole thing forward to sit flush and safe.
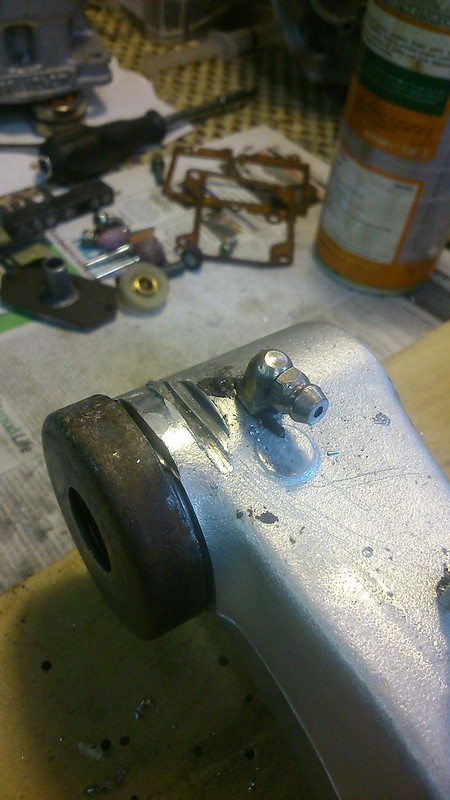
Having alot of fun tearing it about, led me to ignore a serious issue. After letting the chain eat my original WR200 chain guide and very good condition Delta-box swinger, it was time to go back and fit plan A.
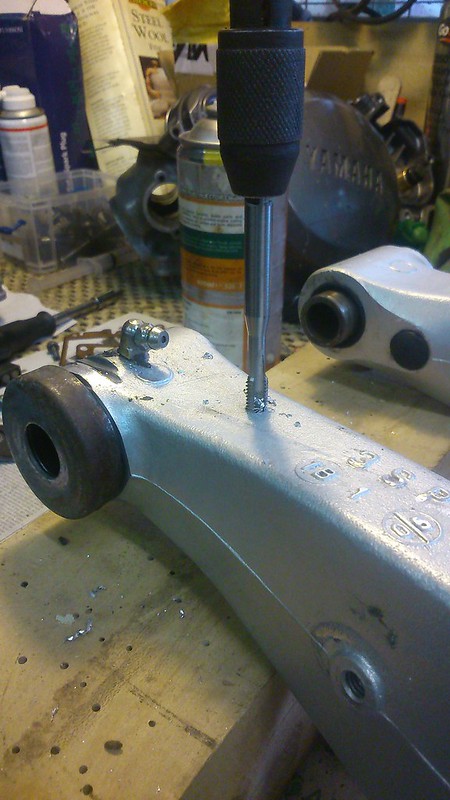
Drilled and M6 taped new mounts. Didn't feel like sacrilege after fucking it over already.
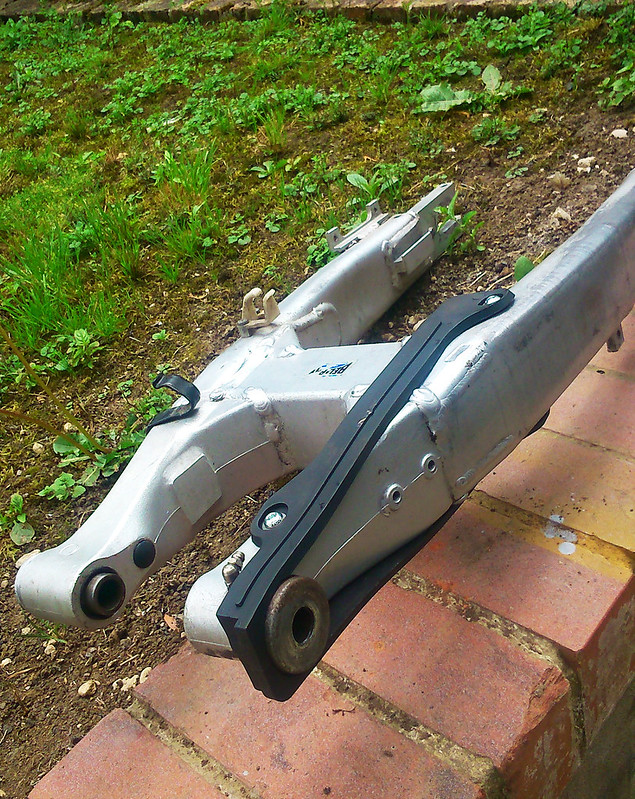
I wanted to do this for ages, fitting a YZ/WR 98'-02' chain guide looked to fit in my head. Can now replace it without having to take the swinger off, and readily available to replace now, as WR200 and early YZ 1990-94' sliders are rare, or silly money new.
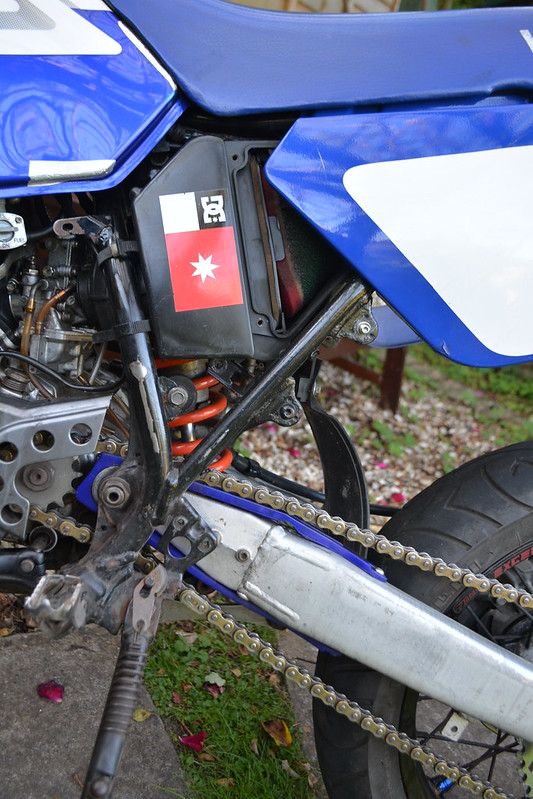
Ugraded to RFX slider in blue, made from a hard polypropylene instead of silicone rubber. Should do the trick.
Running the airbox door removed and older 3MB airbox tract now with a 450 Main jet can you believe. It's now absolutely perfect with peak power dropping away at about 10,900rpm. She sings. Ready for my new ported top end. Looking to go full road racer at 12,600rpm with the larger carb.
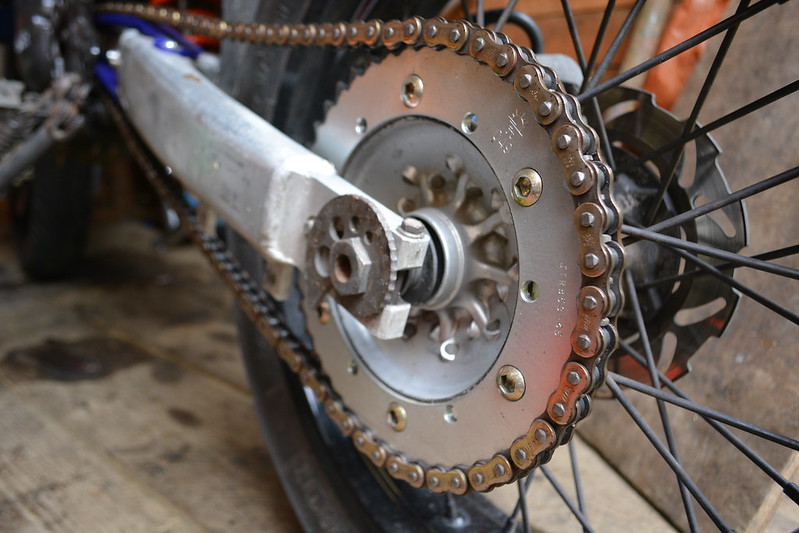
Shortened the chain, back on a Steel sprocket with a 45T 520, good for 80 again which was missed,
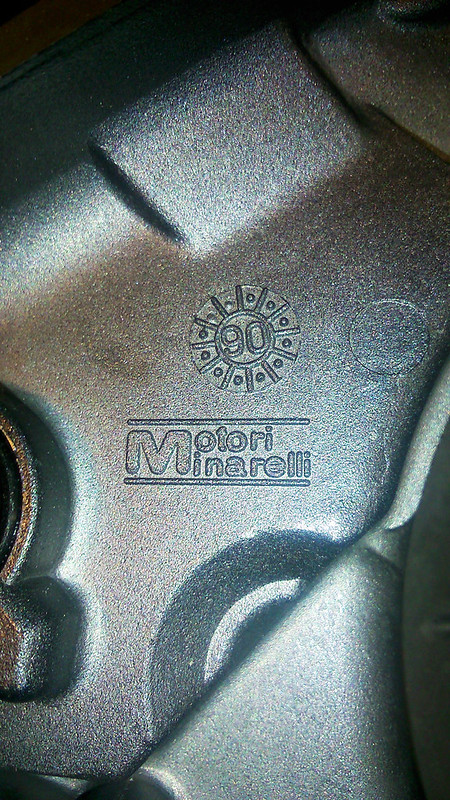
I always preferred the original clutch cases, got a nice oil pump housing design. Had to use my 4DL one.
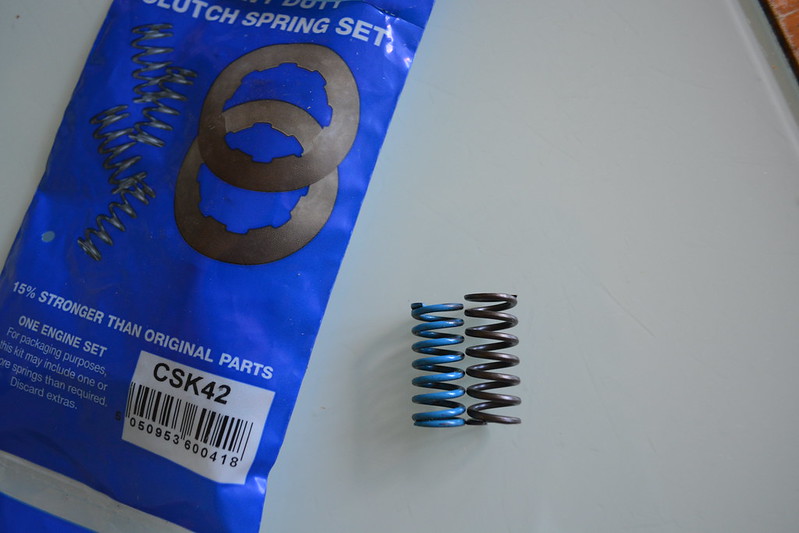
Standard (left) vs EBC's heavy duty clutch spring. Good upgrade, firm clutch with a quicker release.
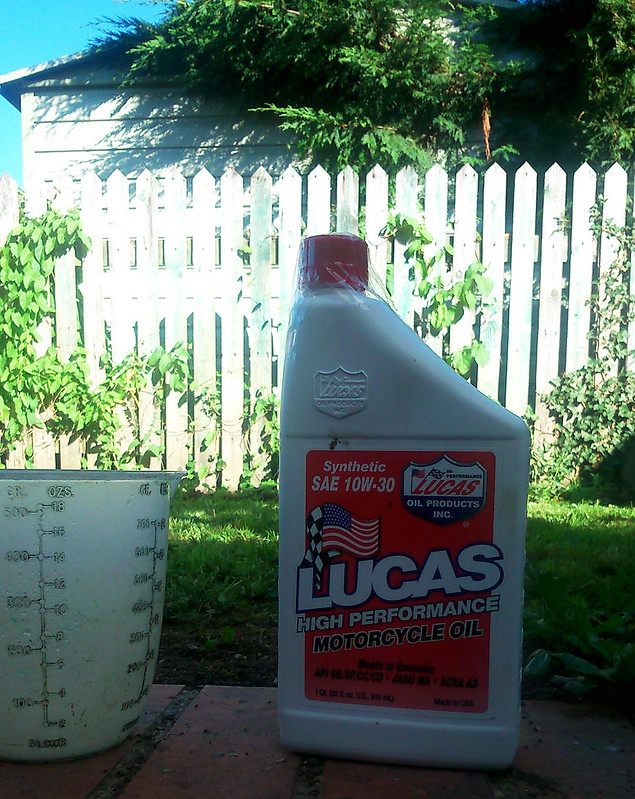
New EBC clutch plates a while back had trashed my gearbox oil, found this, cause race bike..
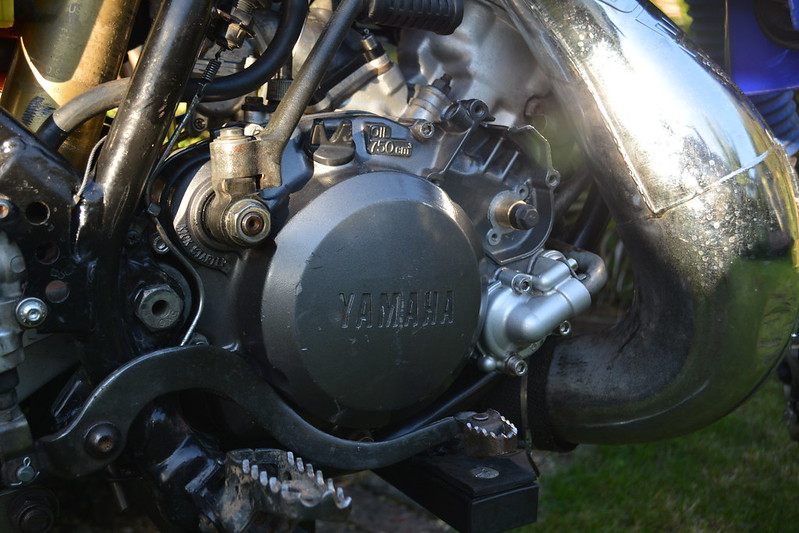
Threaded insert and bolt for oil pump delete, re-sharpened foot pegs and brake pedal from the trail bike days.
-
Some little bits.

Removing material to clear the flanged nut I'm using off the fork leg for the correct position. Renewed this bit a while ago, the YZF carrier is not the best idea.

Finished setup for now, Lathed up 16mm Brass spacers and fitted together with 10.4 HT bolts.

98' YZ 250 1/4 throttle with billet alloy throttle tube, is plush like em snappy

New ceramic resistor.

Trying to keep Jap with a Denso W27ES-U plug. £1.70!

Call me the 'Artful bodger' Ran into some issues just using a capacitor to run the Ignitech. So strapped in ol' faithful in what's left of the only space available on the bike.

Slowly rebuilding my TM32. Sanded, wet sanded and polished internals.


Satisfied like glass. Giving a helping hand to the inevitable ingress of dirt to be combusted.

Remounting the WR rad, cutting the thermostat housing down, deleting the oil tank cap fixture from the support and shortening the rear radiator outlet futher to clear the tank. Then moving the whole thing forward to sit flush and safe.

Having alot of fun tearing it about, led me to ignore a serious issue. After letting the chain eat my original WR200 chain guide and very good condition Delta-box swinger, it was time to go back and fit plan A.

Drilled and M6 taped new mounts. Didn't feel like sacrilege after fucking it over already.

I wanted to do this for ages, fitting a YZ/WR 98'-02' chain guide looked to fit in my head. Can now replace it without having to take the swinger off, and readily available to replace now, as WR200 and early YZ 1990-94' sliders are rare, or silly money new.

Ugraded to RFX slider in blue, made from a hard polypropylene instead of silicone rubber. Should do the trick.
Running the airbox door removed and older 3MB airbox tract now with a 450 Main jet can you believe. It's now absolutely perfect with peak power dropping away at about 10,900rpm. She sings. Ready for my new ported top end. Looking to go full road racer at 12,600rpm with the larger carb.

Shortened the chain, back on a Steel sprocket with a 45T 520, good for 80 again which was missed,

I always preferred the original clutch cases, got a nice oil pump housing design. Had to use my 4DL one.

Standard (left) vs EBC's heavy duty clutch spring. Good upgrade, firm clutch with a quicker release.

New EBC clutch plates a while back had trashed my gearbox oil, found this, cause race bike..

Threaded insert and bolt for oil pump delete, re-sharpened foot pegs and brake pedal from the trail bike days.