Yamaha DT125R '01 - Running Project
-
Welcome to every possibly carb option for a DTR, the darty edition.
Never heard of Nikkon before. Pretty pipe I must add proper phat boi. Also good to see you cracking on at last man -
Well. I sometimes wonder why I bother. If you have ever ridden a proper Off-road motorcycle, you quickly realise when thraping a DT, just what a sqeegey, pogo stick, slightly too small, floppy forked, 80s steel timer chassis it really is. When it comes to modifying a DT. You might aswell buy something better. But anyway, I like playing with it so..
Fitted a 1/4 Action throttle from a 1988 KX80. The throttle tube is a larger diameter, much more comfortable and has been invaluable as an upgrade. I had to modify my 'Genuine' throttle cable by cutting back a bit of outer sheath. XT600 brake lever is a great swap, and I use a little shorty alloy clutch lever of a 85cc on there.
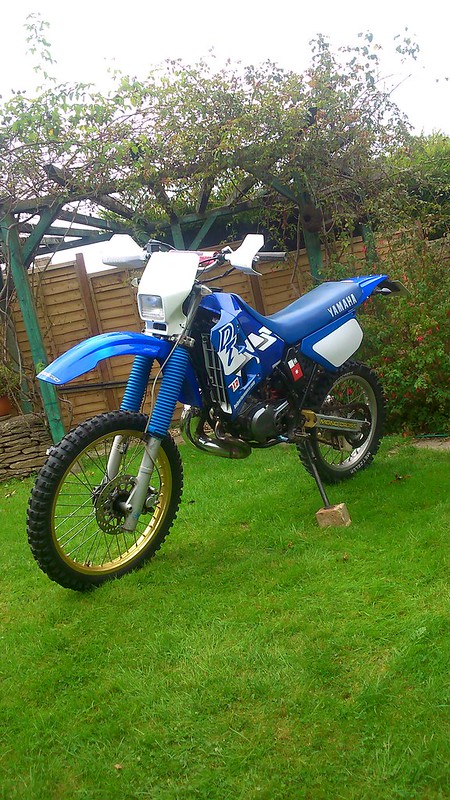
Needed to replace the original headlight cluster.Missed out on a decent Yamaha WR400 headlight.(Perfect shape) Got one of a Aprilia RX, had to do some wiring for this. Needed to be painted white of course. Its worse than the DT headlight.. but, got the look.
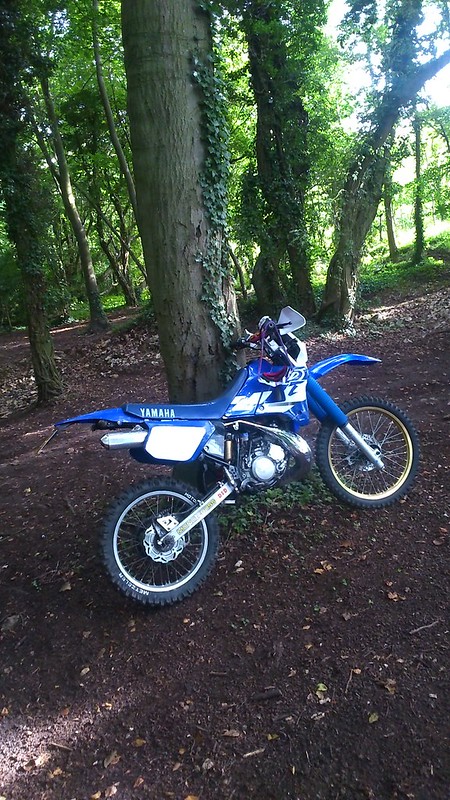
If your into DTRs. Then the DT200R (3ET) is the one to have. I couldn't find much information on these (YZ) wheel upgrades I've seen. I wanted alloy wheels on it like the 200. So after some research and a failed attempt at getting a set of WR200 wheels, I concluded that 1988-94 Yamaha YZ wheels have the same size rear hub as the DT. Straight swap. For the front, had to be 1987'-1988' because they ran similar sized rotors back then. However the hubs are about 10mm wider on the YZ, So I chose some YZ 1986' front spacers, looked similar proportion to match a DT fork in the pictures. If your going to swap to a YZ wheel, I gave up trying to fit the Speedo drive back on and took it off. Took of the clocks. Then fitted a bicycle wired speedo, just for an MOT really.. its crap and does not register the pick up past 60 mph or so. Minor price to pay. A vapour unit out of the budget. Don't need idiot lights for wheelies.
Yamaha built the 1986-1988 YZs with Gold anodised rims and man.. wish I could find a back one. The front is a 1988- the back of a 1994. MX was starting to use 19" rear wheels for better drive and handling back in the early 90s. Yamaha were on this on the YZ range. Bigger wheel does throw the gearing off slightly on acceleration. Got a big dutty knobbly on the back and you really loose out on power if you have to nip along the road.
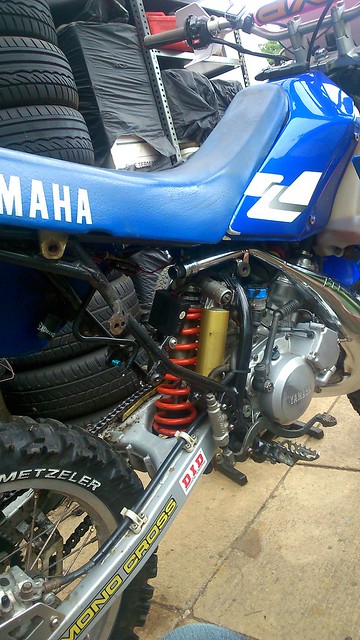
The rear shock is crap on any DTR, or at least mine was. Did some googling' and a man in Australia agreed with me, and I had to copy his idea for myself. The DT uses the same shock to linkage fixing as 87-88' YZs Shipped a 1987' Yamaha YZ490 Rear shocker that bolts right in! Its even got Yamaha's 'B.A.S.S' system on it. Which is rubbish.. but cool anyway. When fitting it, the top damper mount on a YZ frame is different, apparently much narrower than the DT frame, so you will need to use the bearing with it's fixed spacer off the DT shock and replace the YZ one with it. I actually used two big cable ties instead just to stop any lateral movement under compression. Anyway I now have Adjustable spring rate, Damping settings and Rebound settings. It will sit pretty high on a firm setting. 4-5cm lift. I also stuck with my short Dog-bones,3cm riser ones. It gives the shock better clearance from the swing arm, its a tight fit.
I cannot find the thread any more, but here are the pictures on the suspension modifications
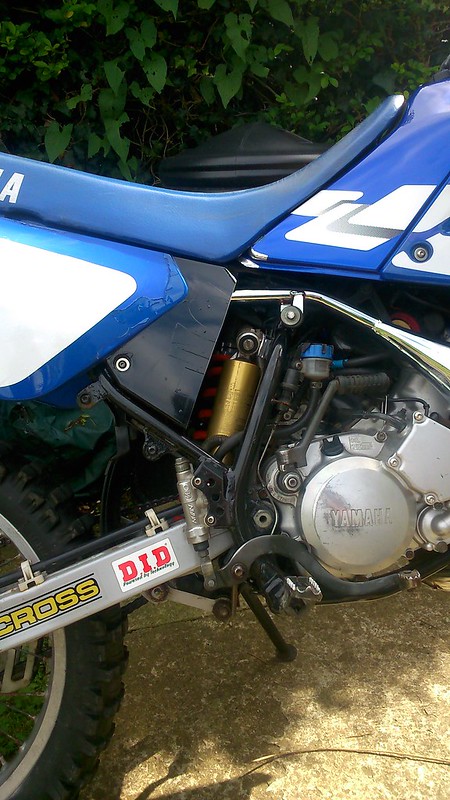
I already replaced the battery with a capacitor from '2strokeracelab' - check it out. The shock is bigger than the DT unit, longer and a fatter spring with of course,with a piggyback reservoir. So there is no room for the battery. It is also no going back as there is the tab which the battery tray is bolted to on the frame, which has to be cut off for the shock to be accepted properly. I also cut the side cover apart. Bit easier to get a flat head in for adjustment and gives me access to the Yamy Tool kit.
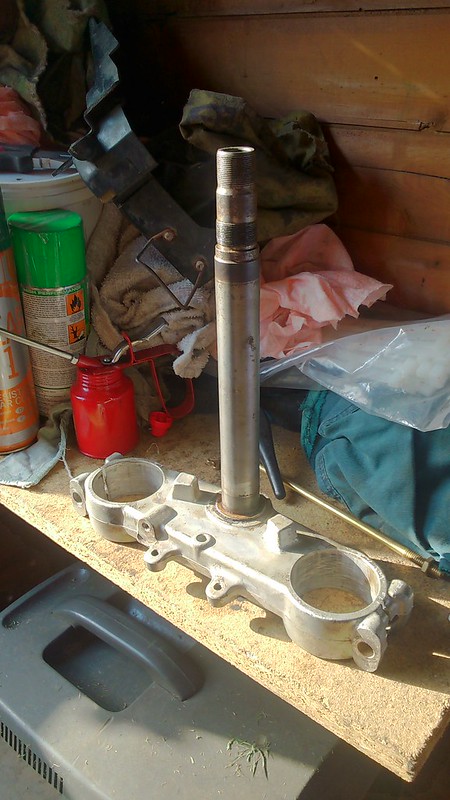
I use 15w Fork oil and it makes the best of the standard forks. I do own a very nice set of 1991' WR200 Kayaba Forks. I chose them because the WR yoke had an Ignition mount. They are just the right forks for it. But I don't want to modify the frame to accept the WR stem. I'm looking at having the Stem pressed from the WR yoke, and getting it machined down with an extended thread which would allow me to just use the original top cap and ball bearing race on the DT. Need to model it in 3D first.
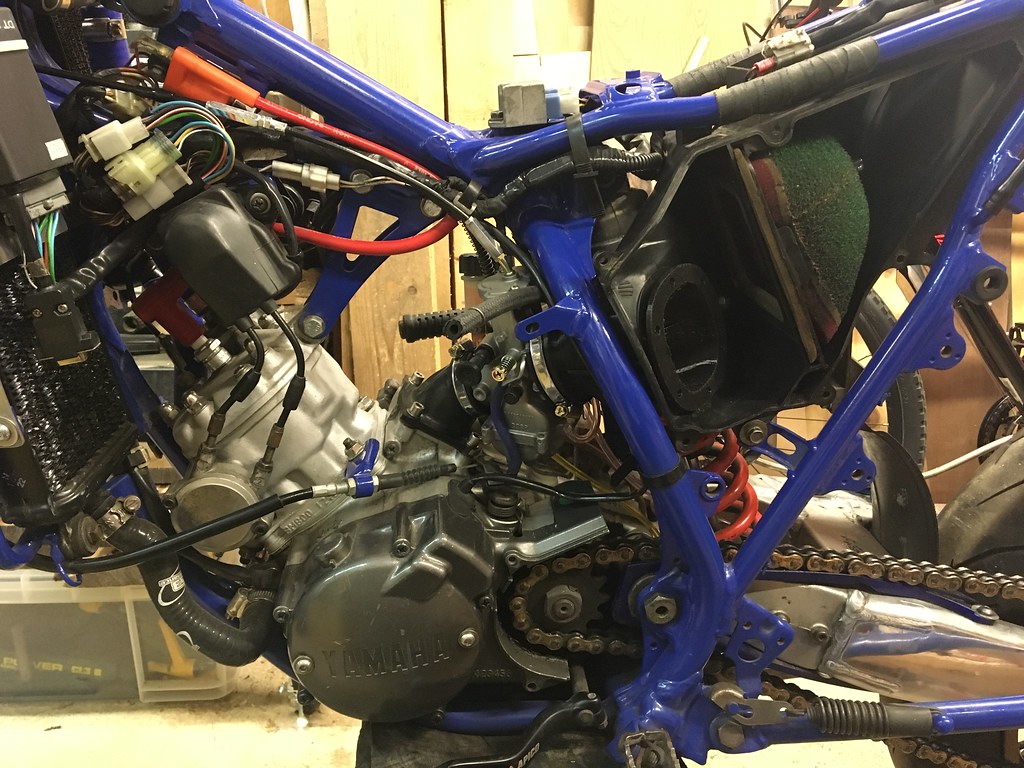
I'm at University currently so I just stock pile things at the moment. But future updates; Installing a Twin radiator configuration from the DT200R(3ET) - Got all the goodies now. I've also got a 'Ignitech DCCDPI2' on the way. The 3RM' really needs ignition modification before anything else. And the fiendishly unfriendly, how do I horse anything bigger than a 30mm Carburettor? plans to Original Air box configuration at some point,
It does not need to be big, I have drilled out the Air box already with good results with some Jetting and Pipecross Airfilter fitted. But I do have a Keihin PWK 36 that would be alot of fun.
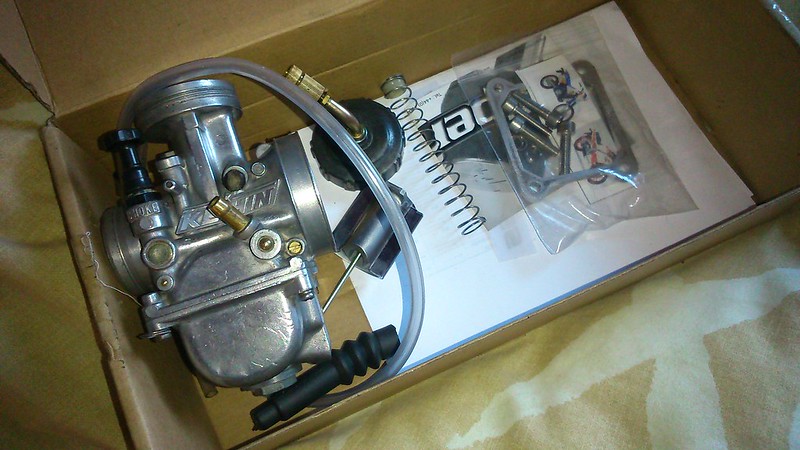
Picked up a very nice Yamaha TZR125RR (3MB00-P-Y2) Barrel ages ago. (The real deal Y3 Belgarda' has eluded me) Just a display piece at the moment. Interested to hear about any Porting experiences.
Thanks
@Darty How do you fit 36mm carb on your dt,what kind of carb boot use for it.
-
@Darty How do you fit 36mm carb on your dt,what kind of carb boot use for it.
@Rizboy We fitted a 38mm keihin carb to a 2001 DTR
https://www.youtube.com/watch?v=bOGAEzTaBgI
Just used a heat gun to up the carb boot and reamed out the inlet manifold to suit.
-
I am also working on a custom inlet. Very cool inspiration here
-
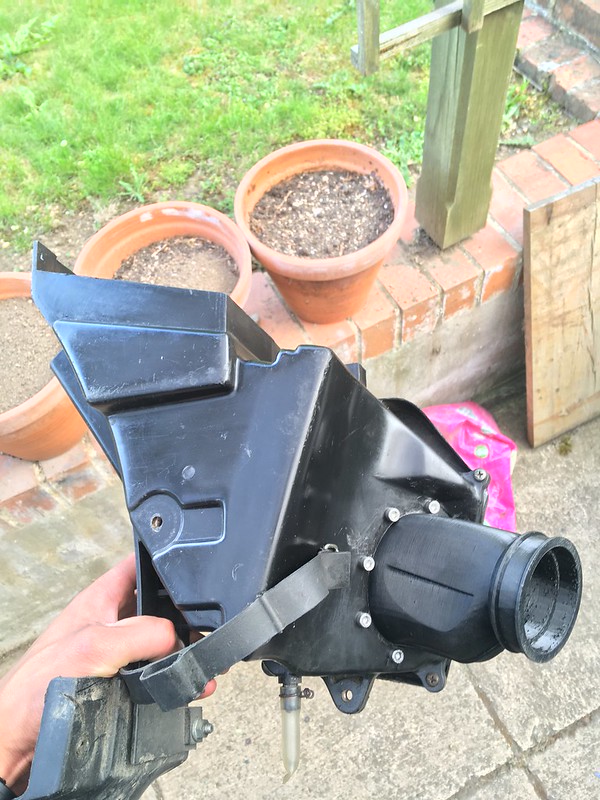
Prototype V4, 3D printed in a TPU at 80A Shore Hardness like the original. This is chemical and UV resistant filament and it's rather tough!
This is the final design for use with a pressure mold.


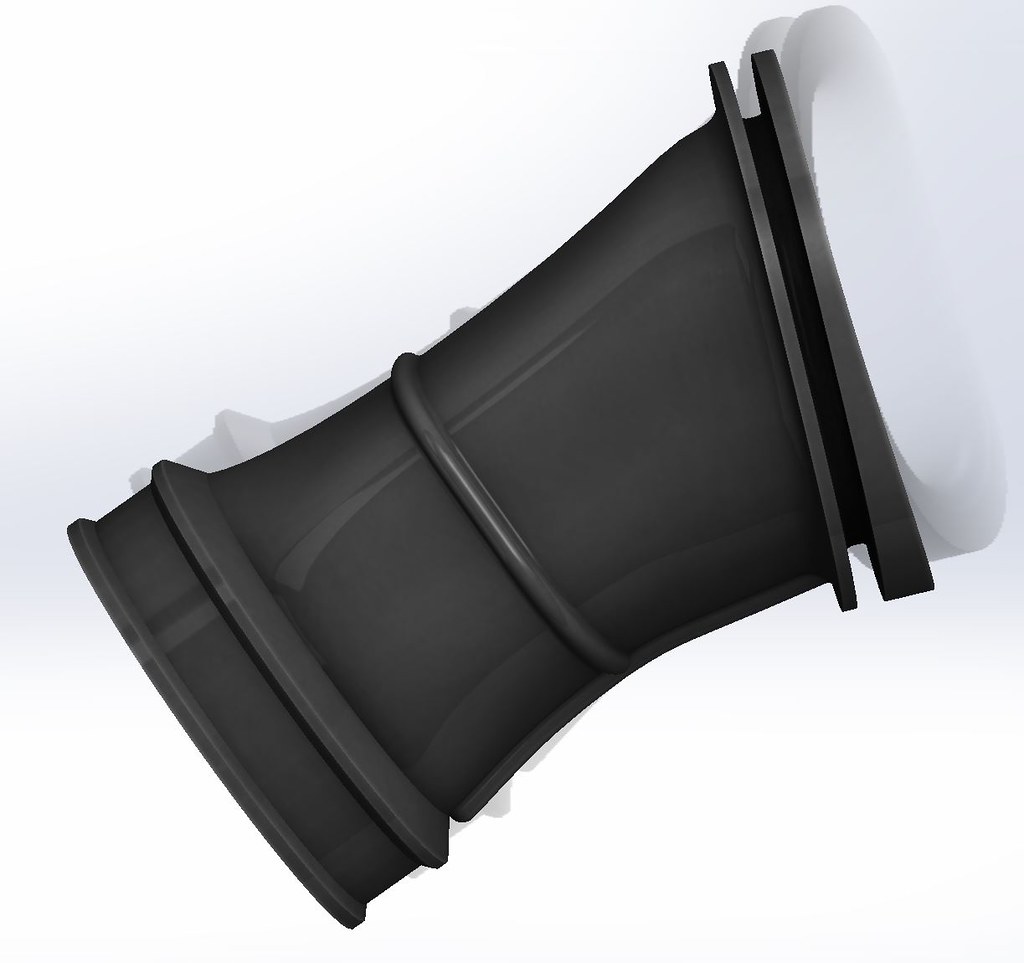
Concessions need to be made for 3D printing rubber unfortunately, so now I'm using M5 Socket cap bolts and the original flange that's molded in the Airbox as a sealing face, it actually works out to be the most effective alternative. Much like a YZ Airbox will use the same design.
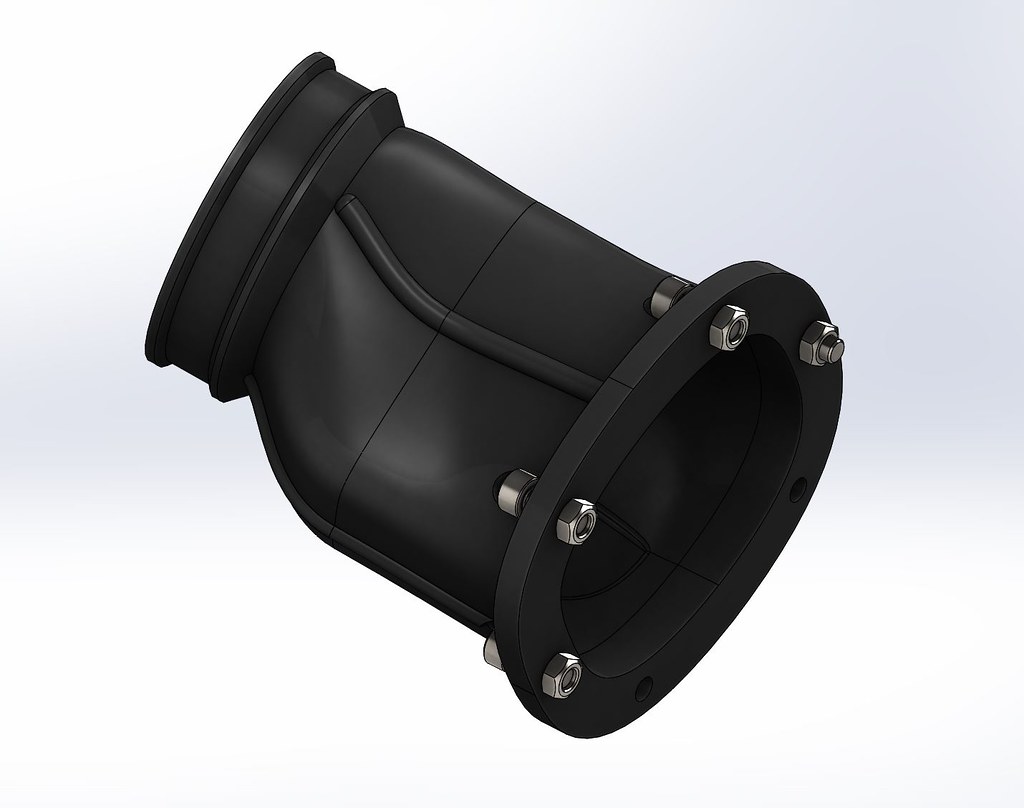
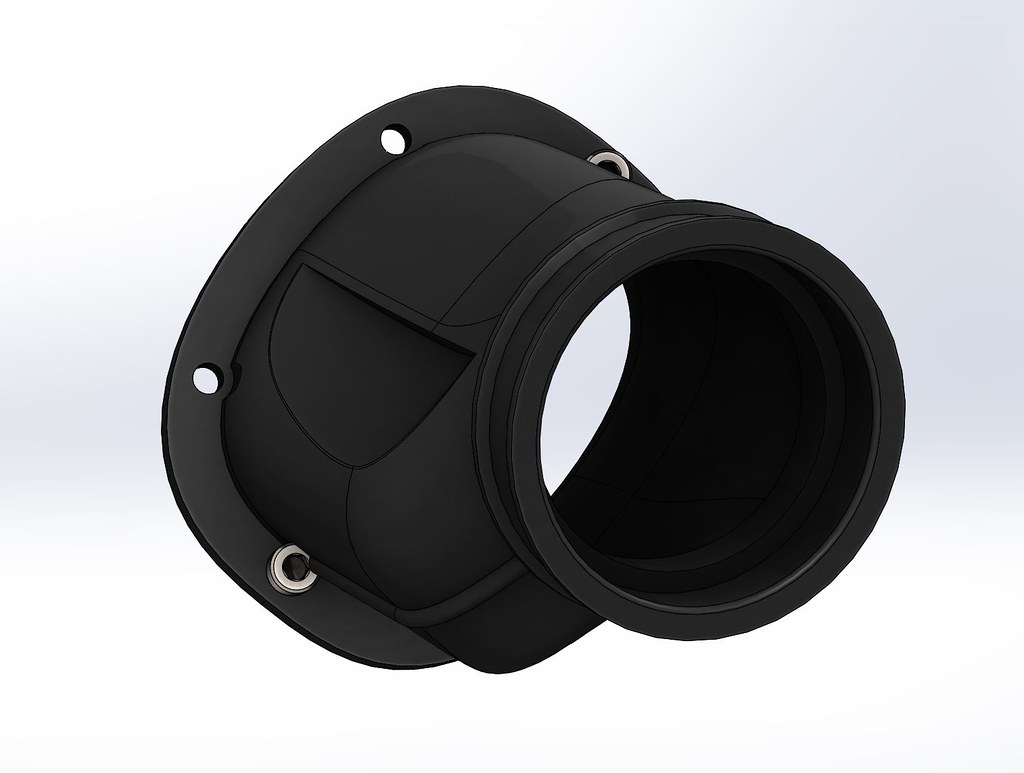

The Airbox is so important when jetting a 2stroke road bike, we need to control the flow of air and have a place to store some also! Induction theory carries on. The area inside is free of interruption and the boot helps to increase the velocity upon entering the carb. I'm hoping to gain more torque down low by using that stock Airbox volume.

The design now minimises any angles greater than 55deg, this means material does not have to be supported as we print. As you can see, this is the optimal version as the rest of the print can completed cleanly as a vertical slice.

Job done,
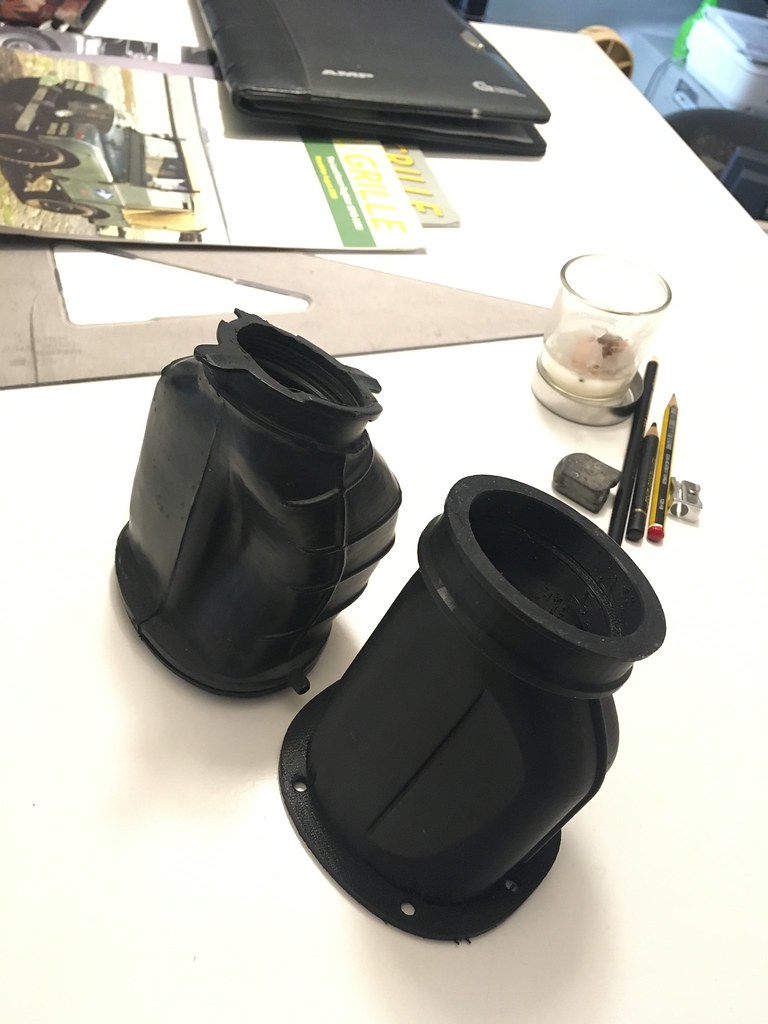
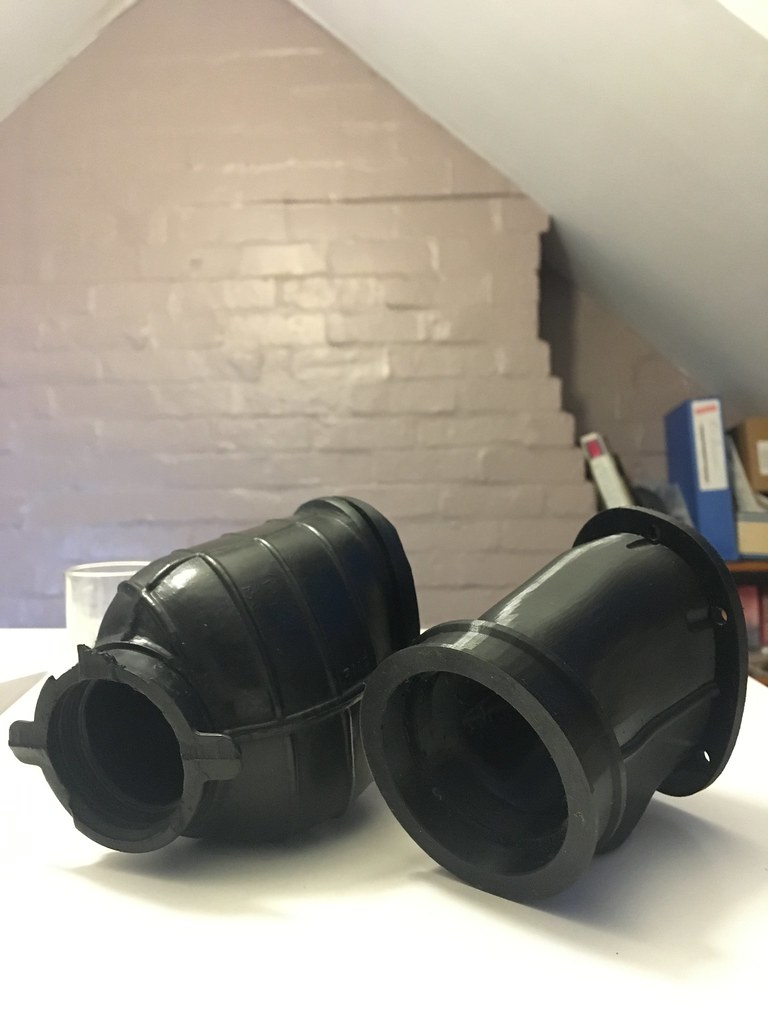

So much more flexibility with jetting. Measure 69 times, draw it once.
Mikuni TM34ss finally finished.
-
Global pandemic huh? returns to shed
Not been doing alot, just wanted to share some bits.

After 4 years, finally built a proper DTX Brembo Caliper conversion. Threw some Titanium bolts on for some weight saving, and bling.
Custom Bracket and Spacers made, was fun on the old Myford Lathe. Got to force yourself to work in Imperial though...,

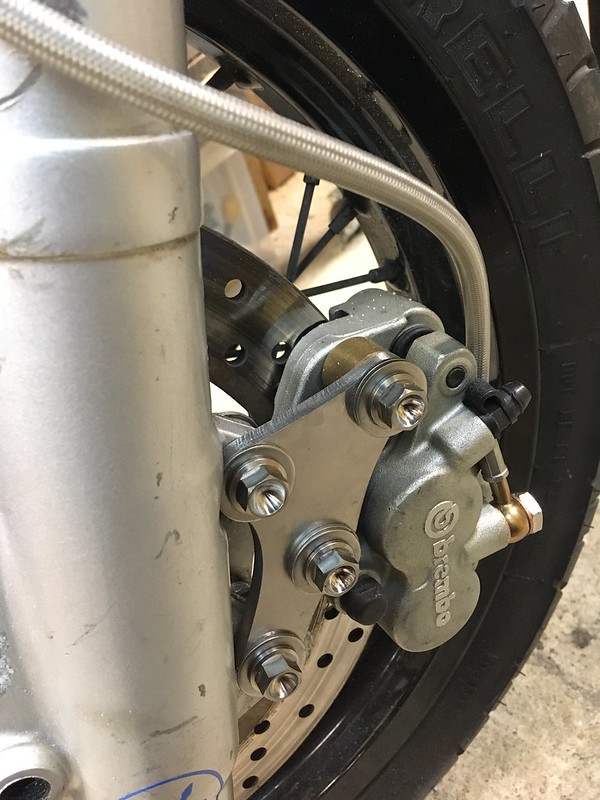
Plenty of braking power with Ceramic Pads on a 298mm Disc. To manage the DTR Fork, I've rebuilt them with 15W Oil and 35mm Spring Top Hat spacers, this effectively shortens the spring travel and keeps the spring in its stiffest part of the stroke. It works well enough for me at 70kg.
Could be better, but you can pedal this thing hard into mid corner so it feels pretty sorted for road use.

I've got a USD setup in bits currently, got a set off NOS 1996 YZ250 Forks, if anything, they just look sick.

I will do a Build thread on installing USD forks for the DTR, as I think many people want to do it but are not sure about the parts needed to do so.
Re-mounted my Ignitech CDI with rubber mounts and polished up my bracket, sadly it seems the company has disappeared. I've never had a problem with my unit and this Programmable CDI is the best thing I ever bought for this project.

The spark on this thing is ridiculously good.

I couldn't be bothered to fix my ported 3MB 'P' 134cc Cylinder so i went back to my old 14,000 Mile standard bore 3MB
Cylinder with a TDR unrestricted Head, and it has been so much fun to ride. Just a torqueey reliable DT engine like I remember it when I was 17.QUICK ENOUGH LOL

Been running different carbs for a few years now, and I have to say you couldnt do much better than well Setup Mikuni TM28ss and the 30ss from a WR200 is brilliant for the 125R.., depending on how good you can setup the floats and mixture.
This is the problem with any carburettor using the standard Inlet,

MIKUNI TM28SS - TM30SS - TM32 - TM34SS - KEIHIN PWK36

My favourite so far has been setting up a Mikuni TM34SS from a Aprilia RS250 and Later model RGV250s, (Same engine)
Mainly, the Venturi is angled so the Fuel Bowl remains level. But it has a really effective power jet and has been easy to setup, it works really well with just 125cc, this engine barks and pulls great at Mid-Range too. For me, I pretty happy keeping this engine under 140cc. It's plenty fun.

I'm using a Modified WR200 Inlet with Boyseen DT200R Reeds. Runs good.
I have a 3D printed Airbox to Carb boot I designed, so it's water tight and easier to jet than a Pod Filter.
Currently waiting to print a new filament that has the right Shore Hardness to produce a rubber part like the original. You need a good amount of flex to seat the airbox and carb together.

This has all been paired with old Nikkon Race exhaust, Handmade, Gas welded steel. There is pretty much no info on these.
I bought this from a guy who used it a couple of times and then stored it for 10 years, as far as I know this is the only DT125R Nikkon pipe left in existence. Which is a shame, because this pipe is so much better than the DEP on the road.
I'm going to copy this pipe into Stainless steel and just keep it the way it is because it suites my application so well. Very large expansion pipe aswell, the design is unique.
Will go further into the restoration of it as it's currently covered in BBQ Black paint.

Long term project aye, I've already had my fun.
@Darty tm34ss is the perfect upgrade due the the shape and angle, keeps the float bowl level .
I think there's a tm36ss also -
Exhaust Porn
This was the last one ever left, I finally bit the bullet and purchased a Stainless exhaust for the DT.

This came all the way from bloody Portugal like this :joy:
Great job lads.
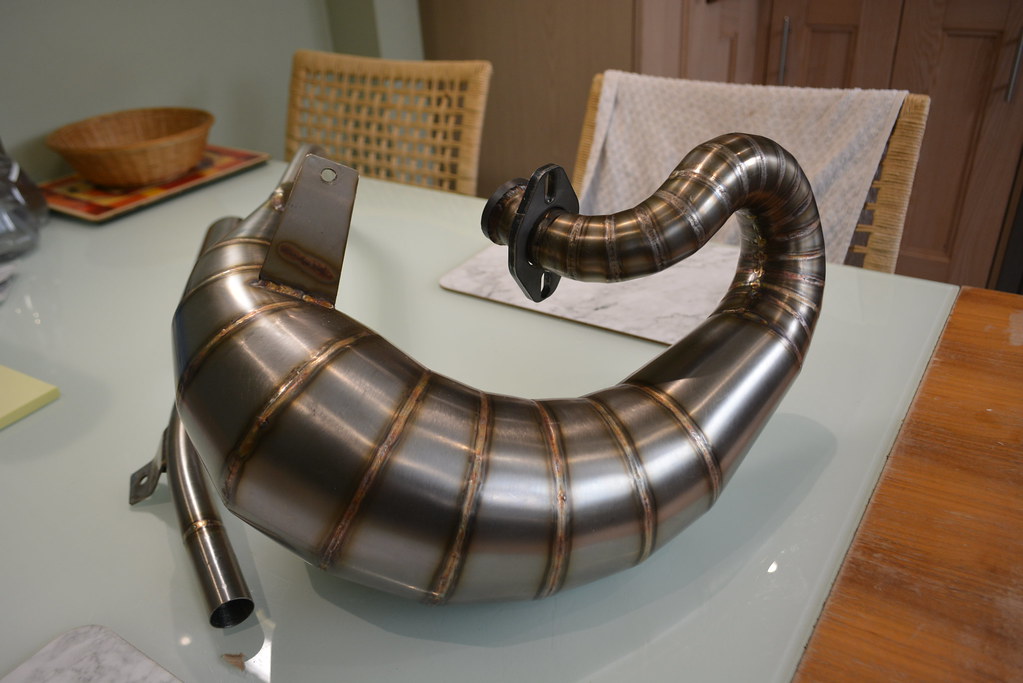


Ballin' - This is the 'YAMAHA DT125 Special Exhaust' in STAINLESS DTX DTR-E with end can from Romeu125 an eBay seller.
Custom design by the gang over there and beautifully hand made.Really quite impressed, only ever 4 sold on eBay.
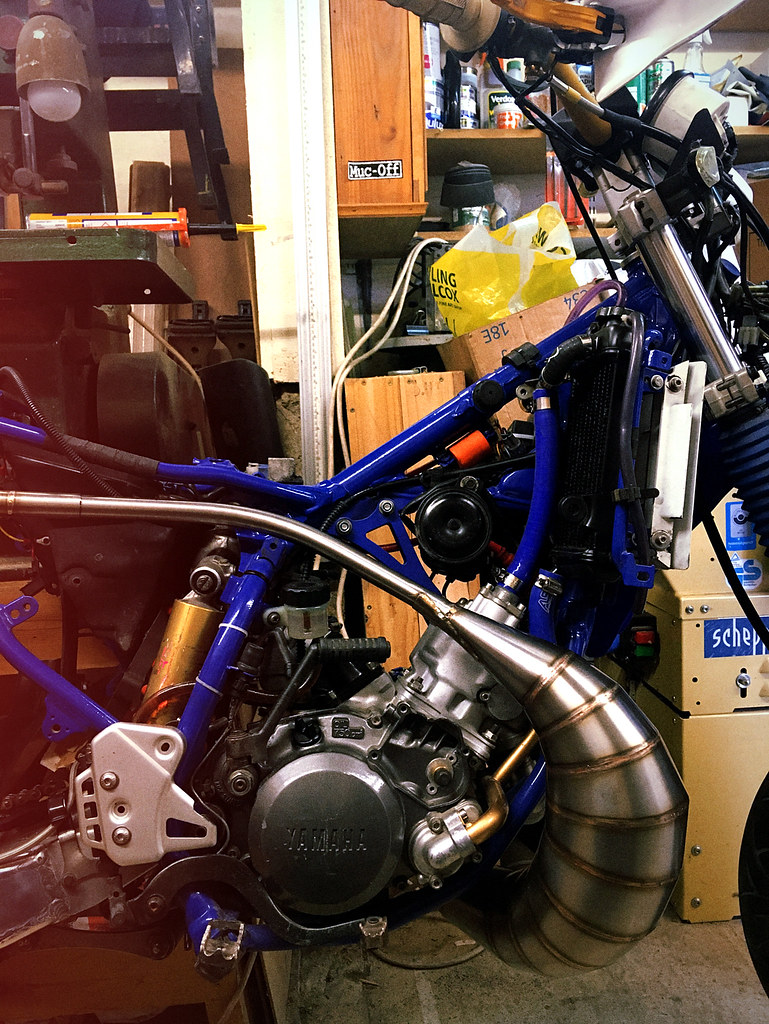
Looks great, low slung - Interesting design. I've got to say, did not fit that well with the tail pipe supplied. It was so awkward in fact I decided to fit my WR200 FMF tail pipe DIY instead.

Looks cool, but too raspy for my taste.
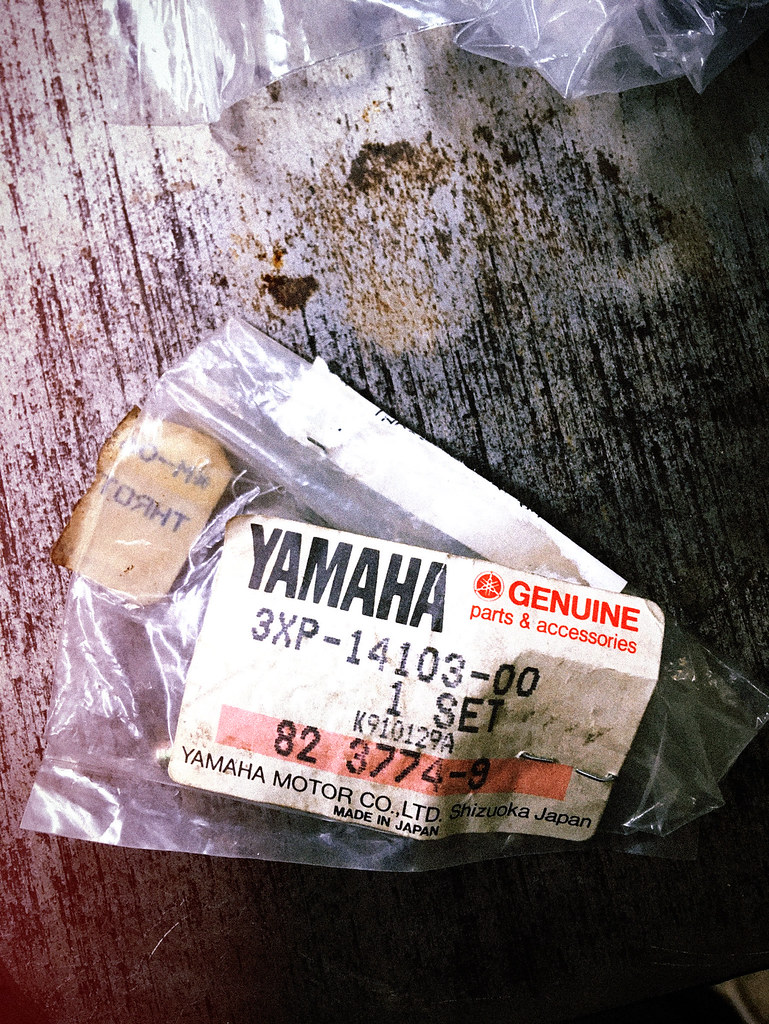
Picked up maybe the last NOS WR200 Mikuni Idle screw ever? This stuff is all getting expensive and stupidly hard to come by these days...Airbox

Next up, finishing up the Airbox. Drilled and bolted up with M5 bolts and importantly using Nylocs. Can't have the ingestion of M5 bolts into the crankcase.
Got it bang on with a perfect seal, sadly it's no going back with the install but that's the best that can be achieved SLA 3D printing.
WR200 SideStand - 1991-1993
The early versions of the WR200 came with a long enduro style kickstand. Almost impossible to find nowadays and I'm kicking myself for not getting one NOS from Fowlers back in the day, but I was a student at the time.

Due to the design you need to notch the DTR frame, so 'sayonara' fresh powdercoat here and sent it with the Grinder. It looks like I've cut to far there, but it's just swarf.
Again, NO GOING BACK.

The WR200 sidestand looks mint, tucks up nicely and props the bike up much further if you run an increased ride height over standard on the DTR.
(New longer spring needed)
FINAL FORM
I'm running DT230 Lanza Frame Guards, Left handside here is a ZETA part. Otherside is an OEM Lanza Part which only fits right handside for the DTR and require spacers and machining to fit the DTR. But worth it.
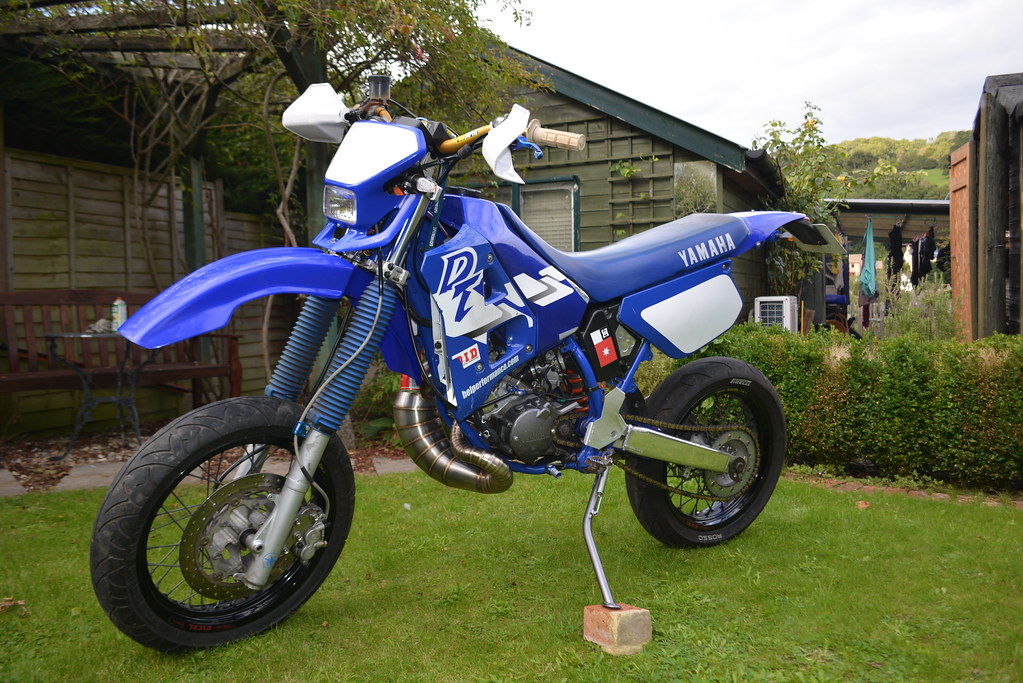
HOT BOI

Such an odd Croissant that pipe....,
I think that's it for the DTR, It's a beast, sounds great and is still alot of fun 7 years on. But it's had it’s day.
Is it better? All I'm certain is that it's mine.
. -
I just ground down the ends of them as they wouldn't sit flush. It's a very minor mod I didn't think twice about it.
-
Yeah it was simple. I tried looking I could find exactly what I bought. I must have done it after I "finished" my bike and thus didn't document it. But yeah was a really easy mod and now I have Phat footrests.
-
@Calum Really nice! My only problem is the budget, those things are like a 100€ 😬 Maybe I should get some Chinesium ones 😅