Skip to content
  • Recent
  • Tags
  • Popular
  • Users
  • Groups
Skins
  • Light
  • Cerulean
  • Cosmo
  • Flatly
  • Journal
  • Litera
  • Lumen
  • Lux
  • Materia
  • Minty
  • Morph
  • Pulse
  • Sandstone
  • Simplex
  • Sketchy
  • Spacelab
  • United
  • Yeti
  • Zephyr
  • Dark
  • Cyborg
  • Darkly
  • Quartz
  • Slate
  • Solar
  • Superhero
  • Vapor

  • Default (Slate)
  • No Skin
Collapse
Brand Logo

DT125R FORUM

HOTSHOT IIIH

HOTSHOT III

@HOTSHOT III
About
Posts
370
Topics
16
Shares
0
Groups
0
Followers
2
Following
0

Posts

Recent Best Controversial

  • Home Made Quick-Lube YPVS Powervalve Cables
    HOTSHOT IIIH HOTSHOT III

    A lot of running problems on DTRs are caused by sticky powervalve cables due to water and dirt ingress. As well as affecting your enjoyment of the bike, this puts a greater load on the servo which as we all know are becoming difficult to get hold of (particularly 3-wire versions). A genuine set costs £40; pattern ones are half the price but all the ones I've tried are the wrong legth meaning only a few adjuster threads engage in the pulley housing when they're adjusted correctly. However, it's possible to upgrade the cables so they're stronger than stock and you can clean and oil them externally in seconds. You'll need:

    Mountain bike inner and 4mm outer gear cables (stainless steel inners are tougher than galvanised and the nipple is the same size as the one that fits into the pulley on the barrel)
    Mountain bike 4mm inline cable oilers
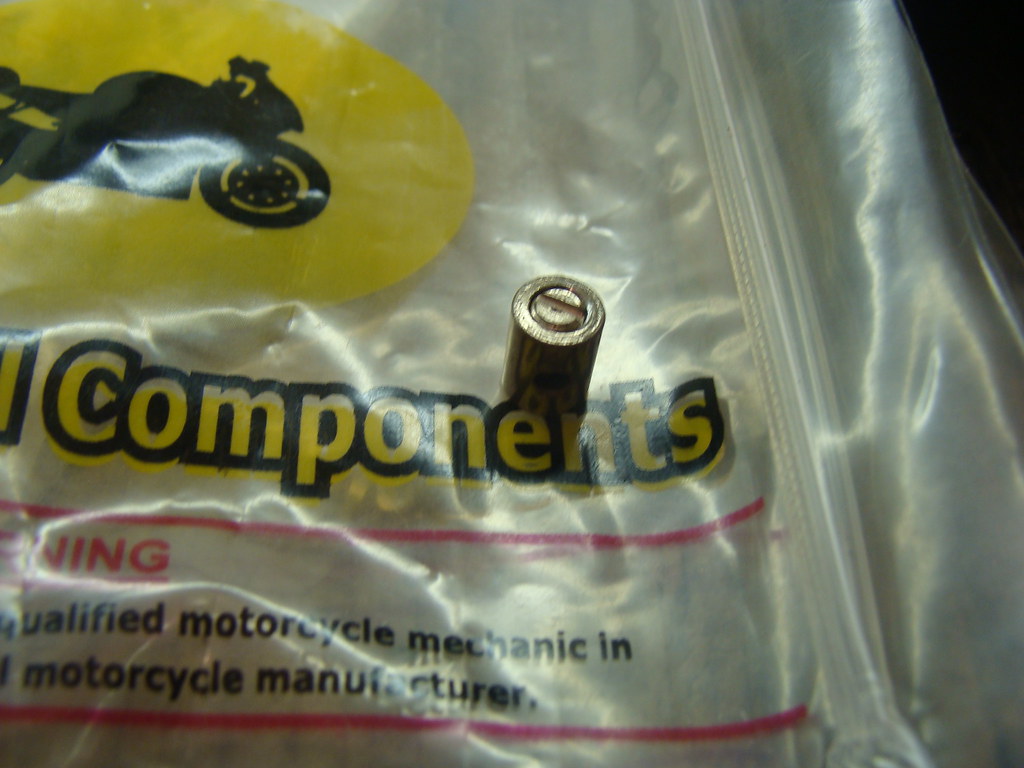
    6mm solderless nipples for the servo end
    Some old powervalve cables as you need to save the threaded adjusters for re-use
    Cable cutters (the type used by cycle shops)

    The first thing to do is remove the original/existing powervalve cables from the bike completely; don't worry about adjustment at this point because this will be done when the new cables are fitted. Next, turn on the ignition so the servo performs its cleaning cycle, turn off the ignition and disconnect the battery. This won't be reconnected until the new cables are fitted and adjusted.

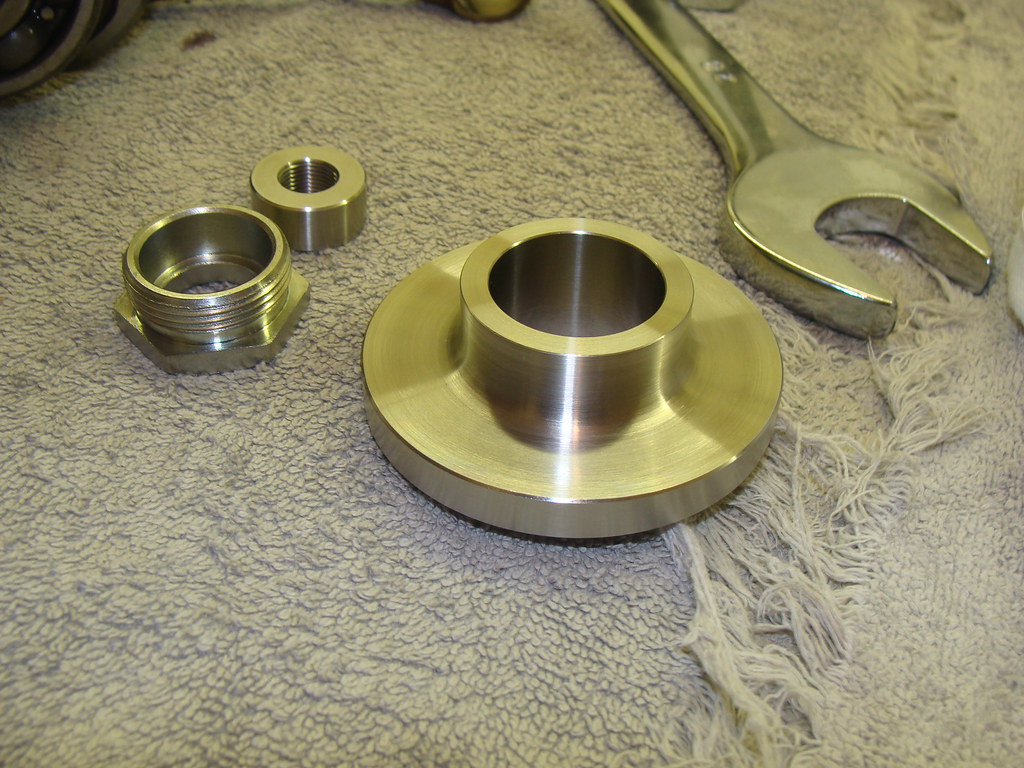
    Take the old cables and do whatever is necessary to remove the inner and outer cable from the adjuster; this usually means chopping the inner cables and carefully hacksawing the very top of the adjusters (the crimped portion above the 8mm hex) to free the outer cable from the adjuster. Then put the adjusters in a vice (using soft jaws to protect the threads) and carefully file or Dremel the top to tidy it up so the new outer cables fit into them easily. Also give them a good clean up so they screw into the pulley housing smoothly and make sure they're not bent as this is a right PITA when setting up the PV.

    Screw the adjusters into the pulley housing and leave about 11mm of the threads exposed above the locknuts. This is so you can disconnect the outer cables from the servo later (to give you enough room to take the inner cables out of the pulley) if you need to.

    Make up the outer cables the right length. Remember to factor in the length of the inline oilers and the little ferrules that fit onto each end (these are supplied with the outer cable and are a pretty snug fit into the servo's cable stops and the modified adjusters). Also the outer cables are a very tight fit into the inline oilers (they have to be so the lube goes where it should) so be ready for this.

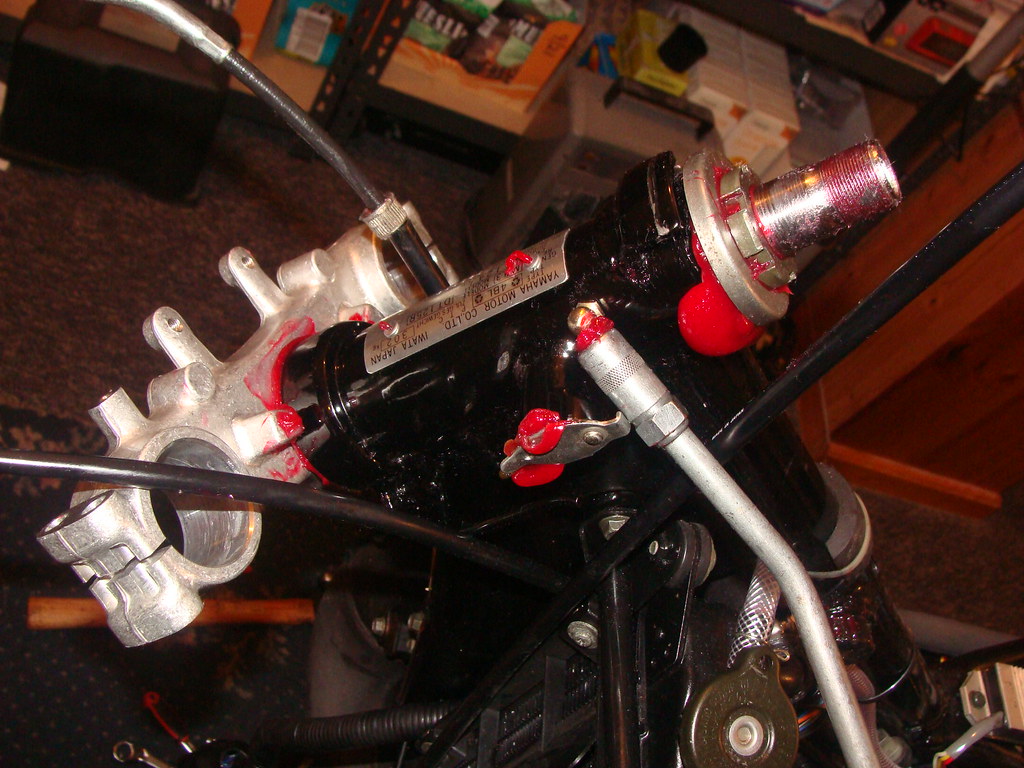
    Set the PV to the fully open position by putting a 4mm drill bit through the U-shaped part at the top of the pulley and locating it in the hole in the barrel behind it. Removing the exhaust and visually checking the actual valve is flush with the exhaust port roof is also useful here. You're now ready to install the inner cables.

    Fit the inner cables starting at the pulley end and threading each one through the 2 lengths of outer cable and the inline oiler. The 6mm solderless nipples will need to be sat in the servo pulley ready so you can thread them through those as well. They're quite long so most of it will end up being cut off but don't worry, most cycle shops supply a pack of clamp-on cable ends to prevent fraying (these are fitted very last thing).

    Pull the inner cables tight with pliers when tightening the grub screw in the solderless nipple; remember if the inner cables need to be disconnected from the pulley you've already provided 11mm of adjustment for this purpose (10mm is about how far the outer cable fits in the cable stops on the servo).

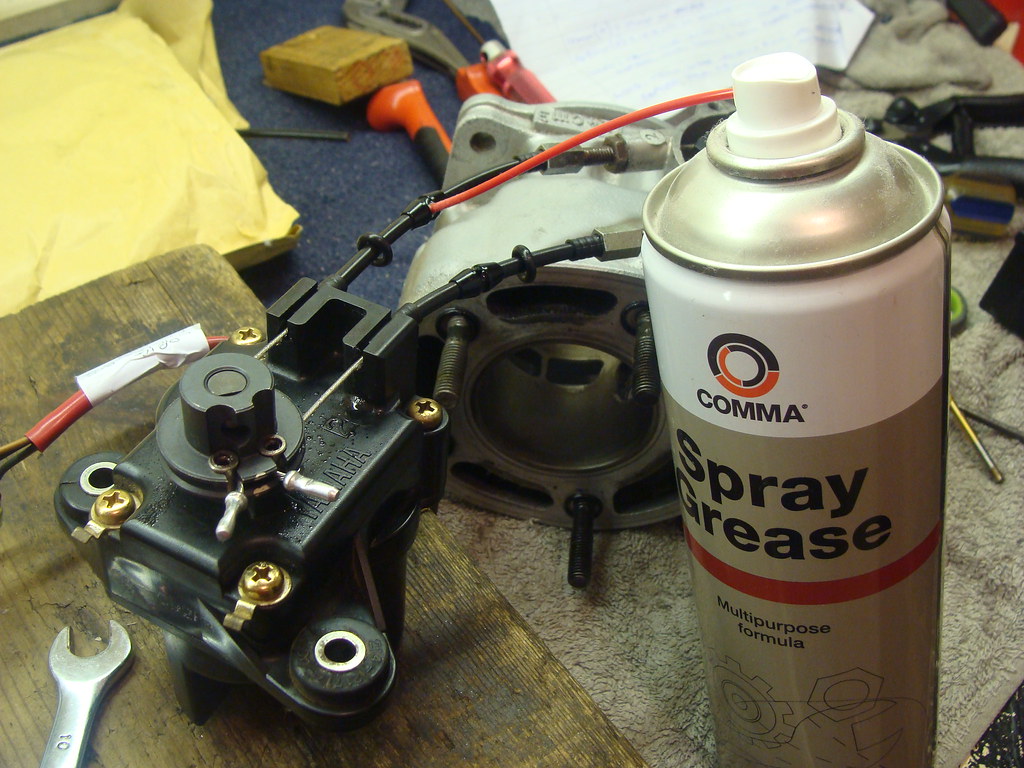
    Cut off the excess cable and fit the cable ends (get them as short as possible to avoid fouling the rubber servo cover), and then adjust the PV cables according to the Yamaha/Haynes manual (fully tighten the inner cables and then back each adjuster off half a turn IIRC). Then fill those cables with lube! Watching clean spray grease come out of each end is strangely pleasurable.

    Remove the 4mm drill but from the pulley BEFORE RECONNECTING THE BATTERY AND SWITCHING ON THE IGNITION; failing to do this can destroy the servo instantly.

    Once you've made sure the cables are adjusted properly and the 4mm drill bit is removed from the pulley/housing, reconnect the battery and switch on the ignition. The servo at this point should perform one complete cycle and rest with the valve in the fully open position (it adjusts to engine speed when the engine starts). If you've done everything right you still might need to do a final adjustment to get it perfect just like if you've fitted new genuine cables.

    This is a fiddly job which a lot of people CBA with, but the problem with YPVS is on most bikes the cables are too short and vertical to retain lube for any length of time. Plus a lot of people never lube them because this means readjusting them. This doesn't stop them acquiring grit and water however, and it is this which is responsible for most DTR powervalves ending up poorly adjusted and not working very well. Fit these properly and you'll have a set of PV cables stronger than stock which take about 30 seconds to clean/lube every time you wash the bike, all for about the same cost as buying a new genuine set.

    I love inline cable oilers. I started using them on my mountain bike a few years ago, and they made the drivetrain so reliable I eventually forgot how to set up gears! Yes, I actually forgot and had to sit through the GMBN Tech how-to guide on YouTube. Most embarrasing 😠

    https://www.sjscycles.co.uk/cables/jtek-cable-oilers-4mm-black-3-pack/

    alt text

    alt text

    alt text

    Engine

  • Happy New Year 2025
    HOTSHOT IIIH HOTSHOT III

    Happy New Year everyone, agreed it's important to keep the Forum alive as the DT125R is IMO one of Yamaha's greatest achievements, I'll be here in 2025!!

    Announcements

  • 2001 DTr
    HOTSHOT IIIH HOTSHOT III

    @StuKing94 I don't know too much about the later DTR electrics so IMO that 1990 with electric start would be a better bet (electric start was a factory extra at the time and quite expensive).

    Plus I think the '88 to about '98 were full power models from new in France.

    General Discussion

  • Help needed...is this a dt125lc or dt125r?
    HOTSHOT IIIH HOTSHOT III

    @StuKing94 It's definitely a DT125R but the 3DB VIN prefix denotes the earlier model with 26mm round slide carb, different bore and stroke, different amount of oil in the forks, different electrics and different sprockets from later models.

    Nothing really wrong with the earlier bike, I owned one and couldn't tell the difference but there aren't as many spares about as they were only made for one year, and you have to be careful previous owners haven't cobbled together a Frankenstein to save money.

    Also I once bought a stock pipe from an eBay seller which turned out to be a 3DB and that was completely different as well.

    General Discussion dt125r dt125lc help

  • So Close!...
    HOTSHOT IIIH HOTSHOT III

    @Calum Thanks for your compliments bud, yes all 80s/90s two-strokes are expensive nowadays, looking at 7 grand for a well sorted TDR250 but I paid £1000 for my 1st one in 1993 as no-one really understood what they were at the time.

    I guess I was in the right place at the right time but it came at a price in the form of parents etc. getting on at me to think about my future and stuff (my brother went straight through higher education, degree by age 21 but I walked out of school at 16 with no qualifications) but I just wanted to be around motorcycles. Got my fingers burned a few times trying to work for Honda and Yamaha main dealers as an apprentice, answering to a workshop foreman didn’t suit so eventually I ended up as a general dogsbody in a place which upset them all by selling grey imports direct from the US and Japan. Very low wages, I had mates at the time earning three times as much as me working for Mercedes, BMW etc., but they didn’t have what I had; some of the guys at the grey import shop were twice my age, ex-forces/prison etc. but I fitted right in and when there were errands to run they’d let me borrow their GSX-R1100s and stuff like that even though I was still a teenager. The boss was a laugh to be around as well, he was a bit of a barrow boy made good and we shared the same sense of humour. He once got me to record a Mr. Cholmondley-Warner style answerphone message for when the shop was closed, wrote a script and everything and we spent a whole afternoon doing loads of takes until it sounded exactly right.

    https://www.youtube.com/watch?v=uzDcecbHnAs

    I stupidly swapped the KR1-S for an RD500LC which was a big disappointment; only 5mph faster than the Kawasaki (which even today is I believe the fastest road-going 250 ever made, Performance Bikes Magazine radar gunned one on an airfield at 139.5mph about 5 seconds before it seized) and it was a big heavy thing with tankslappy 16” wheels and quite weedy suspension by today’s standards. The engine was a bit strange as well, both banks of cylinders were different and it was needlessly complicated for what it was. And you couldn’t really modify them unless you had a blank cheque book to give Stan Stephens.

    alt text

    The TDR250s were definitely the most fun out of all the two-strokes I’ve owned; all my mates at the time had RG500s, NS400s etc., much better on paper but in real life they couldn’t lose me anywhere. They all had a go on the TDR at one time and came back howling with laughter swearing they were going to go out and buy one the very next day but none of them ever did. You have to remember the French had only invented Supermoto racing a few years previously so in the 90s if you showed most British bikers a CR500 with lights, 17” wheels/road tyres and a dustbin lid-sized front brake they’d just shrug their shoulders and say “nah, don’t like trial bikes”. In 1994 me and my TZR250 buddy rode up to Donington for the Yamaha Owners' Festival which included free track use for Yamaha owners. We were very tired by the time we got there (we’d ridden 200 miles up there on Friday night after work) and ended up colliding exiting the M1 less than 5 miles from the circuit which broke his footrest hanger. The next day we went into the village, bought a MCN and found a Yamaha breaker at a place called Lutterworth 50 miles back down the M1 (which is where Frank Whittle developed all the jet engines in WW2) who had the part for £15 so I rode down and got it, and bought an 8mm allen key from a hardware shop in the town to change it (everything like this suddenly becomes easier when you’re not in southern England any more). On the Sunday (exactly 28 days after we’d been there watching Kevin Schwantz take his last ever 500GP win) we were out on the track waxing a lot of bigger bikes, including a particularly obnoxious married couple with matching brand new his ‘n’ hers YZF750s who camped next to us and made fun of our oily jeans, DIY repairs etc. which was very satisfying. Also met a guy with the same bike as me who had a huge “TDR” graphic on the back of his one-piece leathers and had a good battle with him for a few laps.

    alt text

    If I could live that part of my life again I guess I’d do a few things differently but one thing I wouldn’t change is being the proverbial young lad in a bike shop. Crap pay, no qualifications/future but it was a very special time, after being booted out of secondary school, going through the special education system and told I’d never amount to anything I felt valued, like I was right where I needed to be and you can’t put a price on feeling like you’re part of something.

    DTR

  • what it this orange wire on my CDI?
    HOTSHOT IIIH HOTSHOT III

    It supplies power to the ignition coil

    DTR

  • Seized rear suspension relay arm nut removal hack
    HOTSHOT IIIH HOTSHOT III

    Here's a copy of a post I did on a DTR FB group a while back showing how to remove the rear suspension relay arm nut (it's a nut which looks like a bolt) which always seizes on the DTR.
    Some people chop them out with an angle grinder; this risks damaging the frame if you slip and you'll need to buy/recondition another relay arm which can be expensive.
    It's also difficult to beat the nut out because the sidestand bracket is in the way and you can easily damage its internal thread. This method presses the nut out square and you can usually re-use it.

    You need:
    A length (approx. 160mm) of M6 studding (hi-tensile is tougher than stainless)
    M6 nuts or studding connectors (studding connectors in the pics are much deeper and stronger than normal nuts)
    A 24mm socket (nut hex is 22mm but the spigot on the frame prevents a 22mm socket from fitting over it squarely)
    Loads of different sized M6 washers

    First take off the lower chain roller and spray the whole area with WD40 or similar to let it start to work.
    Take out the retaining bolt from the chain side and put that and its washer to one side. Find 2 or 3 washers small enough to fit through the hole in the frame but big enough to sit on the end of the nut like in pic 1 (if they disappear inside the nut they'll damage the thread).

    alt text

    Pic 2 shows the brake side. Put the socket over the head of the nut followed by some bigger washers and then the M6 nut.

    alt text

    Start doing up the nut on the brake side (the one on the chain side will disappear inside the relay arm). This pushes on the nut on the chain side, pressing it out square while allowing the head of the nut to move into the socket. Pics 3-6 show why it seizes; even with a grease nipple to lube the bearing, no grease ever reaches the surface where the nut and the bearing's inner race contact each other. Clean these up with wet and dry an make sure you get loads of copper grease in this space when putting it back together!!

    alt text

    alt text

    alt text

    alt text

    If your relay arm doesn't have a grease nipple, now is the time to fit one!! Pic 7 is the original needle roller bearing from my '93 DTR which is still fitted in the bike now and passed an MOT in April 2021. Grease nipples cost pence, drilling and tapping a hole is an easy job for any engineering shop and a grease gun costs £25 on ebay. If you keep greasing the linkage/swingarm bearings they take years to wear out and you'll hardly ever need to take them apart (the 1990 bike I owned in 1992 as a teenager covered over 30,000 miles without my ever needing to do anything to the rear linkage; a big part of what swayed me to choose the DTR as a hobby 30 years later), I do mine every time I wash the bike.

    alt text

    Hope this post helps someone, any questions don't hesitate!!

    Suspension

  • Correct cable and wiring routing advice required
    HOTSHOT IIIH HOTSHOT III

    @89dt125nick No worries bud 👍 When refitting the CDI to the oil tank, be sure to apply plenty of copper grease to the mounting bolts and brass inserts to prevent them corroding together (this is also a good idea for all the captive threads in the airbox) as if this happens it's almost impossible to get the bolts undone because they just spin round in the plastic. Common problem on MX bikes where the rad shrouds attach to plastic fuel tanks after a lot of pressure washing.

    Framework

  • Fitting a Grease Nipple to the Headstock on a DTR
    HOTSHOT IIIH HOTSHOT III

    Here's a post about doing a headstock bearing grease nipple conversion. One of the great things about the DTR is (on the early versions at least) every bearing on the rear suspension linkage can be greased externally due to it having grease nipples fitted at the factory (and these can be added quite easily if you have a later one where they were deleted).

    Drilling and tapping an M6 hole is relatively easy but the biggest headache is what to do about the slot machined into the steering stem for the separate steering lock!

    If you don't seal this up all the grease will just come out of it and go all over the front mudguard, plus no hydraulic pressure inside the headstock = your bearings won't get cleaned and lubed by all the grease you're pumping into this area.
    So what you have to do is, whilst the front end is apart get some approximately 1" heatshrink tube on the stem to cover it. Secure with zip ties and don't use sticky tape of any kind because once the headstock is full of grease it will break down the glue and make it unravel which will make a bit of a mess and allow the heatshrink to move.

    Because the steering lock protrudes into the head tube slightly it sometimes takes a couple of goes to get the zip ties in the right place but it's quite easy to check and redo this if you're just trying the bottom yoke in there, you can feel if anything is interfering with the lock-to-lock movement.

    Grease nipples have tapered threads to seal them so don't try and do them up until they bottom out as you could ruin the thread you've just tapped. Just get them tight at an angle you can reach with the grease gun when everything is back together. They're pretty inexpensive on ebay etc.

    This does unfortunately mean you can't use the frame mounted steering lock but the actual lock will still function should any future owner want to use it, you/they will just need to remove the heatshrink to allow it to work. IMO perfect headstock bearings are of much greater value than two steering locks which shouldn't be relied upon in the cold light of day in any case; a big chain/D-lock is a much better theft deterrent.

    Also readjustment takes time as all that grease gives you a false reading; Yamaha recommends doing up the adjuster nut to something like 38Nm. rotating the bottom yoke fully a few times, then backing it off to about 6Nm. Pump the headstock full of grease after finishing this step and keep checking them for the 1st few rides.

    If you've got this fitted and grease nipples on all the rear linkage bearings you can basically throw your DTR around a MX track, jet wash it with all the accuracy and sensitivity of the bloke with the M-60 in Full Metal Jacket, then re-lube everything externally so it will take a very long time to wear out. A very special feature I personally believe all bikes should have!!

    alt text

    alt text

    alt text

    alt text

    alt text

    alt text

    alt text

    Framework

  • simple tail tidy?
    HOTSHOT IIIH HOTSHOT III

    @Calum That one fits the shape of the DTRE well 👍

    @mbmO8 Depends what you want from investing in a tail tidy, if you want the back of the bike to look better you can make your own or if you're worried about the number plate falling off when greenlaning (a common problem as two plastic numberplate screws are fine for the road but not really up to serious off-road riding) you can reinforce the fitting of the numberplate with the stock setup.

    I made this one back in the 90s before anyone had thought of manufacturing tail tidies, and my goal here was to make it look like one of the grey import bikes which were popular at the time and always had nicer lights/indicators than the equivalent UK-spec machine. What I did was to make a U-shaped piece of 1mm thick steel with the centre section the same width as the distance across the indicator mounts on the grabrail. The parts each side were about 30mm at the top tapering to 20mm at the bottom and I then mounted it fitted over the indicator mounts, sloping downwards at the same angle. I also made sure the full 260mm rear wheel travel was available without the rear tyre fouling the numberplate by removing the shock and lifting up the rear wheel with the bike on a MX bike stand. Although not visible in the pic there was enough space under the blue rear mudguard to fit one of those little oval standalone number plate lights, nicked off a Kawasaki Eliminator down the breakers IIRC. Cheap-ass mini indicators (but better ones are available these days) and taillight is one of those scaled down TS125R pattern lights and always worked very well:

    https://www.denniswinter.com/off-road-c1/parts-c91/electrical-parts-c144/tail-lights-c473/raceline-enduro-3-motorcycle-tail-light-universal-fit-p258537

    alt text

    alt text

    Or you can attach a piece of 2mm aluminium to the back of your full size numberplate using double sided tape to stop flying stones from breaking it, then use spacers to attach it to the rear mudguard in four places instead of two using M6 bolts, large washers and nyloc nuts (paint the heads black or yellow) for a really bombproof fitting. This looks stock from a distance and so doesn't attract the attention of Plod, the MOT man etc. but I've greenlaned/jumped DTRs with this setup and the numberplate never moved. And you get to keep your OEM rear light which is probably the best option.

    alt text

    alt text

    I realise you asked for a simple tail tidy; neither of these options are simple but it's not going to be simple if you just buy one either. To make a decent job of doing the wiring you'll need a bullet connector kit (don't use those blue/red motor factors connectors) and there's no guarantee an aftermarket one will fit well without modification so you're better off approaching it with the goal of making the bike as good as it can possibly be from the viewpoint of you the owner. In reality nothing about DTR ownership is simple. There is an excellent passage in Zen and the Art of Motorcycle Maintenance by Robert M. Pirsig which goes something like "the craftsman and the work are changing together, and at the exact point where the work is as good as it can possibly be, the craftsman's state of mind is in a complete state of relaxation and contentment". He also talks about taking his (new) bike back to a main dealer to be fixed under warranty, where he observes the mechanics are basically a bunch of 25-going-on-13 adult toddler chimpanzees with OnRadioWuuuuun cranked up full volume (very much my own experience of working in the motorcycle trade). They end up making the bike worse, he takes it home and fixes it himself in about 5 minutes.

    I hope I haven't put you off DTR ownership by writing this, if you buy a tail tidy online and fit it it will probably look good and work well but equally it can be very rewarding to sit down and design/make something that improves your bike and is unique.

    Electrics

  • LED headlight conversion
    HOTSHOT IIIH HOTSHOT III

    @mbmO8 Try upgrading the stock headlight bulb before going the LED route.

    The stock DTR headlight takes a P45T bulb (similar fitting to H4) and has AC lighting (i.e the power for the lights comes straight from the magneto without involving the battery) so you can run a 100/80W halogen bulb without flattening the battery unlike a lot of bigger bikes which run DC. The DTR’s actual light lens/reflector is the same as all Yamaha superbikes of the 80s like the RD500LC and XJ900, but Yamaha cheaped out and fitted a 45/40W candle to the DTR which is why lots of people don’t find it bright enough. 100/80W bulb lights up the roads/trails like a rally car and retains an MOT-friendly beam pattern. Once a year or two ago I met up with a bunch of guys greenlaning on modern KTMs and decided to tag along with them as it was getting dark; they couldn’t believe how much brighter my headlight was. Get this one:

    https://www.ebay.co.uk/itm/161339938963?hash=item25909c1893:g:1~UAAOSwewJTn~QT&amdata=enc%3AAQAIAAAAwF8Gw72CnU%2FbU0Zeu1tjSRJFvfcr8SwbZT4fRnA6WLf6yF0iSX4F43bpTTUSgtfBlW1qXJSqMRtuS3Z1Luu%2FAD2VbsWrYvQrEc7oksN8VfDpaJHi6ZYW7zMtJnc%2F1be5np%2B6CZfap%2Frggb9cb01JyCQriOkPtIXXi8yWcKEn3mLr0%2Bhj6%2FoeZKr0o8Jl3vVA6Hka4%2F2xaD1awxGTbT2XEJFqjhxzyuYbuNe8sKHYOq%2Fho75%2FaGbmg%2FihQpqKGR%2B4kA%3D%3D|tkp%3ABk9SR6iwz8zLYg

    Electrics

  • Merry Christmas 2024
    HOTSHOT IIIH HOTSHOT III

    @Calum Merry Christmas and a Happy New Year!!

    Announcements

  • Unable to post new topic in "Bikes for Sale"
    HOTSHOT IIIH HOTSHOT III

    @Calum Just posted and it seems to have worked OK, thanks again 👍

    Forum Related Issues

  • Unable to post new topic in "Bikes for Sale"
    HOTSHOT IIIH HOTSHOT III

    @Calum Thanks for clarifying, I'm on 35 atm so maybe I'll do some more how-to posts.

    Anyone want to see how to solder on a new HT Lead to a stock DTR coil for better-than-new ignition performance?

    Forum Related Issues

  • How far has one went in one trip on dtr
    HOTSHOT IIIH HOTSHOT III

    @sheamac29 It will be fine as long as the bike is well-maintained.

    Back in 1998 I lived in Southampton and rode to Donington Park to watch the British GP on my '88 round slide carb; 200 miles each way loaded up with camping gear and 4 days of campsite mayhem against MOT failure GSX-Rs, event security Land Rovers etc. One bloke borrowed his boss's signwritten van (a locksmith IIRC) for the weekend and thought it would be a good idea to drive over a moped on fire; this then got caught underneath it and burned the van to a crisp. All the fire brigade could do was watch it burn as there were aerosols exploding inside it as well as the diesel. Sadly the notorious Donington Campsite of the 90s is one more casualty of our risk-averse Health and Safety culture.

    I guess I must have done about 600 miles that weekend and after a thorough check over at home, all I did was top up the 2-stroke oil and keep an eye on the chain. This is what the DTR was built for and people still use them to get around in remote parts of south-east Asia, the Andes etc. Just bleed your oil pump, lube up all cables, keep the gearbox oil and chain and sprockets fairly new (chains are cheap; smashed crankcases are expensive) and keep greasing up the rear suspension linkage and you're laughing 👍

    General Discussion

  • New Crank
    HOTSHOT IIIH HOTSHOT III

    @SpookDog Thanks man 👍 Forgot to mention, the YouTube vids I watched about lapping the crank/flywheel were all adamant that you should only rotate the flywheel in one direction when you do this.

    For crank building/truing check out Allen Millyard on YouTube, he builds 5-cylinder Kawasakis by chopping up two sets of 3-cylinder crankcases and welding them together and stuff like that. Tokyo Offroad is a pretty good channel as well, they've done a how-to series on completely rebuilding a KTM TPI engine.

    https://www.youtube.com/c/AllenMillyard

    https://www.youtube.com/c/TokyoOffroad

    General Discussion

  • New Crank
    HOTSHOT IIIH HOTSHOT III

    @Scootjockey I bought one of these Top Racing cranks from PJME. The bottom and went together well and I had to use a crank puller tool to fit it into the LH main bearing like the Yamaha manual says so critical dimensions would appear to be as they should be. Here's the link to the puller which comes as a set with a case splitting tool, half the price of Yambits etc.:

    https://www.vevor.co.uk/crankcase-splitter-separator-c_11501/crank-case-splitter-separator-puller-installer-automotive-dirt-bike-supplies-p_010929606602?gclid=Cj0KCQjw48OaBhDWARIsAMd966BWcxK2C-gZMUDCxC82-o0MYgJj8BBICg4jfyQ1NDFCc3IMwI18tG8aAi_7EALw_wcB

    To avoid transmitting a side load through the main bearing (which will shorten its working life considerably as ballraces don't like this kind of treatment) I also had this adapter made (pics taken using the original crank for test fitting):

    alt text

    alt text

    alt text

    alt text

    alt text

    alt text

    The only issues I had were:

    The threads for the primary/flywheel nut aren't as well finished as on a genuine crank meaning I had to purchase a couple of M12 dies to lightly chase them before the new OEM Yamaha nuts would screw on smoothly using fingers. Not drastic, the tool didn't feel like it was doing very much and I think it would have been fine to just screw them on with a socket but I'm quite finicky about stuff like that.

    Woodruff key grooves were a little tight (as they should be) so I needed to gently clean up the flywheel side with a needle file and lightly tap the new OEM key in with a toffee hammer.

    My 30-year-old flywheel was a little rusty inside the taper so I lapped it and the crank into each other using some fine valve grinding paste (PJME said they commonly do this when I asked them first). Fit the crank seal before doing this to protect the main bearing, and make sure you clean it all off the crank/flywheel thoroughly before the first startup!!

    I haven't tested the crank yet so can't comment on long-term reliability but I'm pretty impressed with mine so far.

    I think if you buy from PJME it will cost about the same as a refurb depending what level of conrod kit you choose but the main selling point for me was it's brand new, trued and ready to fit; I once had a KX250 crank rebuilt and the web diameter where the main bearings fit were sufficiently worn to allow the crank to rotate inside the main bearing inner races. I got a local machinist to knurl these surfaces to make them slightly proud, then pressed the mains on with loads of high-strength Loctite bearing fit on the advice of a well-respected MX rider/mechanic but the bottom end lasted about 5 minutes before it happened again.

    Also I bought some Athena 56mm top end kit pistons from RRD Preparation (they sell the A, B and C dimension pistons) and they turned up pretty quickly so I'd be happy to order from them again.

    General Discussion

  • TDR 125 extra power
    HOTSHOT IIIH HOTSHOT III

    @Calum That particular TDR250 has been on eBay for a while and in the pics, the temp gauge is literally a couple of mm away from the red zone. Not sure how they managed that as the only time mine went that high was after a rebuild when I forgot to connect up one of the carb warmer hoses 😰 
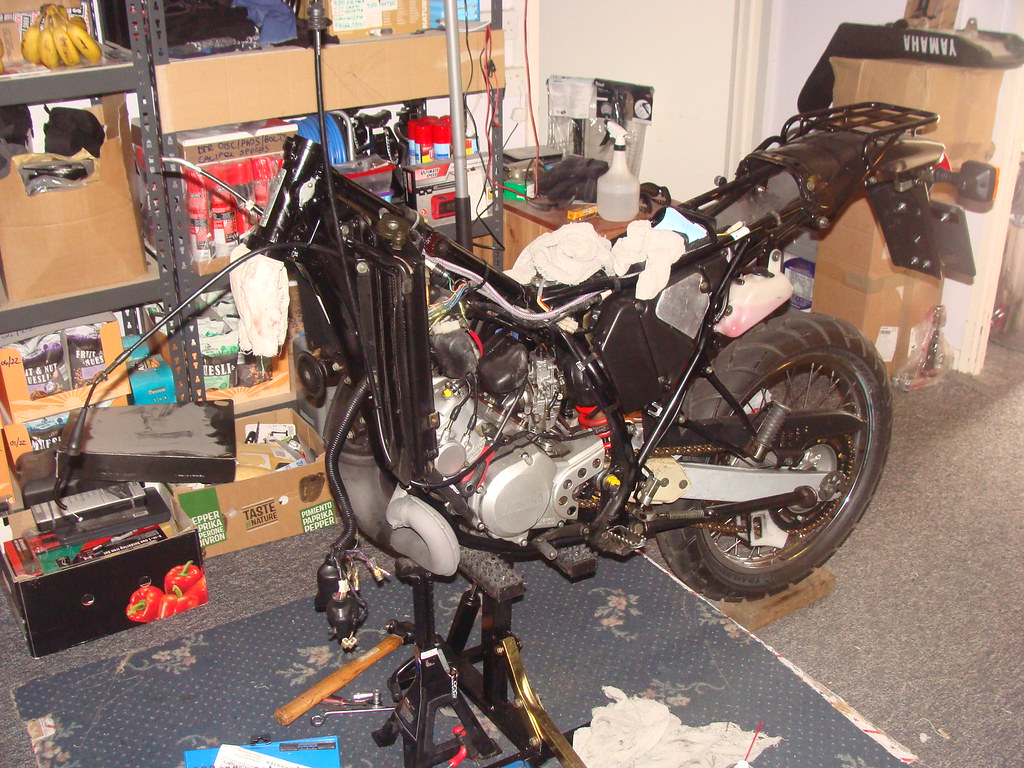
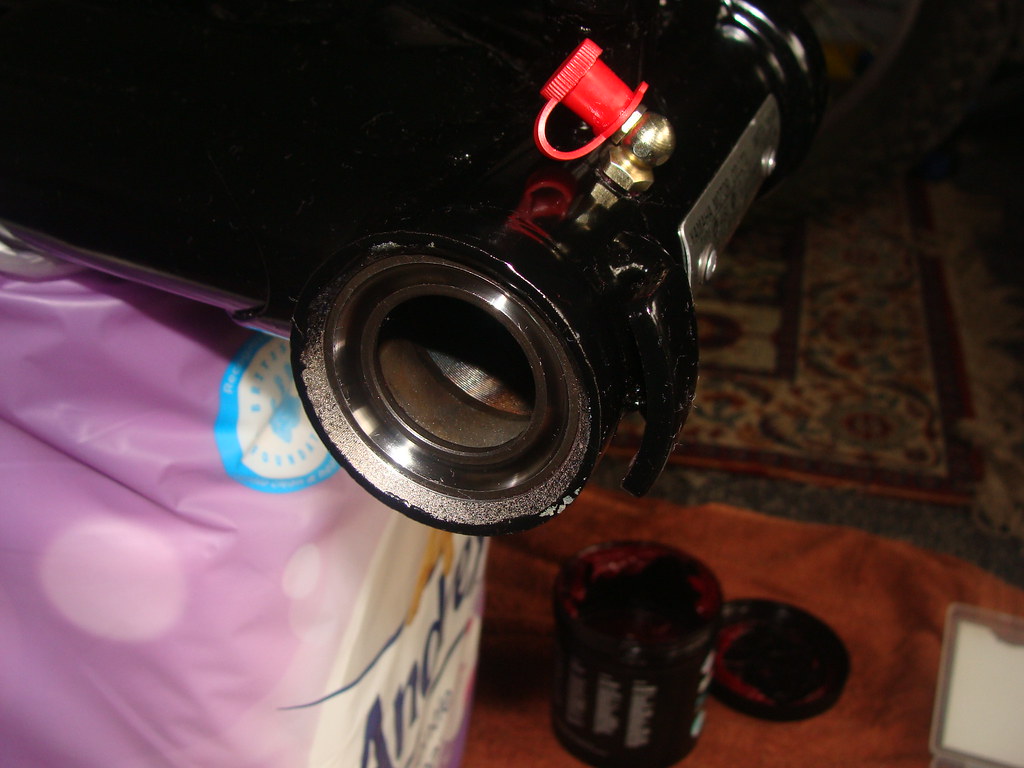
In my defence several so-called mates were in my 8' x 14' shed at the time ripping the p!ss out of me to put it together quicker.

    I'm not sure I'd pay £7k for any TDR250 as it was my 1st "big bike" after passing my test at 18 and although great fun to ride they were something of a disappointment after the DTR. Forks felt (and looked) like they were straight off an air-cooled 70s RD and the frames on all mine had a habit of snapping mounting lugs off through vibration. And the rear suspension linkage don't even get me started; if that was fitted to a bike today I'd consider it a Greta/WEF Nudge Unit plot to discourage motorcycle ownership! Cr@ppy copper/teflon wrapped bushes everywhere which developed MOT failure play about 300 miles after replacement even when road riding without a passenger. I eventually bought a tap and die set and fitted grease nipples to mine which helped but I still had to keep an eye on them. And the plastics broke if a butterfly flapped its wings in the southern hemisphere. I've never really understood this because the R1-Z never suffered from any of these problems as far as I'm aware.

    They all seemed to be bought by yobbos who just ran them into the ground as well, I've never known any other bike to have that much appeal to those kinds of people. Such a shame because you could get them to run rings round sportsbikes with a few cheap mods like Renthals, decent tyres etc. I rode one of mine at the '94 Yamaha Track Day at Donington and mixed it with a lot of bigger bikes, including a particularly obnoxious married couple with matching brand new His 'n' Hers YZF750s who made fun of our oily jeans, last-minute setup changes etc. 🤞

    It was also my 1st taste of modding in the shape of a TZR wheel conversion and a rear light made of 2mm sheet aluminium with a tool-free snap fitting into the tailpiece. A mate with a TZR parallel twin suggested we swap bikes and when following him, I was shocked I looked like that to other road users chucking it round corners with 6" of space above the back wheel, like a sort of Jeremy McGrath/Kevin Schwantz lab experiment gone haywire!

    You have to remember the TDR250 was originally a parts bin special to use up all the surplus TZR parallel twin engines and Yamaha can almost be credited with inventing Supermoto by accident just by making it. Many happy memories for me overall, just a shame they didn't run with it and come up with an updated version after a couple of years...

    alt text

    alt text

    General Discussion

  • Hi from SW UK
    HOTSHOT IIIH HOTSHOT III

    @yeolderaver Only just seen you asked me about my bikes, back in 2021 I owned three French import DTRs, a '93 3NC (black/red Tecno/DEP pipe combo), a '98 3NC (black/red stock pipe) and a '98 3MB (blue/white knobbly tyres). The '93 I did a nut and bolt restoration so it basically looked new, then rebuilt the engine with a new crank, Athena 125cc top end, Zeeltronic ignition etc. Unfortunately I never got to ride it with the engine mods due to a few health problems but the new owner loves it apparently.

    alt text

    The '98 3NC I just cleaned up and rode for a few months, it had only done like 5000 dry miles from new so just needed a recommissioning. Although I did have to replace the oil seal behind the front sprocket as on my local green lanes, some extremely helpful person had left a woolly hat behind; this got sucked up behind the left engine cover and wound itself around the output shaft which knackered the oil seal. Lovely thing though and it turned heads everywhere it went.

    alt text

    The 3MB was owned by someone who used it for Paris commuting for over 20 years and it had racked up over 70000km; the highest mileage DTR I've ever seen anywhere. Despite this it was the fastest of the three, some of the steep hills near me there were places my (both full power) 3NCs would struggle but this just revved and revved. Amazingly when I replaced the head gasket I measured the bore and it was standard! I think the previous owner might have had so many rebores over the years they eventually had to just replace the barrel, French breakers are full of DTRs so you could probably get hold of a standard one quite easily.

    alt text

    I worked in the motorcycle trade when I was younger and that's kind of what led me back to the DTR 30 years later, I needed a Lockdown project and felt I had unfinished business with the bike industry because as a teenager/early 20s I found a lot of people I worked with quite dismissive and unhelpful, not sharing information etc.

    During my recovery I realised I missed cycling more than motorcycling so this year I've restored a few mountain bikes, all mid-to-late 2000s Specialized Stumpjumpers. Eventually I want a 2005 (silver), 2007 (green) and 2008 (blue rims) in both large and medium so I can decide what year/frame size suits me best. The cycle industry can be pretty unhelpful as they're constantly trying to reinvent everything and convince buyers to get the latest thing (it's actually worse here than in the US) so it's quite a challenge hunting for parts all over the world but very satisfying.

    alt text

    alt text

    alt text

    Oh BTW talking of rear shock, I don't think the OEM one is rebuildable as it's under very high pressure like 300psi (Haynes tell you exactly where to drill a 3mm hole in it to release the pressure if you're throwing it away; WEAR GOGGLES) but the YSS DT125R shock is excellent. Also it's about 7mm shorter that the OEM shock which might help your daughter because when you factor in the linkage ratio it makes the rear of the bike sit about 21mm lower:

    https://www.brooksuspension.co.uk/motorcycle-shock-absorbers/yamaha-dt-125-r-yss-mz366-shock-absorber-89-06

    This vid shows why shocks are pressurised to stop the oil foaming:

    https://www.youtube.com/watch?v=GBcRBOikb8c

    @Calum Like your alloy (DT200R 3ET?) swingarm buddy. The plastic mud flap that protects the rear shock wears the (basically priceless) alloy swingarm away at the rear of the linkage bearing over time so it's worth installing something to prevent this (there's an Australian DT200R group on Facebook and almost every swingarm on there looks worn like this). Doesn't have to be expensive or flash, a lot of people with modern Huskies, KTMs etc. JB Weld a coin to the surface of the arm as they're prone to it as well. On mine I used the plastic sleeve which you get inside one of those boxes of sticky labels they sell in the post office cut open and cable tied on.

    alt text

    alt text

    alt text

    Welcome New Owners!

  • New member from Italy
    HOTSHOT IIIH HOTSHOT III

    @Giova @Calum @SpookDog I think the pendulum will begin to swing the other way to be honest. Here in the UK we've just had a new climate emergency/political correctness bedwetter government "elected" who want us all driving electric vehicles and heating our homes with expensive inefficient heat pumps by 2030.

    It's completely unachievable and is only going to cost the ordinary person more and more money and looking at the comments on social media, more and more people are beginning to realise this. Eventually people are going to say enough is enough and turn their backs on the whole Save the Planet movement, voting for anyone who promises to rip the whole thing up. And this will result in a return to two-strokes, V8 muscle cars and gas central heating. Personally I can't wait.

    I'm not completely against electric propulsion; I raced radio control cars for a number of years at a time when electric was taking over classes such as 1/8th scale buggies traditionally dominated by internal combustion engines, the IC boys made fun of us and called is tree-huggers etc., then when we started beating them the boot was on the other foot. they complained to the sport's governing body and secured their own racing class. For me it was a no-brainer as electric was cleaner, quieter, easier to work on and the acceleration was just instant. And the extra weight generated more grip/stability at some tracks (although the 500 2-stroke got the better lap time in the vid below). I think Motorsport would be a better use for the technology as if you've forgotten to charge up the worst that can happen is a crap weekend's racing, nowhere near as bad as having to waste 4 hours recharging your everyday transport. I think they want everyone to be a captive audience buying endless Soy Lattés from Starbucks and tapping away on their laptops whilst their wheel-barrow-tyred box on wheels charges in the car park.

    https://www.youtube.com/watch?v=a44I3746CcA

    Welcome New Owners!
  • Login

  • Don't have an account? Register

  • Login or register to search.
  • First post
    Last post
0
  • Recent
  • Tags
  • Popular
  • Users
  • Groups