Yamaha DT125R '01 - Running Project
-
The sooner it goes back together, the sooner it can be destroyed, that is what it's all about.
It just doesn't fit anymore, and fried the wadding in 3 weeks.
RIP. DEP system.
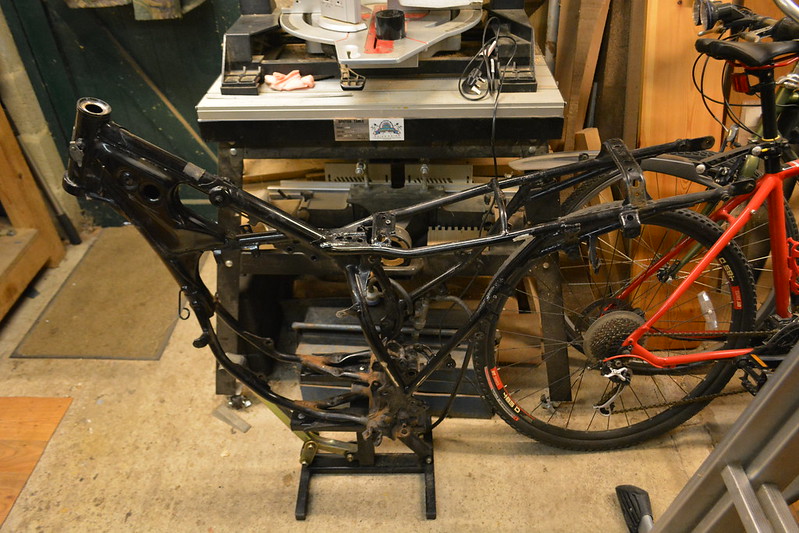
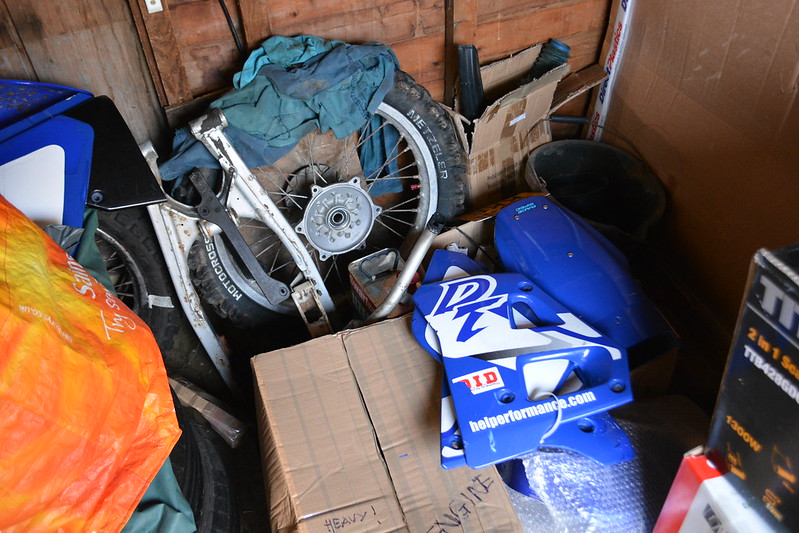
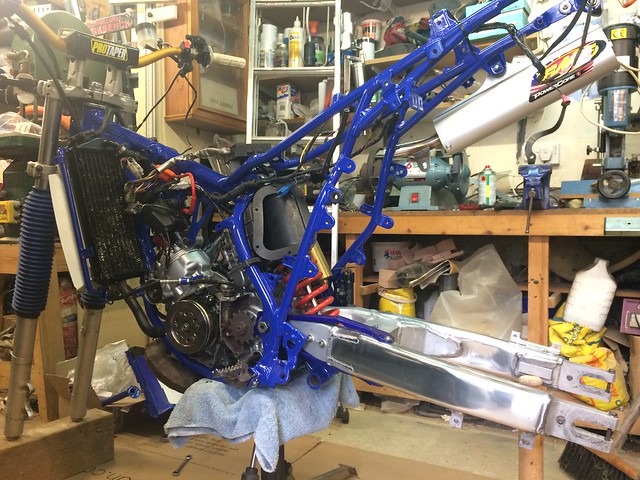
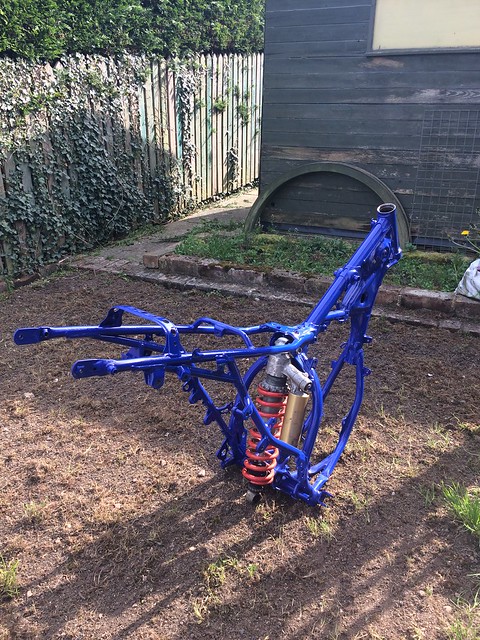
The worst thing is having a Taxed and Insured Motorcycle that looks like this. Chassis needs work.
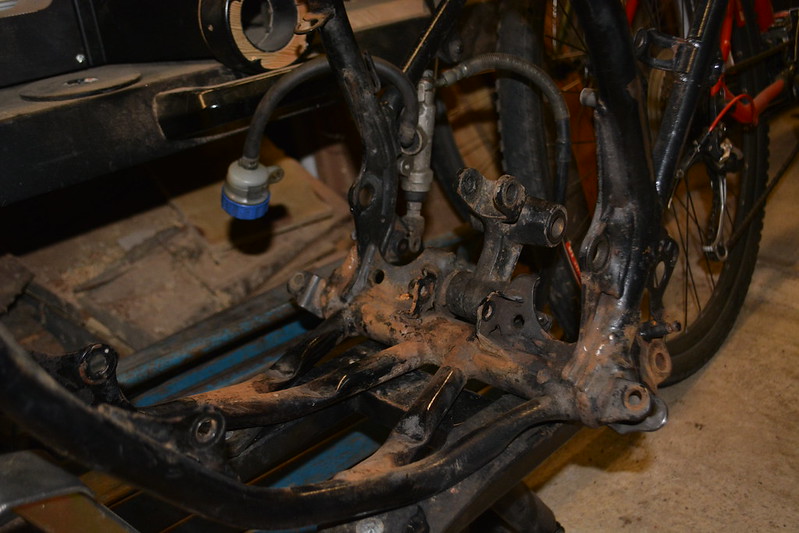
I can also illustrate the knarly fucking dent to the frame rail I found a few years ago.
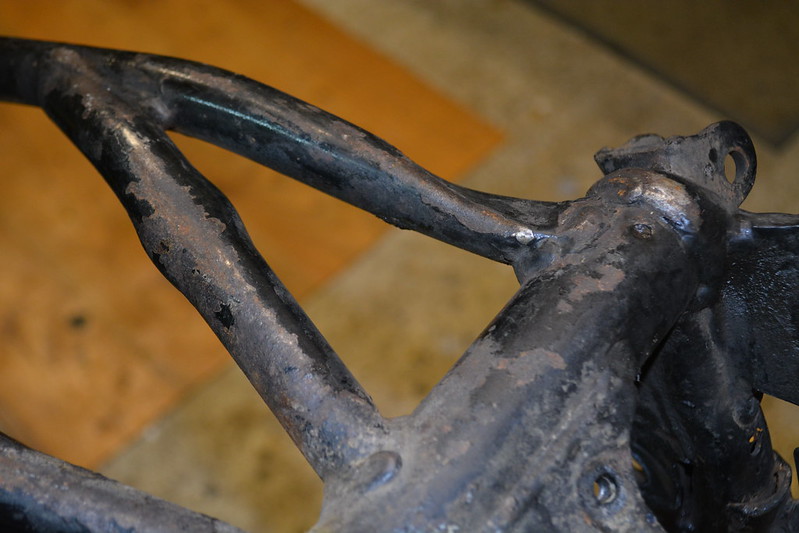
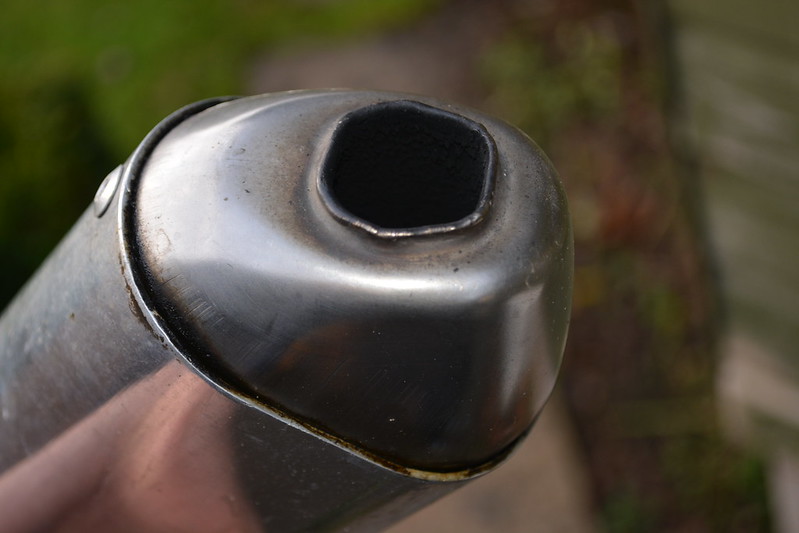
WTF... How do you even?
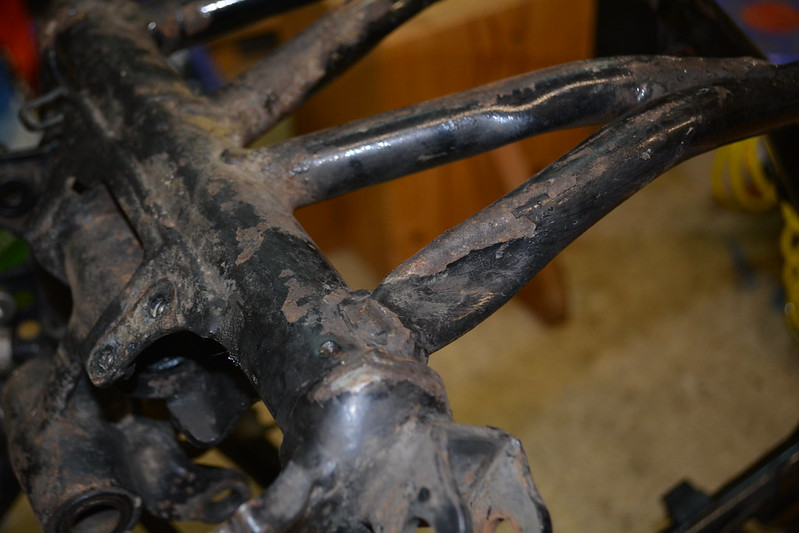
That impact has twisted the down tube, its almost imperceptible, but the engine mounts tell me it's all been effected. I have seen worse before though, much worse! So still a really good base to build on.
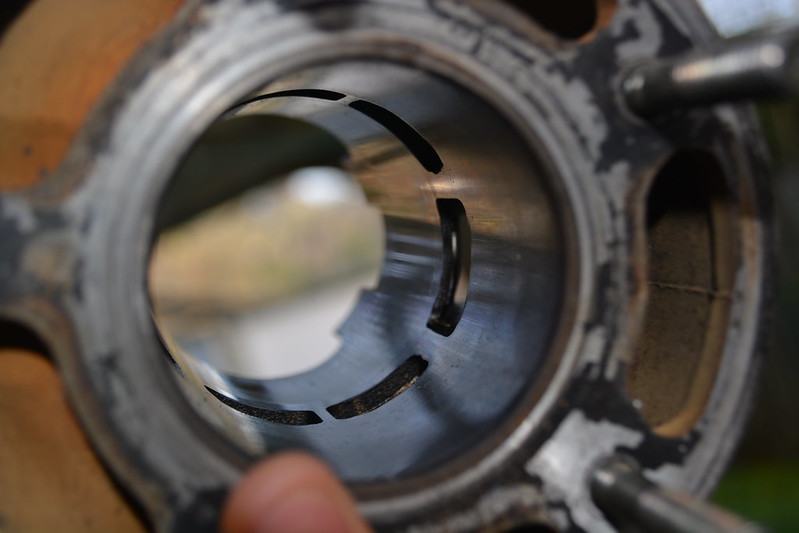
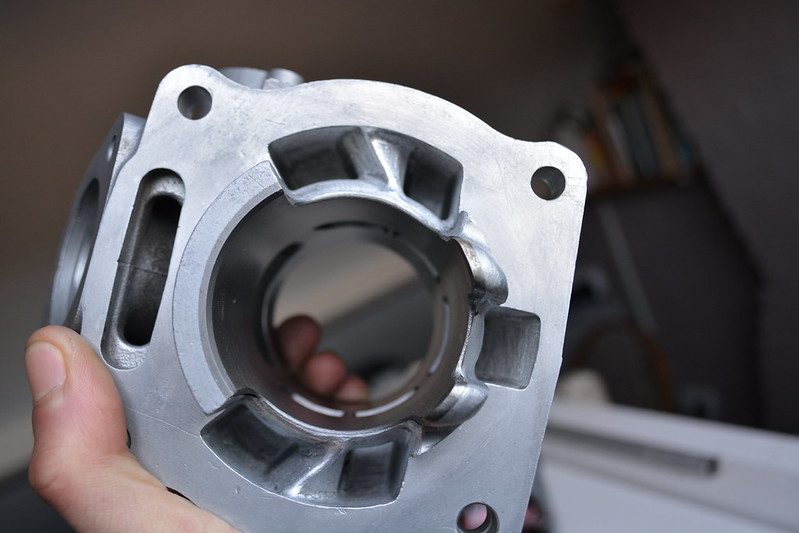
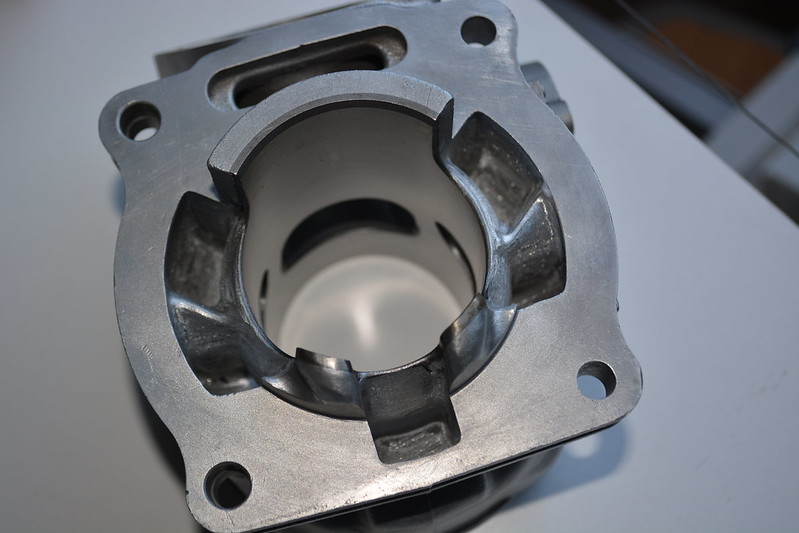
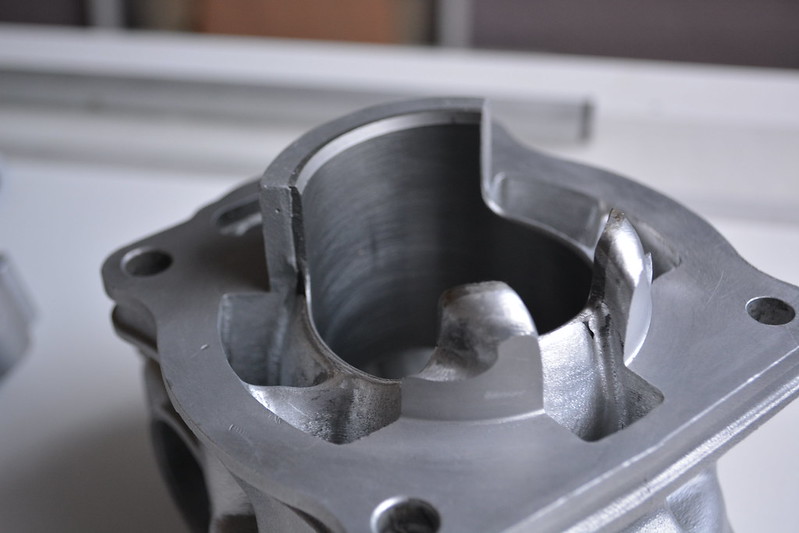
Off comes the old barrel, honing marks are still there.
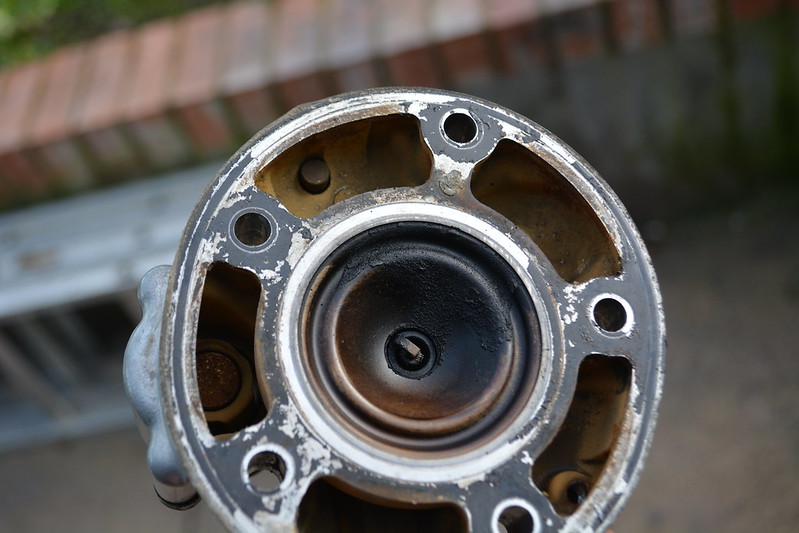
It ran perfect all of it's life. I ruined the mixture towards the end. The Powervalve was completely coked up. If you maintain these things they will see 14,000 miles on a set of rings.
It did heat seize once, didn't last long and never had any-more trouble.
Found an unused WR400 headlight. What a score. Always fancied one.
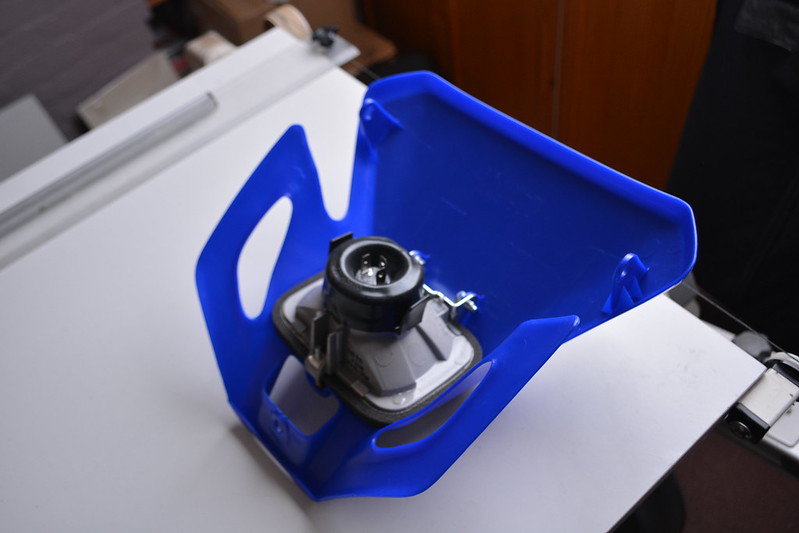
Single bulb Enduro unit, so nothing special really.
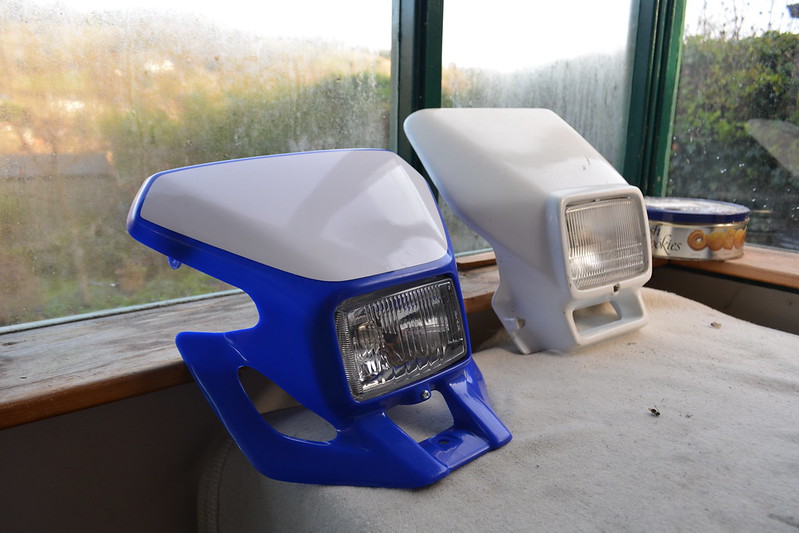
WR vs RX, Not sure what I like more.
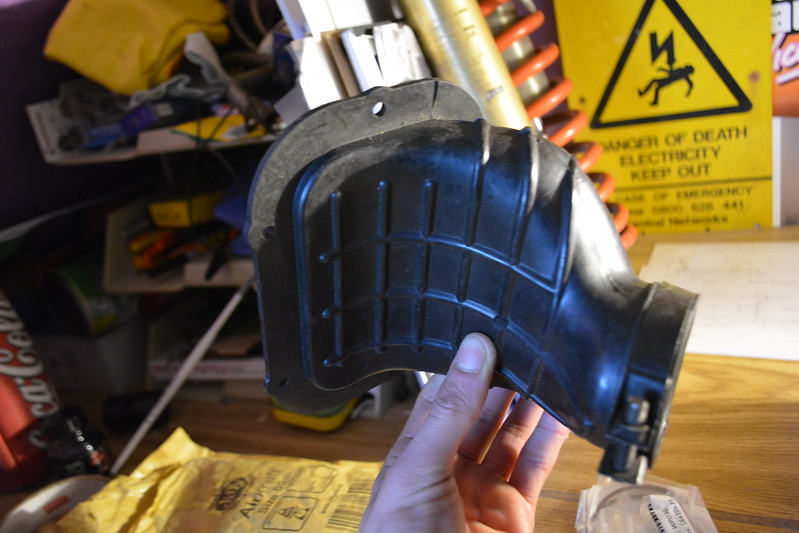
I found a good solution, 1987 YZ125 airboot.
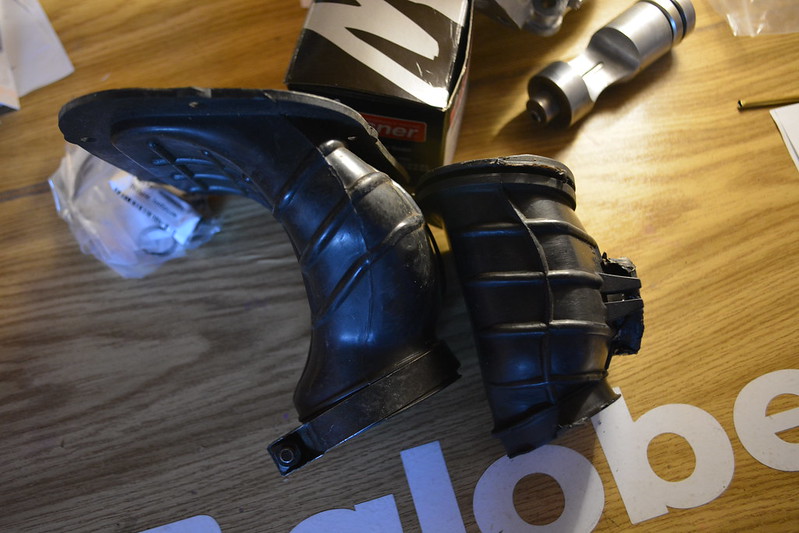
Ready for a 34mm housing, so no more pod-filters, which are rubbish.
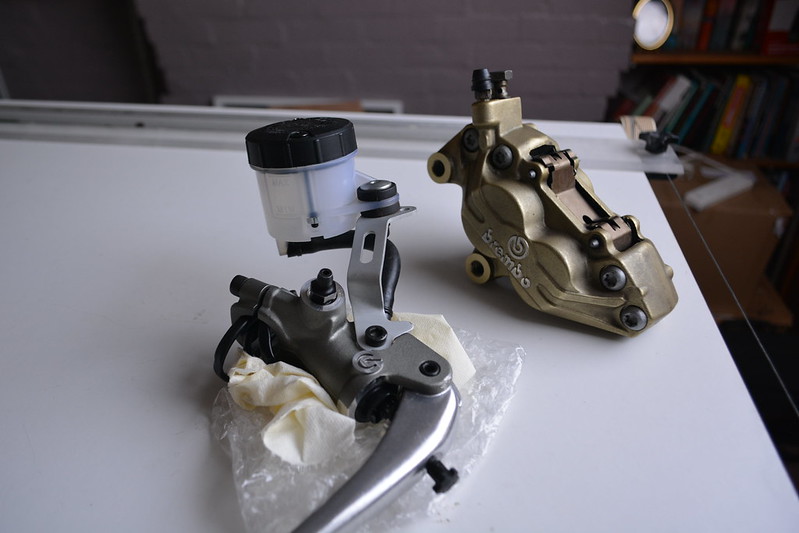
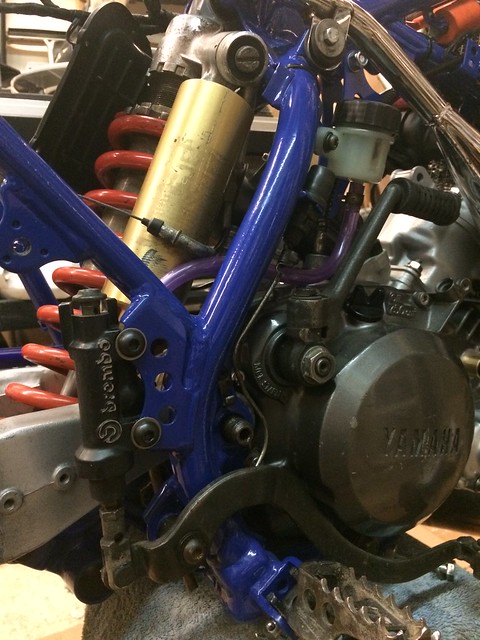
Ducati Brembo 4 pot caliper and Radial Master cylinder. Using a XT660X 320mm brake disc of my DTX hub, I will be able to sling the 4pot in there.
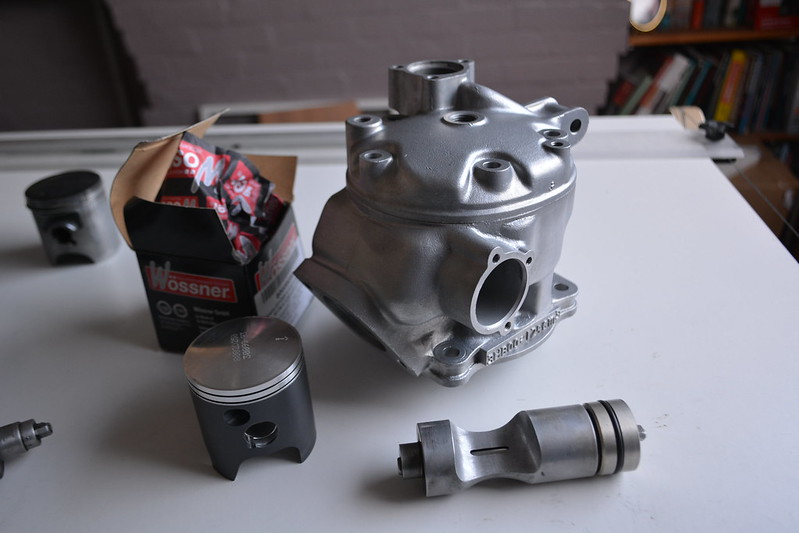
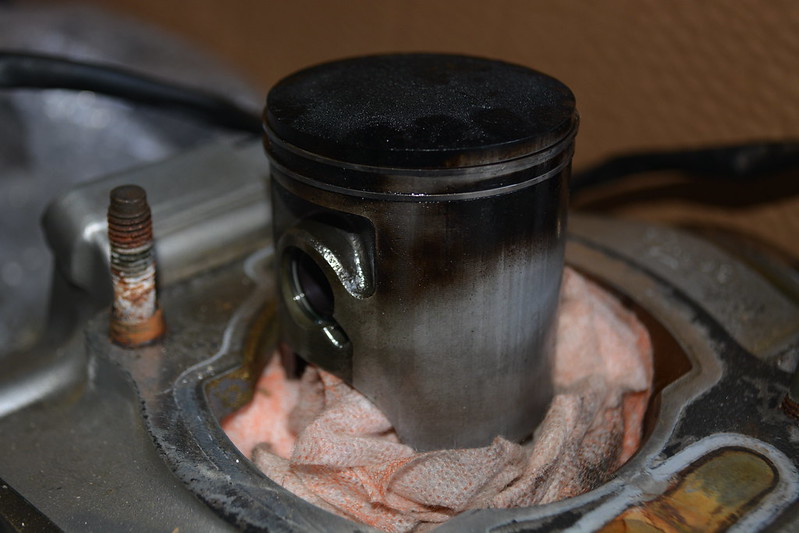
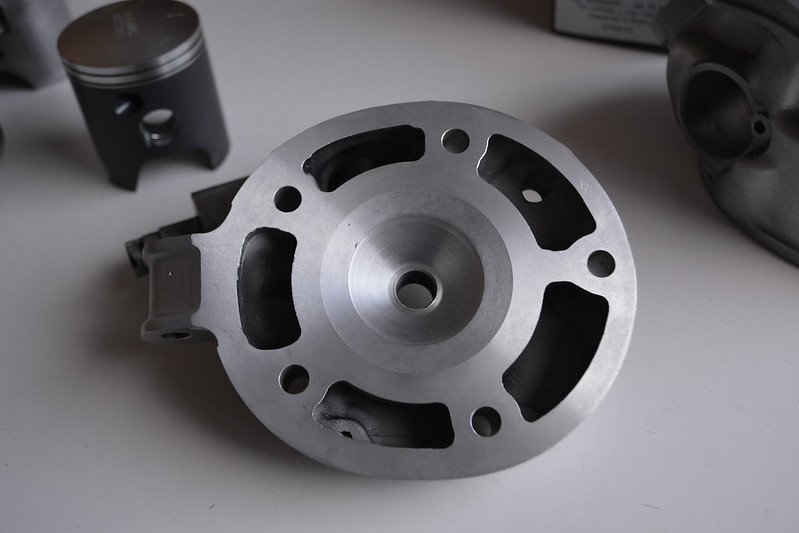
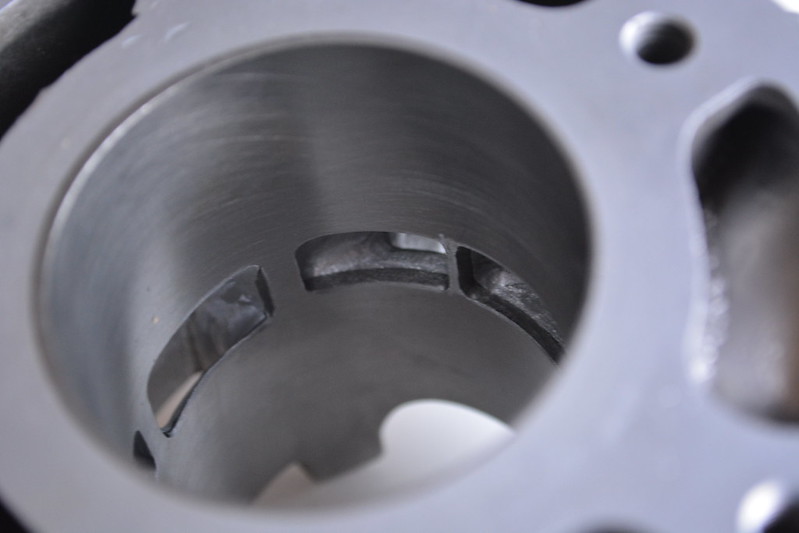
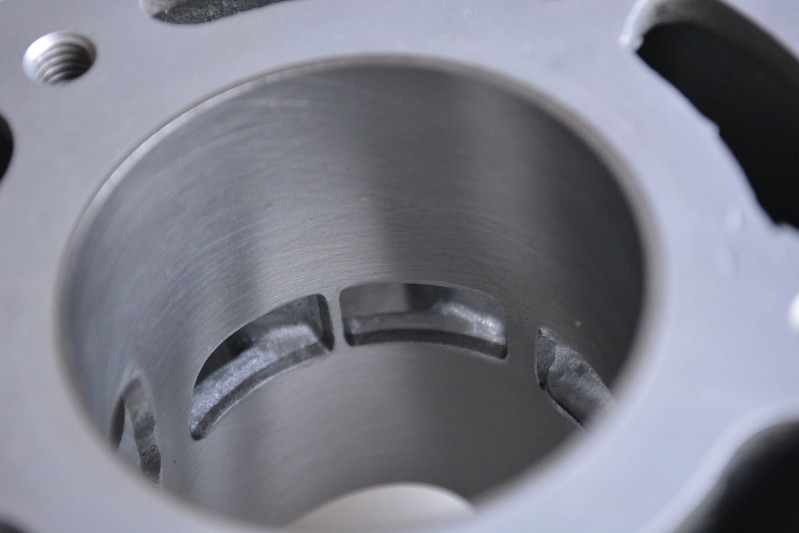
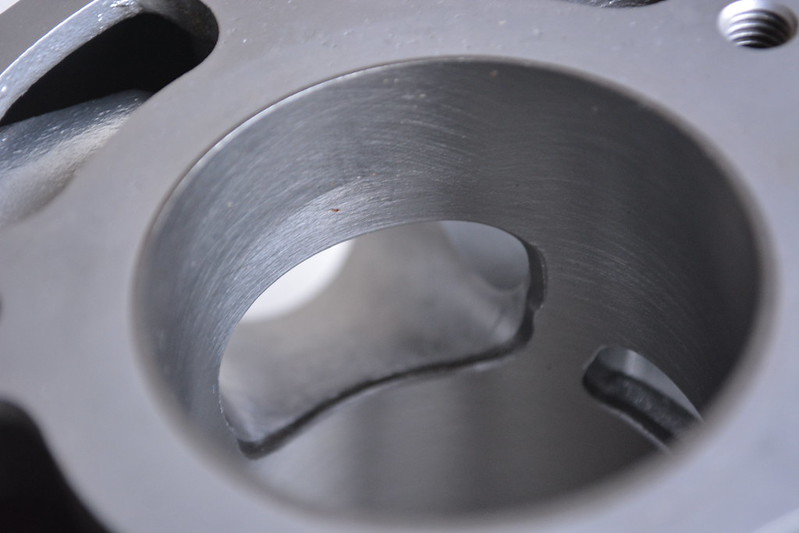
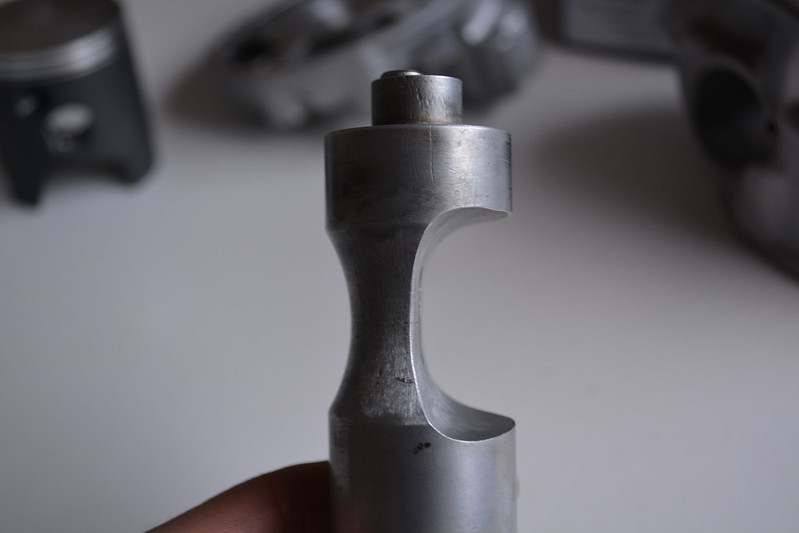
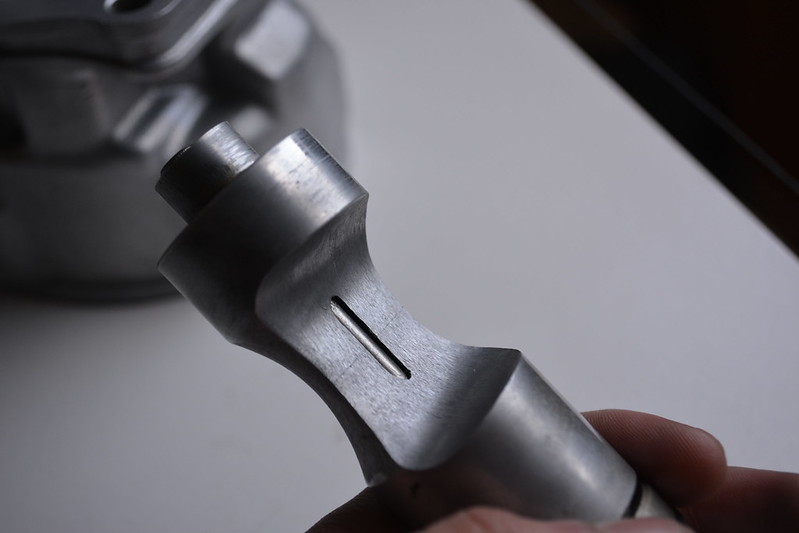
KPmotosolutions did a nice job. Ported, Port timings revised, Squish revised, crown re-machined, and powervalve revised. Tis a little beast.
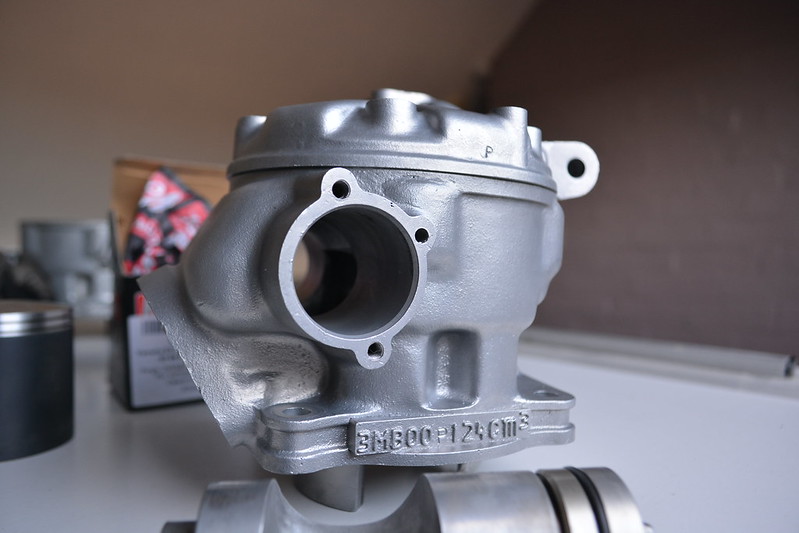
All out for top end, It's a 134cc race tuned still to run on regular 97 octane. The Squish height is at 0.6mm. It's pretty extreme. I'm running a Wossner piston kit for some protection over detonation, Still good for a pounding, I except to blow it up.

The old Mitaka had created some damage before hand,
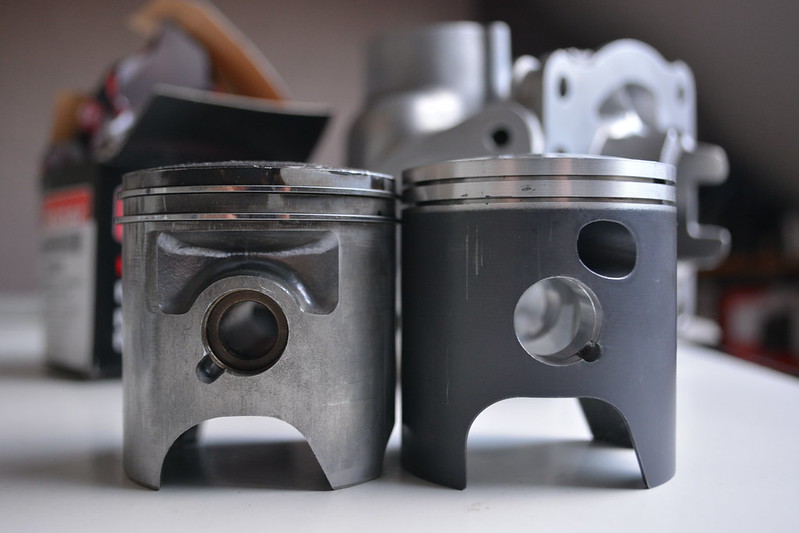
Mitaka vs Wossner. The quality of these forged pistons is really very good.
Shes going to run pretty good. I challenge a 170 kit to outperform this.
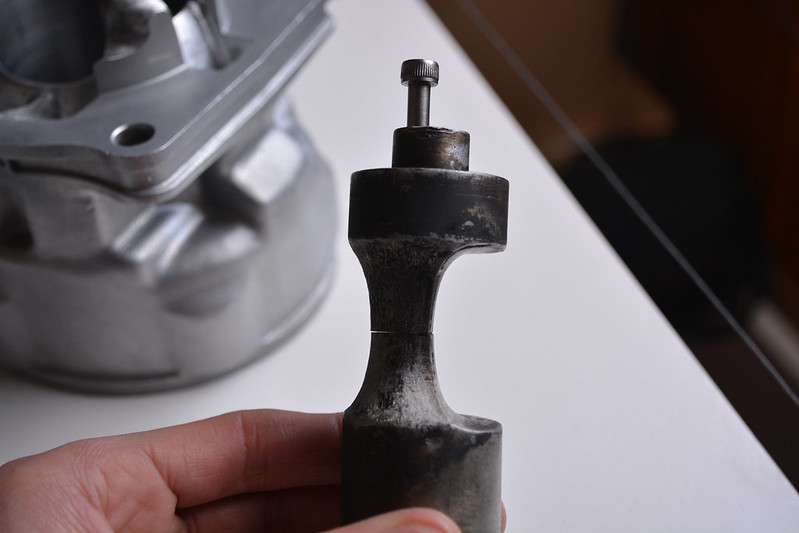
PowerValve clean up and modified with exhaust port.
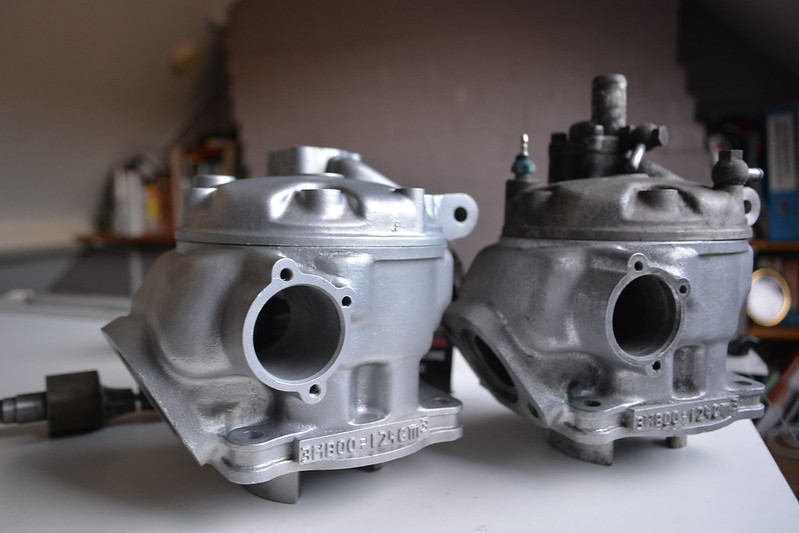
Both a TZR125RR 4DL 3MB-P-00s, but one is a later Y-2 version with a Non Stamped head, which suggests it came of Belgarda TDR. It's a good baseline.
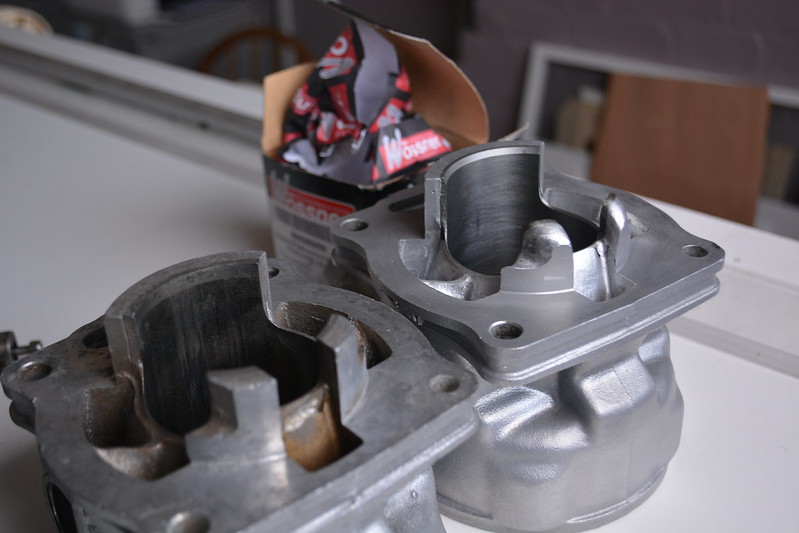
I've done a rough sketch of the port timings between the standard barrel and the reworked one.


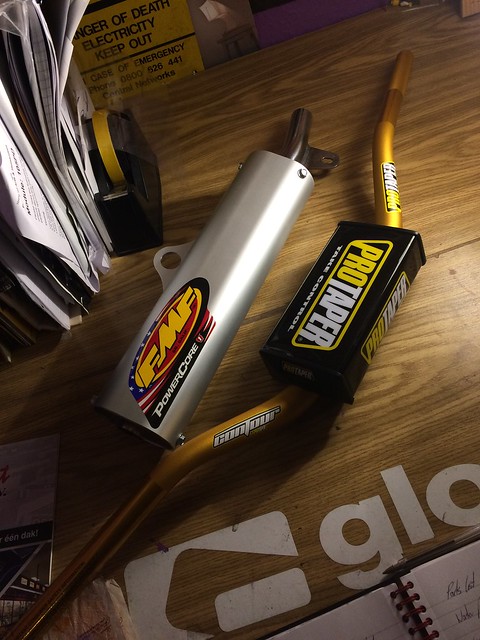
I had the Top end blasted, and what a difference, worth doing for the money. Now I need an exhaust...
-
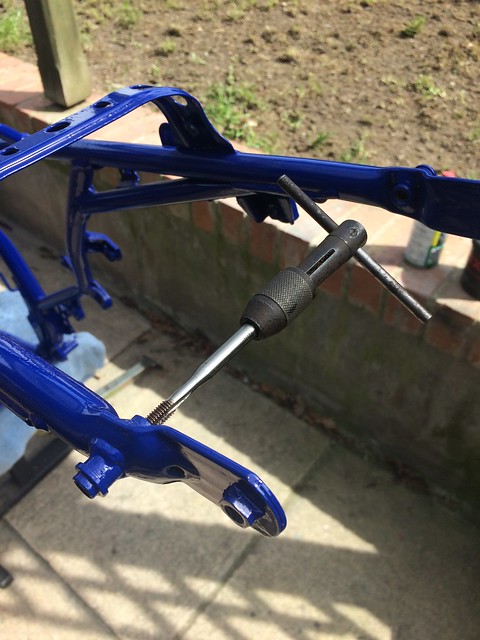
Bit of an odd question, but what tap and die set do you have? My cheapy one is terrible, doesn't have any of the right sizes!
@Mightyman I just used 'Dormer' M6 and M8 Metric Coarse (Straight flute) taps. 1mm pitch I believe. Standard stuff, they seem good quality.
-
Great project there, I see you trying a lot of the things I did.
I had a tm32 carb once upon a time, the only problem was it would overflow because the angle it sits, and if you adjust the floats, it didn't always get enough fuel.Also see you're using a YZ airbox to carb boot like I did,.
-
@Zrako Its from a 1987' YZ490.
Minor Update bits
Hand sanded and Polished.
Ducati 899 Brembo Master Cylinder - 5 minutes to splice the old DTR Brake switch plug on, same coloured wires to.
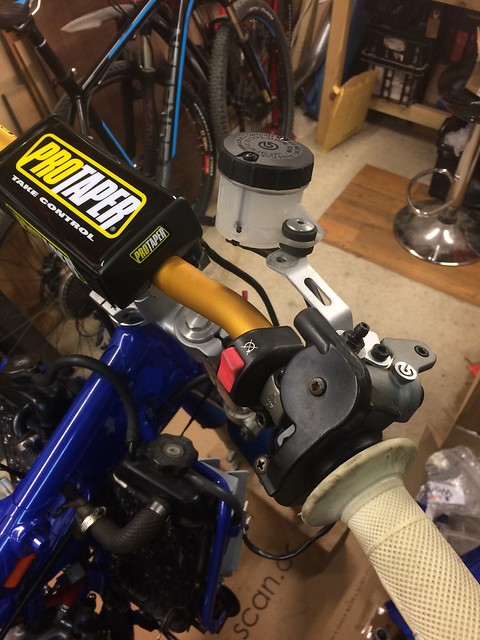
Yamaha TDM900-5PS Brembo Master cylinder - Fits perfect. Frame mounts needs drilling out to M8 is all.
Thought I'd post some engine picys.
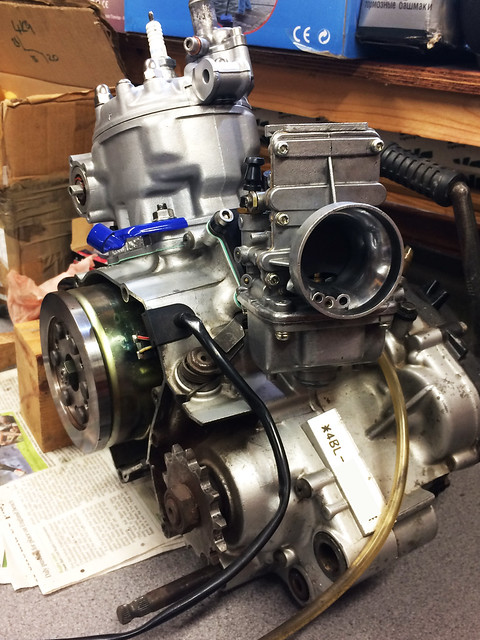
134cc TZR 4DL Topend - Mikuni TM32.
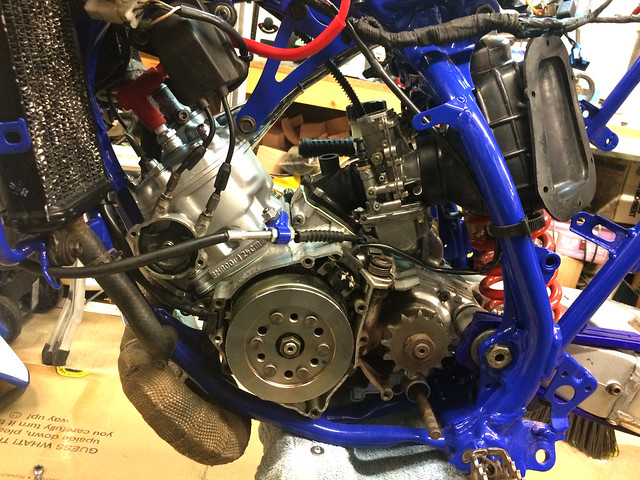
1987' YZ125 Airboot - The original DTR Airbox needs only simple modification.
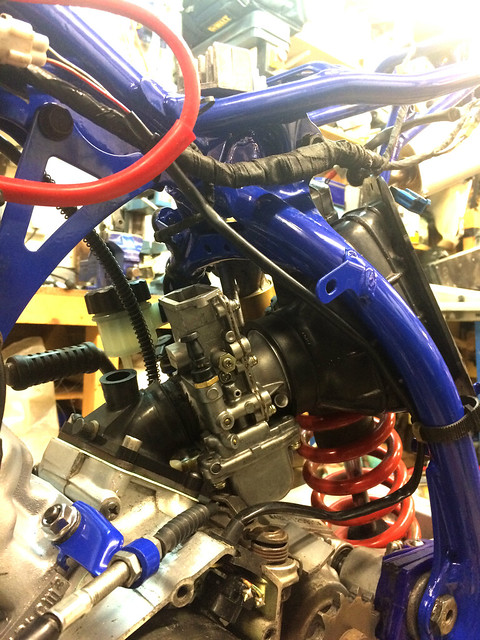
@Louis-James Cheers man, I know what you mean about using any other Carb except a TMSS with an angled Venturi. I couldn't run the TM32 to start with.
I'll use the WR200 Inlet instead, that solves the fitment issues, I use a Reed spacer on the standard inlet and that makes it work well.
The WR200 Inlet helps to level out the Carb to something pretty good.
Keep it real
-
@Zrako Its from a 1987' YZ490.
Minor Update bits
Hand sanded and Polished.
Ducati 899 Brembo Master Cylinder - 5 minutes to splice the old DTR Brake switch plug on, same coloured wires to.
Yamaha TDM900-5PS Brembo Master cylinder - Fits perfect. Frame mounts needs drilling out to M8 is all.
Thought I'd post some engine picys.
134cc TZR 4DL Topend - Mikuni TM32.
1987' YZ125 Airboot - The original DTR Airbox needs only simple modification.
@Louis-James Cheers man, I know what you mean about using any other Carb except a TMSS with an angled Venturi. I couldn't run the TM32 to start with.
I'll use the WR200 Inlet instead, that solves the fitment issues, I use a Reed spacer on the standard inlet and that makes it work well.
The WR200 Inlet helps to level out the Carb to something pretty good.
@Darty that's a good plan, I had thought of a wr200 manifold but that was before I knew you could get new parts for such old bikes haha.
There are a few pictures of the YZ airbox rubber Installed on my bike on the old forum somewhere -
@Zrako Its from a 1987' YZ490.
Minor Update bits
Hand sanded and Polished.
Ducati 899 Brembo Master Cylinder - 5 minutes to splice the old DTR Brake switch plug on, same coloured wires to.
Yamaha TDM900-5PS Brembo Master cylinder - Fits perfect. Frame mounts needs drilling out to M8 is all.
Thought I'd post some engine picys.
134cc TZR 4DL Topend - Mikuni TM32.
1987' YZ125 Airboot - The original DTR Airbox needs only simple modification.
@Louis-James Cheers man, I know what you mean about using any other Carb except a TMSS with an angled Venturi. I couldn't run the TM32 to start with.
I'll use the WR200 Inlet instead, that solves the fitment issues, I use a Reed spacer on the standard inlet and that makes it work well.
The WR200 Inlet helps to level out the Carb to something pretty good.
-
The wr200 manifold won't fit unless you cut the back off it as it's too big to fit the dt case's also the holes look to be in slightly different places
-
@Zrako Its from a 1987' YZ490.
Minor Update bits
Hand sanded and Polished.
Ducati 899 Brembo Master Cylinder - 5 minutes to splice the old DTR Brake switch plug on, same coloured wires to.
Yamaha TDM900-5PS Brembo Master cylinder - Fits perfect. Frame mounts needs drilling out to M8 is all.
Thought I'd post some engine picys.
134cc TZR 4DL Topend - Mikuni TM32.
1987' YZ125 Airboot - The original DTR Airbox needs only simple modification.
@Louis-James Cheers man, I know what you mean about using any other Carb except a TMSS with an angled Venturi. I couldn't run the TM32 to start with.
I'll use the WR200 Inlet instead, that solves the fitment issues, I use a Reed spacer on the standard inlet and that makes it work well.
The WR200 Inlet helps to level out the Carb to something pretty good.
-
@andrewj1680 I know it's not perfect, cutting stuffers off is a big compromise to inlet air speed when using the standard Reed block.
So to avoid that I'm using a VFORCE Reed block, still have to modify the mounts and cut the stuffers off, but the VFORCE will take care of the inlet volume and should give much better Midrange,
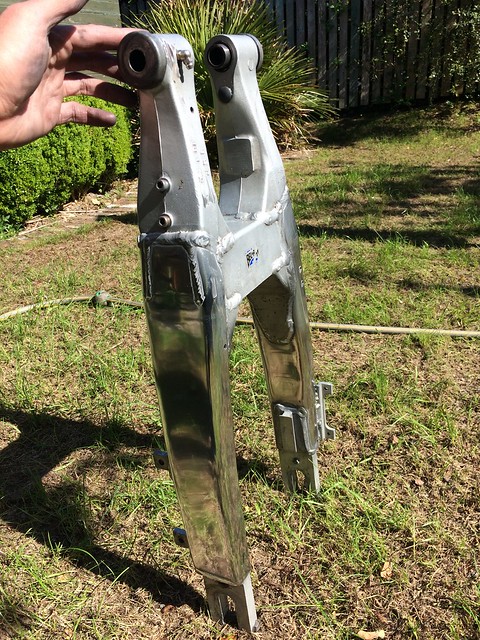
@CYBER-NINJA Actually I did use a Orbital sander with 120 - 400 grit because these older swingarms have huge extrusion depressions under the thick paint, it looked very clumsy before, alot of material had to come away.
hand sanded in between and to Wet n Dry 600-800 grit, 1200 would be too anal.
-
@andrewj1680 I know it's not perfect, cutting stuffers off is a big compromise to inlet air speed when using the standard Reed block.
So to avoid that I'm using a VFORCE Reed block, still have to modify the mounts and cut the stuffers off, but the VFORCE will take care of the inlet volume and should give much better Midrange,
@CYBER-NINJA Actually I did use a Orbital sander with 120 - 400 grit because these older swingarms have huge extrusion depressions under the thick paint, it looked very clumsy before, alot of material had to come away.
hand sanded in between and to Wet n Dry 600-800 grit, 1200 would be too anal.
-
@Darty Came out damn good tho in the end, well worth the time and effort IMO.

I need to do the same on my MX, I started with some wet & dry just to test it out, TBC..................
-
@Darty Yeah lotsa elbow grease know doubt. I find using a good paint stripper with some steel wool works really well and also limits the scratches, then some wet & dry to smooth it all off, before you start on the polishing. All in all that method works very well and also it makes short work of the polishing.
")
-


I did the whole polishing thing when I first started building my cr but by the time I finished I had decided I didn't wanna polish after every ride so I powder coated it black instead, did look the part tho -
I did the whole polishing thing when I first started building my cr but by the time I finished I had decided I didn't wanna polish after every ride so I powder coated it black instead, did look the part tho@andrewj1680 Bang on! That would of looked mint, it's a shame alloy has to oxidise so quickly,
-
I did the whole polishing thing when I first started building my cr but by the time I finished I had decided I didn't wanna polish after every ride so I powder coated it black instead, did look the part tho@andrewj1680 Oh man, that sure looks damn sweet, and such a shame to do all that work and then get all that lovely shiny metal blacked out. But hey-hoo I get why and it was your choice.
Hello! It looks like you're interested in this conversation, but you don't have an account yet.
Getting fed up of having to scroll through the same posts each visit? When you register for an account, you'll always come back to exactly where you were before, and choose to be notified of new replies (either via email, or push notification). You'll also be able to save bookmarks and upvote posts to show your appreciation to other community members.
With your input, this post could be even better 💗
Register Login